 HP
10625
HP
10625
Character guide · Electro Rectifier Support
Buling
Electro Rectifier guide - Exact talents, sequences, teams, synergies, and materials.
Buling is a 4-star Electro Rectifier support in Wuthering Waves. This guide preserves her verified stats, complete talents and multipliers, sequence notes, teams, synergies, materials, and videos.
 Element: Electro
 Weapon: Rectifier
Rarity: 4★
Version: 2.8
Weapon: Rectifier
Rarity: 4★
Version: 2.8

Overview
Base stats
HP
10625
 ATK
225
ATK
225
 DEF
1259
DEF
1259
 Max Energy
100
Max Energy
100
 Crit Rate
5%
Crit Rate
5%
 Crit DMG
150%
Crit DMG
150%
 Healing Bonus
0%
Healing Bonus
0%
 Electro DMG Bonus
0%
Electro DMG Bonus
0%
 Tune Break Boost
0
Tune Break Boost
0
 Off-Tune Buildup Rate
100%
Off-Tune Buildup Rate
100%
Talents
Talent descriptions & multipliers
Talent priority
 Normal Attack
Recommended levelLv. 10
Normal Attack
Recommended levelLv. 10
 Resonance Skill
Recommended levelLv. 6
Resonance Skill
Recommended levelLv. 6
 Forte Circuit
Recommended levelLv. 10
Forte Circuit
Recommended levelLv. 10
 Resonance Liberation
Recommended levelLv. 6
Resonance Liberation
Recommended levelLv. 6
 Intro Skill
Recommended levelLv. 6
Intro Skill
Recommended levelLv. 6
Normal Attack
Hexagram Calls, Lightning Falls
Basic Attack
Perform up to 4 consecutive attacks, dealing Electro DMG.
Heavy Attack - Mountain Over Thunder
Hold Normal Attack to consume the highlighted and from left to right and cast , dealing Electro DMG.
Heavy Attack - Thunder Over Mountain
Hold Normal Attack to consume the highlighted and from left to right and cast , dealing a small amount of Electro DMG and additionally reducing the target's Vibration Strength.
Heavy Attack - Twin Mountains
Hold Normal Attack to consume the highlighted 2 Trigrams - Mountain from left to right and cast , healing all nearby Resonators in the team.
Heavy Attack - Twin Thunders
Hold Normal Attack to consume the highlighted 2 Trigrams - Thunder from left to right and cast , healing all nearby Resonators in the team once per second for 8s.
Heavy Attack - Ghost Gate Omen
When holding Normal Attack with fewer than 2 Trigrams, Buling fails the divination, becoming temporarily immobilized and losing all Trigrams and 20% of her current HP. This effect will not consume HP if Buling's current HP is below 1%.
Mid-air Attack
Consume STA to perform Mid-air Attack, dealing Electro DMG.
Dodge Counter
Press Normal Attack right after a successful Dodge to perform , dealing Electro DMG.
After performing Dodge Counter, press Normal Attack to perform .
Trigram
Buling can hold up to 4 Trigrams. When Trigrams reach the max number, gaining new Trigrams moves all Trigrams 1 slot to the left, and the original leftmost Trigram will be removed.
is obtained when Basic Attack Stage 2 deals damage.
is obtained when or Mid-air Attack deals damage.
is obtained when casting Resonance Skill - .
Multipliers Lv.
Open this panel to load exact values.
Resonance Skill
In Shadow Thunder Stirs
Attack the target, dealing Electro DMG and continuously pulling in nearby targets.
Right after casting Resonance Skill, press Normal Attack to perform .
Multipliers Lv.
Open this panel to load exact values.
Forte Circuit
Thunder Begets Life
Yin-Yang Balance
When Buling obtains and , she enters the state, replacing her Resonance Liberation - with Resonance Liberation - : Harmony.
Flashing Thunder Spell - Harmony
Attack the target, dealing Electro DMG and generating a at the target area. The array deals Electro DMG and inflicts 2 stacks of on all targets within it every 2s, lasting for 24s. When is active, all Resonators in the team enter the state.
While in the state, when any Resonator in the team casts Intro Skill, becomes .
grants 10% Resonance Skill DMG Bonus to all active Resonators in the team. When any Resonator in the team casts Intro Skill during this state, becomes .
grants 25% Resonance Skill DMG Bonus to all active Resonators in the team.
Minor Yang and Minor Yin
is obtained after casting or .
is obtained after casting or .
Multipliers Lv.
Open this panel to load exact values.
Resonance Liberation
Flashing Thunder Spell
Attack the target, dealing Electro DMG.
Multipliers Lv.
Open this panel to load exact values.
Intro Skill
Summon and Smite
Attack the target, dealing Electro DMG and healing all nearby Resonators in the team.
Multipliers Lv.
Open this panel to load exact values.

Outro Skill
Exorcism Spell
Heal the active Resonator in the team by 18% of Buling's ATK per second for 16s. All nearby Resonators in the team have their DMG Amplified by 15% for 30s.

Tune Break
Tune Break: Rectifier
When the target's is full, the Resonators may cast Tune Break on the target.

Inherent Skill I
Time Arrives, Evil Declines
Buling gains 25% Healing Bonus when restoring HP for Resonators with less than 50% HP.

Inherent Skill II
Earthly Immortal is Here!
Targets damaged by Intro Skill - obtain 4 stacks of . This effect is triggered once every 10s.
Sequences
Sequence value

S1
Exorcist Gadgets, Lend Me Your Power
★★★★★
The Crit. Rate of Resonance Liberation - : Harmony is increased by 20% upon dealing damage.
Why it matters
The Liberation that comes from Buling’s Forte has +20% Crit Rate (this is not her normal Liberation).

S2
Talisman Burns, Spirits Turn
★★★★★
Buling restores 25 points of Resonance Energy when she enters the state. This effect is triggered once every 24s.
Why it matters
Buling gains 25 Energy when she uses her Forte, before activating the Forte Liberation.

S3
Summoner of Spirits, Seeker of Fate
★★★★★
While lasts, whenever the HP of Resonators in the team drops below 50%, immediately restore their HP by 350+150% of Buling's ATK. This effect can be triggered once every 24s.
Why it matters
After activating her Forte Liberation and doing her Outro, if a teammate drops below 50% HP, Buling heals them. This happens once every 24s (about once per rotation).

S4
Wanderer of Solaris, Blessed by Fortune
★★★★★
Buling gains 20% Healing Bonus.
Why it matters
Her healing is increased.

S5
Forum Ban? New Account!
★★★★★
instantly inflicts another 6 stacks of on all targets within its range upon generation.
Why it matters
When activating the Forte Liberation and doing her Outro, she applies stacks. Now, when the ring appears, it applies 6 more stacks instantly.

S6
"Almighty Forum Lord of Thunder Spell"
★★★★★
The state now grants 50% Resonance Skill DMG Bonus to the active Resonator in the team.
Why it matters
This buff is now 50% Skill DMG Bonus instead of 25%.
Multipliers Lv.
Open this panel to load exact values.
Teams
Current Team DPS teams
Teams are loaded from the current validated Team DPS projection. Future validated Team DPS updates appear here automatically.
Current teams load only when this section is reached.
Character synergies


Review
Buling review
Review updated:
Buling is a 4-Star Electro Rectifier support from Version 2.8 — which means she is effectively free: every account gets her from the standard pool over time, and her sequences arrive by playing, not by spending. She is a healer-support whose kit is built around Trigrams, the Yin-Yang Balance state, and the Five Thunders Spell Array, and her value is a support package aimed at Resonance Skill damage dealers: up to 25% team-wide Resonance Skill DMG Bonus (50% at S6), a 15% team-wide DMG Amplification Outro, healing, grouping, and Electro Flare application. Her personal damage is negligible — about 4% of her team's output in the tested data — so judge her by what she hands the carry, never by her own numbers.
The live Team DPS section is the authority for Buling's current tested compositions, ordering, DPS values, and rotations. It updates from the validated Team DPS projection instead of freezing those values in this review.
Quick Verdict
Build Buling if you own a Resonance Skill damage dealer — Carlotta and Jinhsi are her tested carries — and you want a free sustain support whose buffs match that profile exactly. She works at S0, but her headline buff only reaches full strength at S6, which for a 4-star is a matter of time, not money. At S6 she roughly matches Verina in Skill-carry teams, while never threatening the dedicated 5-star supports (Shorekeeper, Verina) in general teams.
How Buling Works
Everything in her kit funnels toward one cast: her enhanced Liberation, Flashing Thunder Spell: Harmony.
Step 1 — Trigrams. Her attacks generate Trigram - Mountain (Basic Attack Stage 2) and Trigram - Thunder (Basic Attack Stage 4, her Skill, Mid-air Attack), up to 4 held at once. Holding Normal Attack consumes two highlighted Trigrams into different Heavy Attacks: Mountain + Thunder or double Thunder are the fast routes — and the two that matter are Mountain Over Thunder (damage, granting Minor Yang) and Twin Thunders (a team heal-over-time, granting Minor Yin). One honest warning from the kit: holding Normal Attack with fewer than 2 Trigrams fails the divination — she is briefly immobilized and loses HP, so never force a Heavy on an empty hand.
Step 2 — Yin-Yang Balance and the Array. Holding both Minor Yin and Minor Yang upgrades her Liberation into Flashing Thunder Spell: Harmony: it creates the Five Thunders Spell Array for 24 seconds — an Electro field that keeps inflicting Electro Flare stacks on the targets inside it — and puts the team into Thunder Spell - Primordial Qi. This is where her real buff begins, and it escalates with Intro casts: when any teammate casts an Intro, the state becomes Thunder Spell - Yin and Yang (10% Resonance Skill DMG Bonus to all active Resonators); a second Intro advances it to Thunder Spell - Heaven, Earth, Mind (25% Resonance Skill DMG Bonus — 50% at S6). Note the delivery chain: the buff is tied to her Array window and reaches whoever is on the field, so the team's Intros should be spent inside her 24-second Array, not outside it.
Step 3 — the Outro. Exorcism Spell heals the active Resonator for 16 seconds and grants the whole team 15% DMG Amplification for 30 seconds — general, not type-locked, so every carry uses it fully.
Around this core: her Intro heals and applies 4 Electro Flare stacks (once per 10s), her Skill pulls enemies in, and her Inherent Skills add 25% Healing Bonus when healing targets below half HP. Electro Flare is a Negative Status — the same utility category as Lucilla's Glacio Chafe — so one Buling rotation can switch on game-mode buffs keyed to Negative Statuses for the whole fight, and at high stacks Flare upgrades into Electro Rage, a periodic damage effect on the afflicted enemies.
Tested rotation — identical in both of her tested teams, about 5.65 seconds of field time:
Basic 1, 2, 3, 4 (cancel the 4th with Skill) > Skill > Basic 4 (start holding Heavy immediately) > Heavy Hold (cancel the second Forte with Liberation) > Echo > Liberation > Outro
One string to learn, used everywhere.
Build Priorities
Her page carries no weapon or Echo comparison — her personal damage is about 4% of the team, so nothing about her equipment is about damage. The tested setup tells you what matters:
- Rejuvenating Glow 5-piece — the healer set, which with Fallacy of No Return adds a further team ATK buff on top of her own.
- Energy Regen first. Her entire buff package sits behind an upgraded Liberation every rotation, so Energy Regen is her one real stat requirement — the tested teams run Cosmic Ripples for exactly this reason: before her S2 (which restores 25 Energy per rotation), her Energy demands are noticeably tight.
- Healing Bonus is her only other meaningful stat, with ATK% trailing right behind it for the same reason — her heals scale with her ATK. Crit is decoration on a 4% share.
Talent priority: Normal Attack and Forte Circuit to Lv. 10 (her Trigram/Array engine lives there); Resonance Skill, Resonance Liberation, and Intro Skill to Lv. 6.
Team Fit & Account Value
Her two tested teams define her role precisely: Carlotta with Zhezhi and Buling, and Jinhsi with Zhezhi and Buling.
- Carlotta is her best-tested home. Carlotta's damage is overwhelmingly Resonance Skill-typed, so she uses every piece of Buling's package: the 25% (50% at S6) Skill DMG Bonus, the 15% general Amplification, and the healing — while Zhezhi covers the sub-DPS damage in the same team. The tested version sits in the same band as Carlotta's standard Zhezhi structures, which is exactly where a free support wants to be.
- Jinhsi is the second tested home — see her review for the full picture. The short version: Buling's Skill buffs and healing fit Jinhsi's 68% Skill profile, but she fills the sustain slot, not the gauge slot — she has no Coordinated Attacks, so Zhezhi (or Cantarella) must still feed Jinhsi's Incandescence. One tested caveat repeated in both teams: without a Crit Rate support like Shorekeeper, the carry's average damage dips even when the crit highs look bigger — that is the trade you make when Buling holds the sustain slot instead.
- Untested but mechanically sensible: any other Skill-typed main DPS fits her profile — Phrolova's Resonance Skill share, for example, is large enough that Buling reads as roughly Verina-equal in her teams too. Treat that as mechanics, not tested data, until the projection covers it.
Her honest limits: her headline buff is locked to Skill-typed carries — a Heavy Attack, Liberation, or Basic Attack carry gets only the 15% general Amplification; her healing is tied to her own rotation rhythm; and she competes with Shorekeeper and Verina, whose Crit buffs and shorter rotations keep them ahead in general teams. She is the free specialist for Skill teams, not a budget replacement for the premium generalists.
Sequence Value
Buling works at S0, but her sequences are where a free character becomes a genuinely strong one — and since she is a 4-star, these arrive naturally from playing on any banner. There is no sequence chart on her page; the nodes speak for themselves.
- S1 — Exorcist Gadgets, Lend Me Your Power (2/5): +20% Crit Rate on her Forte Liberation. A personal-damage node on a 4% share — skip the thought.
- S2 — Talisman Burns, Spirits Turn (5/5): Restores 25 Resonance Energy when she enters Yin-Yang Balance (once per 24s). This is the comfort node that stabilizes her Liberation-every-rotation loop and relaxes her Energy Regen requirements — the first one that matters.
- S3 — Summoner of Spirits, Seeker of Fate (2/5): While the Array lasts, teammates dropping below 50% HP get an emergency heal (once per 24s). Nice safety, nothing structural.
- S4 — Wanderer of Solaris, Blessed by Fortune (2/5): +20% Healing Bonus. More of what she already does.
- S5 — Forum Ban? New Account! (4/5): The Array instantly inflicts 6 more Electro Flare stacks on generation — with her Intro's 4, that is the full Electro Rage threshold the moment the field appears. Real Negative Status value.
- S6 — "Almighty Forum Lord of Thunder Spell" (5/5): The node that defines her. Thunder Spell - Heaven, Earth, Mind now grants 50% Resonance Skill DMG Bonus instead of 25% — doubling her headline buff and putting her on par with Verina in Skill-carry teams.
Realistic stopping points: play her at whatever sequence you own; S2 makes her comfortable, and S6 is the destination — reached for free, with time.
Build Value
Since Buling is a 4-star, there is no pull decision — only an investment one.
Build Buling if:
- You own Carlotta or Jinhsi (or another Skill-typed carry) and want a free sustain support whose buffs match them exactly — her tested teams are right there in the live Team DPS section.
- Your account is new or thin on supports — she covers healing, grouping, general Amplification, and a Negative Status in one free slot, which is exactly what a second endgame team needs.
- You want a sustain option that frees Shorekeeper or Verina for the team that needs them more — Buling holds the Skill-carry side at roughly Verina's level once she reaches S6.
Leave Buling unleveled if:
- None of your carries deal Resonance Skill damage — her best buff would sit unused, and a general support serves you better.
- You already own Shorekeeper and Verina and your two endgame teams already have their sustain slots covered — she does not displace them, she understudies them.
- You cannot spare the Energy Regen gear yet — below S2 with no ER weapon, her Liberation loop stumbles, and a stumbling Buling gives very little.
Materials
Exact totals come from the canonical material data.
Character materials

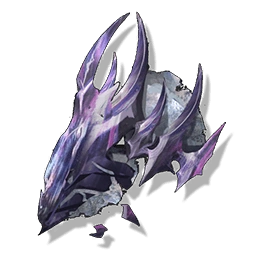

Important skills


Max character and skills
Videos
Related videos
Videos load only when this section is reached.