 HP
11000
HP
11000
Character guide · Electro Rectifier Sub DPS
Yinlin
Electro Rectifier Sub DPS - Exact talents, sequences, build, teams, and damage notes.
Yinlin is a 5-star Electro Rectifier Sub DPS in Wuthering Waves. This guide preserves her verified stats, complete talents and multipliers, sequence comparison, build targets, weapons, Echo setup, live teams, synergies, damage breakdown, materials, and videos.
 Element: Electro
 Weapon: Rectifier
Rarity: 5★
Version: 1.0
Weapon: Rectifier
Rarity: 5★
Version: 1.0
—

Overview
Base stats
HP
11000
 ATK
400
ATK
400
 DEF
1283
DEF
1283
 Max Energy
100
Max Energy
100
 Crit Rate
5%
Crit Rate
5%
 Crit DMG
150%
Crit DMG
150%
 Healing Bonus
0%
Healing Bonus
0%
 Electro DMG Bonus
0%
Electro DMG Bonus
0%
 Tune Break Boost
0
Tune Break Boost
0
 Off-Tune Buildup Rate
100%
Off-Tune Buildup Rate
100%
Talents
Talent descriptions & multipliers
Talent priority
 Normal Attack
Recommended levelLv. 6
Normal Attack
Recommended levelLv. 6
 Resonance Skill
Recommended levelLv. 10
Resonance Skill
Recommended levelLv. 10
 Forte Circuit
Recommended levelLv. 10
Forte Circuit
Recommended levelLv. 10
 Resonance Liberation
Recommended levelLv. 10
Resonance Liberation
Recommended levelLv. 10
 Intro Skill
Recommended levelLv. 6
Intro Skill
Recommended levelLv. 6
Normal Attack
Zapstring's Dance
Basic Attack
Yinlin controls the puppet "" to perform up to 4 attacks, dealing Electro DMG.
Heavy Attack
Consumes Stamina to control puppet "" to attack, dealing Electro DMG.
Mid-air Attack
Consumes Stamina to control the puppet "" to perform a Plunging Attack, dealing Electro DMG.
Dodge Counter
Use Basic Attack after a successful Dodge to attack the target, dealing Electro DMG.
Multipliers Lv.
Open this panel to load exact values.
Resonance Skill
Magnetic Roar
Magnetic Roar
The puppet "" deals Electro DMG to the target, and puts Yinlin into the .
Execution Mode
Basic Attack and Dodge Counter will trigger 1 when hitting a target. Each stage of Basic Attack or Dodge Counter can only trigger 1 , up to 4 times.
Electromagnetic Blast
Attack all targets marked with Resonance Circuit , dealing Electro DMG.
Lightning Execution
Use Resonance Skill after casting Resonance Skill Magnetic Roar to cast to attack the target, dealing Electro DMG. If Resonance Skill is not activated in a while or this Character is switched, this Skill will be put on Cooldown.
Multipliers Lv.
Open this panel to load exact values.
Forte Circuit
Chameleon Cipher
Chameleon Cipher
When Yinlin's "" is full, her Heavy Attack is replaced with Chameleon Cipher, which consumes all "" to attack the target, dealing Electro DMG. When it hits a target marked with , the is replaced with , lasting for 18 seconds.
Sinner's Mark
Normal Attack 's Dance, Resonance Liberation Thundering Wrath, and Intro Skill Roaring Strorm will apply on hit. is removed when Yinlin exits.
"Punishment Mark"
When a target marked with is damaged, Judgement Strike will fall, dealing Electro DMG to all targets marked with . This can be triggered up to once per second.
Judgment Points
Yinlin can hold up to 100 Judgement Points.
When Normal Attack 's Dance hits a target, restores "".
Upon casting Resonance Skill Magnetic Roar, restores "".
When Resonance Skill hits a target, restores "".
Multipliers Lv.
Open this panel to load exact values.
Resonance Liberation
Thundering Wrath
Command "" to call for thunder to fall upon a large range, dealing Electro DMG.
Multipliers Lv.
Open this panel to load exact values.
Intro Skill
Raging Storm
Command puppet "" to attack, dealing Electro DMG in a large range.
Multipliers Lv.
Open this panel to load exact values.

Outro Skill
Strategist
The next character (or other characters on a nearby team that activates an Outro Skill) gains 20% Electro DMG Deepen, and 25% Resonance Liberation DMG Deepen for 14 seconds or until the Character is switched.

Tune Break
Tune Break: Rectifier
When the target's is full, the Resonators may cast Tune Break on the target.

Inherent Skill I
Pain Immersion
After using Resonance Skill Magnetic Roar, Yinlin's Crit. Rate is increased by 15% for 5s.

Inherent Skill II
Deadly Focus
The damage of Resonance Skill is increased by 10% when hitting targets marked with "", and Yinlin's ATK is increased by 10% for 4s when this is triggered.
Sequences
Sequence value

S1
Morality's Crossroads
★★★★★
Resonance Skill Magnetic Roar and deal 70% more DMG.
Why it matters
Not Available

S2
Ensnarled by Rapport
★★★★★
Resonance Skill recovers an additional 5 Judgement Point(s) and 5 Resonance Energy on hit.
Why it matters
Not Available

S3
Unyielding Verdict
★★★★★
Forte Circuit 's DMG multiplier is increased by 55%.
Why it matters
Not Available

S4
Steadfast Conviction
★★★★★
When Forte Circuit hits a target, the ATK of all team members is increased by 20% for 12s.
Why it matters
Not Available
S5
Resounding Will
★★★★★
Resonance Liberation Thundering Wrath deals 100% extra DMG to targets with Forte Circuit's or .
Why it matters
Not Available

S6
Pursuit of Justice
★★★★★
In the first 30s after casting Resonance Liberation Thundering Wrath, when Yinlin's Basic Attack hits a target, Furious Thunder will be triggered, dealing Electro DMG equal to 419.59% of Yinlin's ATK. Every Basic Attack hit can trigger Furious Thunder 1 time, up to 4 times. This is considered Resonance Skill DMG.
Why it matters
Not Available
Multipliers Lv.
Open this panel to load exact values.
Sequence damage comparison
Build
Build targets
Sub-stat priority
- 1Crit Rate
- 2Crit DMG
- 3ATK%
- 4
 Resonance Skill DMG Bonus
 - 5Energy Regen
Build targets
ATK2,400Crit Rate75%Crit DMG275.0%Energy130.0%Skill DMG43.0%Weapon comparison
Relative damage
Cost 4 Crit Rate is used when the weapon provides Crit DMG, Cost 4 Crit DMG is used when the weapon provides Crit Rate, and Cost 4 Crit Rate is used when the weapon provides neither.
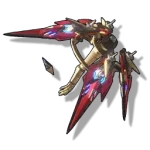
Stringmaster R5
ATK 500Crit Rate 36%
117.75%Cost 4 Crit DMG
Weapon effect
Grant 24% Attribute DMG Bonus. When dealing Resonance Skill DMG, increases ATK by 24%, stacking up to 2 time(s). This effect lasts for 5s. When the equipped Resonator is not on the field, increases their ATK by an additional 24%.
Stringmaster R1
ATK 500Crit Rate 36%
100%Cost 4 Crit DMG
Weapon effect
Grant 12% Attribute DMG Bonus. When dealing Resonance Skill DMG, increases ATK by 12%, stacking up to 2 time(s). This effect lasts for 5s. When the equipped Resonator is not on the field, increases their ATK by an additional 12%.

Rime-Draped Sprouts R1
ATK 500Crit DMG 72%
90.82%Cost 4 Crit Rate
Weapon effect
Increases ATK by 12%. Using Resonance Skill gives the equipped Resonator 12% Basic Attack DMG Bonus for 6s, stacking up to 3 times. When casting Outro Skill with 3 stacks, consume all stacks to give 52% DMG Bonus to the off-field Basic Attacks performed by the equipped Resonator, lasting for 27s.

Cosmic Ripples R1
ATK 500ATK 54%
82.50%Cost 4 Crit Rate
Weapon effect
Increases Energy Regen by 12.8%. When hitting a target with Basic Attacks, increases Basic Attack DMG Bonus by 3.2%, stacking up to 5 time(s). This effect lasts for 8s and can be triggered 1 time(s) every 0.5s.
Echoes
Main stats
Echoes 1
Empyrean Anthem Set


Sonata effect
Empyrean Anthem · 5 pieces
2 SetEnergy Regen +10%.
5 SetIncrease the Resonator's Coordinated Attack DMG by 80%. Upon a critical hit of Coordinated Attack, increase the active Resonator's ATK by 20% for 4s.
Main Echo
Nightmare: Tempest Mephis
Transform into Nightmare: Tempest Mephis and attack surrounding enemies, dealing 405% Electro DMG. The Resonator with this Echo equipped in their main slot gains 12.00% Electro DMG Bonus and 12.00% Resonance Skill DMG Bonus.
Cost 4Crit DMG / Crit Rate
Cost 3Electro / ATK
Cost 3Electro / ATK
Cost 1ATK
Cost 1ATK
Echo stat comparisons

 4 DMG3 Electro3 Electro1 ATK1 ATK100%4 DMG3 Electro3 ATK1 ATK1 ATK97.13%4 DMG3 ATK3 ATK1 ATK1 ATK91.36%
 4 DMG3 Electro3 Electro1 ATK1 ATK75.67%4 DMG3 Electro3 ATK1 ATK1 ATK69.77%4 DMG3 ATK3 ATK1 ATK1 ATK63.51%
Teams
Current Team DPS teams
Teams are loaded from the current validated Team DPS projection. The DPS shown is the average across three rotations, and future validated Team DPS updates appear here automatically.
Current teams load only when this section is reached.
Calculations
Damage breakdown
100%
Resonance Skill59.79%
Resonance Liberation20.12%
Echo13.81%
Heavy Attack5.00%
Basic Attack0.71%
Intro0.56%
This breakdown is based on Yinlin's damage distribution when she is played solo without buffs from other characters.
Character synergies



Review
Yinlin review
Review updated:
Yinlin is a 5-Star Electro Rectifier Sub-DPS from Version 1.0, one of the oldest limited characters in the game. Her kit runs on two marks. Sinner's Mark is painted on enemies while she is on the field, and her Forte Heavy Attack, Chameleon Cipher, converts that mark into Punishment Mark for 18 seconds. Once Punishment Mark is on a target, Judgment Strike falls every time that target takes damage, up to once per second, and it keeps falling after Yinlin has left the field. That is her real output: she is an off-field damage dealer whose damage is produced by her teammates hitting the enemy, and she hands the character who follows her a strong Electro buff through her Outro Skill, Strategist. In her tested teams she holds roughly 20%–22% of the team's damage.
The live Team DPS section is the authority for Yinlin's current tested compositions, ordering, DPS values, and rotations. It updates from the validated Team DPS projection instead of freezing those values in this review.
Quick Verdict
At S0 Yinlin is complete. Sinner's Mark, the Chameleon Cipher conversion, Judgment Strike, and her Outro all work with no sequences at all. Her field time is short, her rotation is one of the easiest in the game, and her build has no strange requirements. The pulling advice is still simple: she is not worth pulling right now. Her Outro only pays in full on an Electro carry whose damage is Resonance Liberation damage, and her tested teams sit at the bottom of the validated projection. The rest of this review is written for owners and for returning players who want to play her correctly.
How Yinlin Works
Yinlin's rotation has one job: get Punishment Mark onto the enemy before she leaves the field. Everything else in her kit exists to make that happen.
Step 1: apply Sinner's Mark. Only three actions apply it, and only on hit: her Normal Attack Zapstring's Dance, her Resonance Liberation Thundering Wrath, and her Intro Skill Raging Storm. Her Resonance Skill does not apply it. This is the first failure point in her kit, and it comes with a hard rule printed in her talent text: Sinner's Mark is removed when Yinlin exits the field. A Sinner's Mark she does not convert before swapping out is simply gone.
Step 2: fill Judgment Points. She holds up to 100 Judgment Points, and three things restore them: Normal Attack hits, casting Resonance Skill Magnetic Roar, and Electromagnetic Blast hits. Magnetic Roar also puts her into Execution Mode, where each stage of her Basic Attack and her Dodge Counter triggers one Electromagnetic Blast on hit, up to 4 times. Electromagnetic Blast attacks every target carrying Sinner's Mark, so Step 1 and Step 2 feed each other: marks make the Blasts hit, and the Blasts give back the points.
Step 3: convert. When Judgment Points are full, her Heavy Attack is replaced with Chameleon Cipher. It consumes all of the points, and when it hits a target marked with Sinner's Mark, that mark becomes Punishment Mark for 18 seconds. Two conditions have to be true at once here, and if either one fails she leaves the field with nothing: the points must be full, and the target must already be carrying Sinner's Mark.
Step 4: leave and let the team work. Judgment Strike falls whenever a Punishment Marked target is damaged, up to once per second, and it hits every Punishment Marked target at once. The damage is real, but it is not hers to control. It needs a teammate on the field hitting the enemy steadily. A carry who attacks constantly triggers close to one Judgment Strike per second for the full 18 seconds. A carry who spends a long windup on one big hit wastes those seconds, and they do not come back.
Her Outro is the other half of her value. Strategist gives the next character 20% Electro DMG Deepen and 25% Resonance Liberation DMG Deepen for 14 seconds or until that character is switched out. It goes to one character, not the team, it arrives only through her Outro, and it dies the moment that character swaps. The 20% half needs an Electro carry. The 25% half needs a carry whose damage is actually tagged as Resonance Liberation damage. A carry who is only one of those two collects only half of what she gives.
Her two Inherent Skills are small but conditional. Pain Immersion gives her 15% Crit Rate for 5 seconds after casting Magnetic Roar. Deadly Focus adds 10% damage to Lightning Execution when it hits a Sinner's Marked target, and gives her 10% ATK for 4 seconds when that happens. Deadly Focus is another reason to apply Sinner's Mark early: opening with the Skill before any mark is on the enemy loses both parts of it.
One cooldown trap. Lightning Execution is the second press of her Resonance Skill after Magnetic Roar. Her talent text says that if it is not used within a certain time, or if Yinlin is switched out, the Skill goes on cooldown. Swapping away mid-Skill costs you the follow-up.
Tested rotation — about 6.2 seconds of field time:
Intro > Basic 4 > Skill > Heavy (cancel the animation with Skill) > Skill > Liberation > Basic 1 > Forte Heavy > Outro
The Team DPS card counts 18 seconds of Judgment Strike damage after she leaves. Her Echo can be slotted in before the Outro.
Tested fast variant — about 4.56 seconds of field time, split into two visits:
Skill > Heavy > Skill (cancel the Skill animation with Liberation) > Liberation > Basic 1 > swap out
Intro > Forte Heavy > Echo > Outro
This version front-loads her Skill and Liberation in an opening visit, then brings her back only long enough to convert the marks and hand over the Outro. It produces almost exactly the same damage from Yinlin in roughly a second and a half less field time, and it is the harder of the two to execute because of the Skill-into-Liberation cancel. It is not automatically the better choice: the tested team note is explicit that this shorter cycle finishes faster than Shorekeeper's Liberation cooldown, so by the third rotation Shorekeeper comes back on the field without her Liberation ready. The slower version exists for exactly that reason, to keep the cycle long enough for the support to stay in rhythm. Use the fast variant when your third slot has no cooldown you are waiting on, and the normal one when it does.
Build Priorities
Her solo damage profile, without buffs from teammates:
- Resonance Skill: 59.79%
- Resonance Liberation: 20.12%
- Echo: 13.81%
- Heavy Attack: 5.00%
- Basic Attack: 0.71%
- Intro: 0.56%
The Basic Attack line is the one to notice. Yinlin presses Basic Attacks constantly, but they are there to build points, apply marks, and trigger Electromagnetic Blasts, not to deal damage. Do not build her as a Basic Attack character, and be careful with weapons and sets that only buff Basic Attacks.
- Sub-stat priority: Crit Rate > Crit DMG > ATK% > Resonance Skill DMG Bonus > Energy Regen.
- Talent priority: Forte Circuit, Resonance Skill, and Resonance Liberation to Lv. 10; Normal Attack and Intro Skill to Lv. 6.
Build targets:
ATK2,400
Crit Rate75%
Crit DMG275%
Energy Regen130%
Resonance Skill DMG Bonus43%
The 75% Crit Rate works with Pain Immersion: 75% + 15% = 90% during the 5 seconds after Magnetic Roar, which is most of her on-field burst. That window closes around the time she swaps out, so build the 75% for the 18 seconds of Judgment Strikes that follow rather than assuming the passive covers you. The 130% Energy Regen target exists because her Max Energy is 100 and her tested field time is only 4.56–6.2 seconds, which is very little time to generate energy. Thundering Wrath is not optional for her, since it is 20% of her damage and one of only three actions that apply Sinner's Mark, so Energy Regen is what guarantees it is ready every cycle. Both recommended sets carry 10% Energy Regen on the 2-piece, covering part of the target before sub-stats.
Echoes. The page's build is 5-piece Empyrean Anthem with Nightmare: Tempest Mephis as the main Echo, Crit DMG or Crit Rate on Cost 4, Electro or ATK on both Cost 3 slots, and ATK on both Cost 1 slots. Empyrean Anthem's 5-piece gives 80% Coordinated Attack DMG, which is exactly what her off-field damage is, plus 20% ATK to the active Resonator for 4 seconds on a Coordinated Attack critical hit. Nightmare: Tempest Mephis adds 12% Electro DMG Bonus and 12% Resonance Skill DMG Bonus to whoever has it in their main slot, on top of a 405% Electro transformation hit.
For Cost 3, the page's comparison, all calculated with Stringmaster and Empyrean Anthem, puts 2 Electro at 100%, 1 Electro plus 1 ATK at 97.13%, and 2 ATK at 91.36%. The first two are under three points apart, so sub-stat quality decides between them. The real gap is against double ATK, and the reason is which multiplier is scarce: Yinlin's own base sheet has 0% Electro DMG Bonus, while ATK already arrives from her weapon's ATK 500 line, her stacking weapon passive, her two Cost 1 Echoes, and her sub-stats. Elemental damage is the multiplier she is short of, so Electro Cost 3 outscales ATK Cost 3.
The set choice depends on who the damage belongs to. The same page comparison, at identical main stats, puts Empyrean Anthem at 100% and Moonlit Clouds at 75.67% for Yinlin's own damage. Both tested teams still run her on Moonlit Clouds, and that is not a contradiction. Moonlit Clouds gives 22.5% ATK to the next Resonator for 15 seconds after her Outro, and in those teams the next Resonator is the carry holding about three quarters of the team's damage. Giving up roughly a quarter of a 20% share to add 22.5% ATK to a 77% share is the correct trade. The rule to take away: wear Moonlit Clouds when your carry is the team's damage, and Empyrean Anthem when Yinlin is expected to carry her own weight or when the carry's ATK is already saturated by other buffs.
Weapons. Her signature is Stringmaster, and the page's comparison puts it at 100% as the baseline at R1, with Rime-Draped Sprouts R1 at 90.82% and Cosmic Ripples R1 at 82.50% behind it. She is a sub-DPS, so the honest answer is that you can skip her signature. Rime-Draped Sprouts keeps about 91% of her damage even though its passive is entirely Basic Attack focused and therefore almost dead on a character with a 0.71% Basic Attack share. Nearly all of that result comes from its stat line, ATK 500 and 72% Crit DMG. Cosmic Ripples is the same story with 54% ATK, and its 12.8% Energy Regen helps with the 130% target directly.
Stringmaster is still the one whose passive actually fits her: 12% Attribute DMG Bonus, 12% ATK per stack when dealing Resonance Skill damage up to 2 stacks, and another 12% ATK while the wielder is off the field, which is where Yinlin spends most of her rotation. If you own it, use it. If you do not, do not chase it for her.
Follow the Cost 4 rule printed on the page: Cost 4 Crit DMG when the weapon gives Crit Rate (Stringmaster), and Cost 4 Crit Rate when the weapon gives Crit DMG or neither (Rime-Draped Sprouts, Cosmic Ripples).
Team Fit & Account Value
Her number 1 team is Xiangli Yao, Yinlin, and Shorekeeper. It is her only tested structure, and both entries in the projection are that same trio with the two Yinlin rotations described above. The live Team DPS section carries the current compositions, ordering, equipment, and values for it.
The reason that team works is that Xiangli Yao collects both halves of her Outro. He is Electro, and his solo damage profile is 65.15% Resonance Liberation, so the 20% Electro Deepen and the 25% Resonance Liberation Deepen both land on the majority of his output. The timing lines up as well: her Outro lasts 14 seconds or until he swaps, and his tested field time is 13.1 seconds, so it covers essentially his whole turn. Her Punishment Mark lasts 18 seconds from the conversion she performs right before her Outro, which also covers his entire window while he attacks steadily enough to trigger Judgment Strike near its once-per-second cap.
Shorekeeper is a better third partner for her than a generic support. Her Outro, Binary Butterfly, amplifies all nearby party members' damage by 15% for up to 30 seconds. Because it is party-wide and time-based rather than a buff riding on one incoming character, it is still active during the 18 seconds of Judgment Strikes after Yinlin has left the field. This is the general point about buffing Yinlin: most Outro buffs handed to her end the moment she switches out, so they only cover her short on-field window and miss the 18 seconds that follow, which is where most of her damage actually lands. Persistent team-wide effects are what reach it.
Calcharo is the other carry her Outro fully fits. He is Electro with 62.04% Resonance Liberation in his solo profile, the same shape as Xiangli Yao, so both halves of Strategist land on him too. That pairing is not in the validated projection yet, so treat it as a kit match rather than a tested result.
Augusta is the honest exception among her listed synergies, for two separate reasons. The first is her damage type. She is Electro, so the 20% Electro Deepen lands, but the 25% Resonance Liberation Deepen mostly does not, and the reason is in Augusta's own talent text rather than in her rotation: her Liberation hits, Sword of Eternal Oath, Sublime is the Sun - Sunborne, and Sublime is the Sun - Everbright Protector, are each considered as Heavy Attack DMG. Her solo profile shows the same shape, 82.53% Heavy Attack with no meaningful Liberation line. Augusta uses her Liberation constantly and still collects only half of Yinlin's Outro.
The second reason matters more, and it is specific to how Yinlin deals damage. Augusta's Sublime is the Sun puts her into Sworn Allegiance for 7 seconds, and her talent text is explicit that time is temporarily stopped for that duration. Off-field follow-up hits do not fire while time is stopped, and Yinlin's Judgment Strikes are exactly that kind of hit. Those 7 seconds land inside Augusta's largest damage phase and inside Yinlin's 18-second Punishment Mark window, so Yinlin goes quiet during the part of the rotation that should be feeding her the most triggers. The pairing is playable and there is a rotation for it on the site, but both halves of Yinlin's contribution are worth less here than they are beside an Electro carry whose damage is Resonance Liberation damage.
For the sub-DPS slot itself, Lynae is the stronger option in the tested data. The same core has been tested with Lynae in Yinlin's place, and that version performs better in the projection. Lynae takes a larger personal share, she brings Tune Break and Tune Rupture damage that Yinlin has no equivalent of, and her Outro carries the same 25% Resonance Liberation Amplification alongside 15% All DMG Amplification. Where Yinlin is ahead is the element-matched half, since 20% Electro beats 15% of everything for an Electro carry, and field time: her fast variant asks for about 4.56 seconds where Lynae's tested rotation takes over 7. If you own both, Lynae is the recommendation for that slot. If you own Yinlin and not Lynae, you are not missing the team, only some of its ceiling.
Her honest limits. Her buff is conditional twice over, on element and on damage type, which is a narrow target for a support-flavoured slot. Her own damage is produced by someone else's attacks, so a slow or nuke-shaped carry quietly wastes it. Her marks vanish if she leaves the field before converting them, which means a rushed swap can zero out her rotation. And her Outro reaches exactly one character, not the team.
Sequence Value
Yinlin is complete at S0. Every mechanic described above works without a single sequence. The page's sequence damage chart: S0 100% → S1 102% → S2 102% → S3 125% → S4 129% → S5 147% → S6 198%.
- S1 — Morality's Crossroads (2/5): Magnetic Roar and Lightning Execution deal 70% more damage. That sounds large and the chart barely moves, 100% to 102%. Those two specific casts are a small slice of her 59.79% Resonance Skill share; the bulk is Electromagnetic Blast and Judgment Strike, which S1 does not touch.
- S2 — Ensnarled by Rapport (2/5): Electromagnetic Blast recovers 5 extra Judgment Points and 5 extra Resonance Energy on hit. The chart does not move, 102% to 102%, because this adds no damage. Full Judgment Points arrive sooner, making Chameleon Cipher more reliable, while the extra energy reduces pressure on the 130% Energy Regen target.
- S3 — Unyielding Verdict (3/5): Judgment Strike's multiplier increases by 55%, and the chart jumps 102% to 125%. This is the first node that pays, confirming that Judgment Strike is her largest single damage source.
- S4 — Steadfast Conviction (5/5): When Judgment Strike hits, all team members gain 20% ATK for 12 seconds. Her personal chart moves only 125% to 129%, because it measures her own damage and this is a team buff. The 5/5 rating is correct: 20% ATK on a carry holding most of the team's damage matters far more than four points on her own bar, and Judgment Strike can refresh it once per second for 18 seconds. This is her most valuable node by a distance.
- S5 — Resounding Will (4/5): Thundering Wrath deals 100% extra damage to targets carrying Sinner's Mark or Punishment Mark, moving the chart from 129% to 147%. Her Liberation is 20.12% of her damage, so roughly doubling it against marked targets produces the expected jump. The condition is free in practice because her rotation always has a mark up when she casts it.
- S6 — Pursuit of Justice (5/5): For 30 seconds after Thundering Wrath, her Basic Attack hits trigger Furious Thunder for 419.59% of her ATK, once per hit and up to 4 times, counted as Resonance Skill damage. The chart reaches 198%. Those four triggers need four separate Basic Attack hits inside the window, which her longer tested rotation can supply but her fast swap variant cannot. The 198% figure assumes a rotation that takes those hits, and that field time is not free in a team that wants it for the carry.
Realistic stopping points: S0 is where most owners should stay. If she is a character you play regularly, S4 is the first stop worth real resources because it is the only node that changes what she gives the team rather than what she deals herself, and S3 on the way is a genuine damage node. S6 is a whale ceiling, and it asks for field time her teams do not want to give.
Pull Value
Pull Yinlin if:
- You love the character herself, her design, her puppet, her place in the story, and you are pulling for that reason alone.
- You are collecting, and completion matters more to you than power.
That is the whole list. There is no power-based reason to pull her right now.
Skip or delay Yinlin if:
- You want damage. Her share sits around a fifth of her team's output, and the same pull spent on a newer damage dealer goes further.
- Your carries are not Electro, or their damage is not tagged as Resonance Liberation damage. Both halves of her Outro are conditional, and a carry who meets only one collects only half of it.
- You are F2P or a low spender counting every pull. She is cheap to build and easy to play, but the slot she fills already has a stronger tested option.
- You are returning to the game and remember her as the sub-DPS everyone wanted. She was, back in Version 1.0. The game has moved on.
Materials
Exact totals come from the canonical material data.
Character materials


Important skills


Max character and skills
Videos
Related videos
Videos load only when this section is reached.