 HP
10300
HP
10300
Character guide · Fusion Pistols DPS
Galbrena
Fusion Pistols guide - Best weapons, Echoes, stats, teams, and damage notes.
Galbrena is a 5-star Fusion Pistols damage dealer whose rotation mixes Heavy Attack and Echo Skill damage. This guide preserves her weapons, Echo setup, build targets, sequence value, combo comparisons, teams, and damage-source calculations.
 Element: Fusion
 Weapon: Pistols
Rarity: 5★
Version: 2.7
Weapon: Pistols
Rarity: 5★
Version: 2.7

Overview
Base stats
HP
10300
 ATK
462
ATK
462
 DEF
1112
DEF
1112
 Max Energy
100
Max Energy
100
 Crit Rate
5%
Crit Rate
5%
 Crit DMG
150%
Crit DMG
150%
 Healing Bonus
0%
Healing Bonus
0%
 Fusion DMG Bonus
0%
Fusion DMG Bonus
0%
 Tune Break Boost
0
Tune Break Boost
0
 Off-Tune Buildup Rate
100%
Off-Tune Buildup Rate
100%
Talents
Talent descriptions & multipliers
Talent priority
 Normal Attack
Recommended levelLv. 10
Normal Attack
Recommended levelLv. 10
 Resonance Skill
Recommended levelLv. 6
Resonance Skill
Recommended levelLv. 6
 Forte Circuit
Recommended levelLv. 10
Forte Circuit
Recommended levelLv. 10
 Resonance Liberation
Recommended levelLv. 10
Resonance Liberation
Recommended levelLv. 10
 Intro Skill
Recommended levelLv. 6
Intro Skill
Recommended levelLv. 6
Normal Attack
Slayer's Trigger
Basic Attack
Perform up to 4 consecutive attacks, dealing Fusion DMG. Basic Attack Stage 1 to 3 DMG are considered as Heavy Attack DMG, and Basic Attack Stage 4 DMG as Echo Skill DMG.
Press Normal Attack right after performing Basic Attack Stage 4 to perform Basic Attack Stage 2.
Heavy Attack - Volley of Death
Consume STA to attack the target and perform up to 3 consecutive attacks, dealing Fusion DMG. Stage 3 DMG is considered as Echo Skill DMG.
Press Normal Attack right after performing Heavy Attack - Volley of Death Stage 1 to perform Basic Attack Stage 2. Press Normal Attack right after performing Heavy Attack - Volley of Death Stage 2 or 3 to perform Basic Attack Stage 3.
Mid-air Attack - Ashfall Barrage
While in mid-air, press Normal Attack to consume STA to perform a Plunging Attack, dealing Fusion DMG, considered as Heavy Attack DMG.
While in mid-air, hold Normal Attack to continuously consume STA to launch a barrage of shots at targets below, dealing Fusion DMG, considered as Heavy Attack DMG. If Galbrena does not land when interrupted during the barrage, she cannot immediately cast this skill again. Release Normal Attack during the barrage to cast Plunging Attack.
Press Normal Attack right after casting Plunging Attack to cast Basic Attack Stage 3.
Dodge Counter - Blood for Blood
Press Normal Attack right after a successful Dodge to attack the target, dealing Fusion DMG, considered as Heavy Attack DMG. Press Normal Attack right after casting this skill to cast Basic Attack Stage 4.
Multipliers Lv.
Open this panel to load exact values.
Resonance Skill
Edge Transcended
Resonance Skill - Encroach
Dash forward and leap into the air. Flip backward upon hitting the target, dealing Fusion DMG, considered Heavy Attack DMG.
Resonance Skill - Ascent of Malice
Upon reaching 100 points of , Resonance Skill is replaced with Resonance Skill - Ascent of Malice.
Slash at enemies with her wings, dealing Fusion DMG, considered Heavy Attack DMG. Upon casting this skill:
Galbrena enters .
is converted into an equivalent amount of Purging Flame.
Can be followed by Basic Attack - Seraphic Execution Stage 2.
Multipliers Lv.
Open this panel to load exact values.
Forte Circuit
Beyond Threshold
Threshold State
By default, Galbrena is in , and in this state, she accumulates and .
Demon Hypostasis
While in , Basic Attack, Heavy Attack - Volley of Death, Mid-air Attack - Ashfall Barrage, Dodge Counter - Blood for Blood, and Resonance Skill - Encroach are replaced with Basic Attack - Seraphic Execution, Heavy Attack - Flamewing Verdict, Mid-air Attack - Hellsent Barrage, Dodge Counter - Purgatory Scourge, and Resonance Skill - Ravage, which consume Purging Flame on hit.
While in , every point of increases the DMG of Basic Attack - Seraphic Execution, Heavy Attack - Flamewing Verdict, Mid-air Attack - Hellsent Barrage, Resonance Skill - Ravage, and Dodge Counter - Purgatory Scourge by 1.5%, up to 60%, which is removed upon exiting .
When Purging Flame depletes or after staying in for over 50s, ends automatically.
Basic Attack - Seraphic Execution
Perform up to 5 consecutive attacks, dealing Fusion DMG. Consume Purging Flame on hit. Stage 1 to 3 DMG are considered Heavy Attack DMG, and Stage 4 & 5 DMG Echo Skill DMG.
Press Normal Attack after casting Basic Attack - Seraphic Execution Stage 5 to cast Basic Attack - Seraphic Execution Stage 3.
Heavy Attack - Flamewing Verdict
Consume STA to attack the target and perform up to 3 consecutive attacks, dealing Fusion DMG. Consume Purging Flame on hit. Stage 3 DMG is considered Echo Skill DMG.
Press Normal Attack after casting Heavy Attack - Flamewing Verdict Stage 1 to cast Basic Attack - Seraphic Execution Stage 2.
Press Normal Attack after casting Heavy Attack - Flamewing Verdict Stage 2 & 3 to cast Basic Attack - Seraphic Execution Stage 3.
Mid-air Attack - Hellsent Barrage
While in mid-air, press Normal Attack to consume STA to perform aerial attacks, dealing Fusion DMG, considered Heavy Attack DMG. Consume Purging Flame on hit.
While in mid-air, hold Normal Attack to continuously consume STA to launch a barrage of shots at targets, dealing Fusion DMG, considered Heavy Attack DMG. Consume Purging Flame on hit. If Galbrena does not land when interrupted during the barrage, she cannot immediately cast this skill again. Release Normal Attack during the barrage to cast Plunging Attack.
Press Normal Attack after the Plunging Attack to cast Basic Attack - Seraphic Execution Stage 3.
Dodge Counter - Purgatory Scourge
Press Normal Attack right after a successful Dodge to attack the target, dealing Fusion DMG, considered Heavy Attack DMG.
Press Normal Attack right after casting this skill to cast Basic Attack - Seraphic Execution Stage 4.
Resonance Skill - Ravage
Dash forward and leap into the air. Flip backward upon hitting the target, dealing Fusion DMG, considered Heavy Attack DMG.
Consume Purging Flame on hit. Resonance Skill - Ravage and Resonance Skill - Encroach share a cooldown.
Hellstride
Press Dodge on the ground while casting Galbrena's own skills to cast to deal a fixed amount of Fusion DMG, considered Basic Attack DMG that does not bear any effect from DMG buffs. can trigger successful Dodges. cannot be cast consecutively.
Casting this skill does not reset the attack cycles within a short period of time.
Burning Drive
Casting Intro Skill, , Normal Attack - Seraphic Execution Basic Attack Stage 4, Resonance Skill - Encroach, Resonance Skill - Ascent of Malice, and Resonance Skill - Ravage increases Galbrena's resistance to interruptions and ATK by 20% for 4s.
Afterflame
Galbrena can hold up to 40 points of .
While in , Galbrena recovers 8 points of when Resonators in the nearby team cast Echo Skill. Echoes with the same name can only trigger this effect once. This effect resets when Galbrena exits .
All is removed upon exiting .
Sinflame
Galbrena can hold up to 100 points of .
While in , hitting an enemy with Basic Attack, Heavy Attack - Volley of Death, Mid-air Attack - Ashfall Barrage, Resonance Skill - Encroach, and Intro Skill - Hellflare Overload recovers .
Multipliers Lv.
Open this panel to load exact values.
Resonance Liberation
Hellfire Absolution
Attack the target and deal Fusion DMG, considered Echo Skill DMG.
Gain 85% DMG Multiplier increase for Basic Attack - Seraphic Execution, Heavy Attack - Flamewing Verdict, Mid-air Attack - Hellsent Barrage, and Dodge Counter - Purgatory Scourge for 14s while in .
Press Normal Attack after casting Resonance Liberation to cast Basic Atttack Stage 2. While in , cast Basic Attack - Seraphic Execution Stage 2 instead.
Can be cast in mid-air close to the ground.
Multipliers Lv.
Open this panel to load exact values.
Intro Skill
Hellflare Overload
Attack the target and deal Fusion DMG.
Hold Normal Attack after casting this skill to cast Heavy Attack - Volley of Death Stage 2. While in , cast Heavy Attack - Flamewing Verdict Stage 2 instead.
Press Normal Attack right after casting this skill to perform Basic Attack Stage 2, which is replaced with Basic Attack - Seraphic Execution Stage 2 if Galbrena is in .
Multipliers Lv.
Open this panel to load exact values.

Outro Skill
Ashen Pursuit
Attack the target, dealing Fusion DMG equal to 79.5%*3+556.5% of Galbrena's ATK.
Multipliers Lv.
Open this panel to load exact values.

Tune Break
Tune Break: Pistols
When the target's Off-Tune Level is full, the Resonators may cast Tune Break on the target.

Inherent Skill I
Oathbound Hunt
1 stack of is inflicted on the target when the following skills hit: Intro Skill, Basic Attack, Basic Attack - Seraphic Execution, Dodge Counter, Heavy Attack - Volley of Death, Heavy Attack - Flamewing Verdict, Mid-air Attack, , Resonance Skill - Encroach, Resonance Skill - Ascent of Malice, Resonance Skill - Ravage and Resonance Liberation, up to 4 stacks.
Each stack Amplifies the DMG directly dealt by Galbrena's Normal Attack, Resonance Skill, Forte Circuit, Resonance Liberation, Intro Skill, and Outro Skill by 5% for 5.5s. The same type of skill can trigger this effect on the same target once every 5s.
Resonance Skill - Encroach and Resonance Skill - Ravage are considered the same type of skill.

Inherent Skill II
Sin Feaster
Casting Basic Attack Stage 4, Basic Attack - Seraphic Execution Stage 5, Heavy Attack - Volley of Death Stage 3, and Heavy Attack - Flamewing Verdict Stage 3 recovers 10 points of STA.
Sequences
Sequence value

S1
Heart of Defiance Ever Ablaze
★★★★★
When casting Resonance Skill - Ascent of Malice, each point of additionally grants 2% Crit. DMG to Basic Attack - Seraphic Execution, Heavy Attack - Flamewing Verdict, Mid-air Attack - Hellsent Barrage, Resonance Skill - Ravage, and Dodge Counter - Purgatory Scourge, up to 80%. This effect is removed upon exiting .
While in , Basic Attack - Seraphic Execution Stage 5, Heavy Attack - Flamewing Verdict Stage 3, and Mid-air Attack - Hellsent Barrage are immune to interruption.
Why it matters
Each point of increases Crit DMG for hits after entering the state (except the Liberation) by 2%, stacking up to 80%. This Crit DMG buff works only during the state (which is activated after using the Forte Skill Ascent of Malice). To reach the maximum Crit DMG (80%), you need to provide Galbrena with 5 Echo casts.

S2
Hellbound Dive of Fire and Abyss
★★★★★
grants 350% more ATK Bonus.
Why it matters
The buff you get from maintaining the gauge located below the Forte can remain active when using [Intro Skill, , Normal Attack – Seraphic Execution Stage 4, Resonance Skill – Encroach, Resonance Skill – Ascent of Malice, and Resonance Skill – Ravage]. This buff provides Galbrena with 20% ATK, and it will now increase by 350%, for a total of 370% ATK.

S3
Hunter’s Blood Oath Rekindled
★★★★★
Resonance Liberation DMG Multiplier is increased by 130%.
Why it matters
The damage dealt by the Liberation is now increased by 130%. For example, a hit that previously dealt 50,000 will now deal 115,000.

S4
Carry Forth This Fading Spark
★★★★★
When Resonators in the team cast Echo Skill, all Resonators in the team gain 20% all-Attribute DMG Bonus for 20s.
Why it matters
When any character in the team casts an Echo Skill, all characters in the team will gain 20% Attribute DMG. This means Fusion DMG for all Fusion characters, Aero DMG for all Aero characters, Havoc DMG for all Havoc characters, and so on. The effect remains active at all times as long as you follow the normal rotation.

S5
Though Light Fades, Torment Consumes
★★★★★
The DMG Multipliers of Resonance Skill - Encroach, Resonance Skill - Ascent of Malice, and Resonance Skill - Ravage are increased by 150%.
Why it matters
The DMG multiplier for all three of Galbrena's skills will increase, which includes the Normal Skill, the Forte Skill, and the skill used after the Forte. However, the damage increase is not significant, especially since the Forte Skill animation is usually canceled.

S6
I Remain Who I am, Eternal My Flame
★★★★★
becomes Eternal Hypostasis. Eternal Hypostasis retains all effects of .
Additionally, Eternal Hypostasis lasts, the DMG Multipliers of Basic Attack - Seraphic Execution, Heavy Attack - Flamewing Verdict, Mid-air Attack - Hellsent Barrage, and Dodge Counter -Purgatory Scourge are additionally increased by 60%.
When casting Resonance Skill - Ascent of Malice, for every 1 point of consumed, Galbrena's Basic Attack - Seraphic Execution, Heavy Attack - Flamewing Verdict, Mid-air Attack - Hellsent Barrage, Resonance Skill - Ravage, and Dodge Counter -Purgatory Scourge gain 0.875% Fusion DMG Amplification, up to 35%, which is removed upon exiting Eternal Hypostasis.
Why it matters
After using the Forte Skill, Galbrena enters a state that was previously called , now renamed Eternal Hypostasis. This state keeps all the same effects as before, including the system, but the damage of her hits is now greatly increased by 60% (except for the Liberation and the Skill).
If Galbrena's gauge is full — which requires 5 Echo casts — she will gain an additional 35% Fusion DMG Bonus. This bonus is separate from the damage increase gained when entering the state, meaning the 60% boost will always apply even if the gauge is not full.
Sequence damage comparison
Build
Build targets
Sub-stat priority
- 1Crit Rate
- 2Crit DMG
- 3ATK%
- 4
 Heavy Attack DMG Bonus
 - 5Energy Regen
Build targets
ATK2200-2300Cost 3 Fusion / FusionATK2450-2600Cost 3 ATK / FusionCrit Rate64-67.5%Crit DMG285-295%Energy125%Heavy Attack DMG20-35%Weapon comparison
Relative damage
All the calculations below are based on using Cost-4 Crit Rate if the weapon provides Crit DMG, Cost-4 Crit DMG if the weapon provides Crit Rate, and Cost-4 Crit Rate if the weapon provides neither.
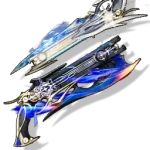
Lux & Umber R5
ATK 587Crit DMG 48.6%
126.41%Cost 4 Crit Rate
Weapon effect
ATK is increased by 24%. Upon dealing Echo Skill DMG, gain 48% Heavy Attack DMG Amplification for 6s. Upon dealing Heavy Attack DMG, gain 48% Echo Skill DMG Amplification for 6s. DMG Amplification on each attack is capped at 48%. While both effects are active, dealing damage ignores 16% of the target's DEF.
Lux & Umber R1
ATK 587Crit DMG 48.6%
100%Cost 4 Crit Rate
Weapon effect
ATK is increased by 12%. Upon dealing Echo Skill DMG, gain 24% Heavy Attack DMG Amplification for 6s. Upon dealing Heavy Attack DMG, gain 24% Echo Skill DMG Amplification for 6s. DMG Amplification on each attack is capped at 24%. While both effects are active, dealing damage ignores 8% of the target's DEF.
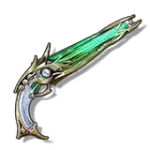
Woodland Aria R1
ATK 500Crit Rate 36%
81.25%Cost 4 Crit DMG
Weapon effect
ATK is increased by 12%. Inflicting Aero Erosion on the target gives 24% Aero DMG Bonus for 10s. Hitting targets with Aero Erosion reduces their Aero RES by 10% for 20s. Effects of the same name cannot be stacked.
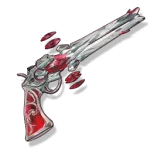
The Last Dance R1
ATK 500Crit DMG 72%
81.14%Cost 4 Crit Rate
Weapon effect
Increases ATK by 12%. Every time Intro Skill or Resonance Liberation is cast, Resonance Skill DMG Bonus increases by 48% for 5s.
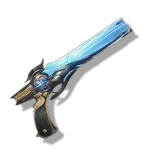
Static Mist R1
ATK 587Crit Rate 24.3%
77.36%Cost 4 Crit DMG
Weapon effect
Increases Energy Regen by 12.8%. When Outro Skill is released, increases the switched-in Resonator's ATK by 10%, stacking up to 1 time(s). This effect lasts for 14s.
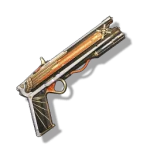
Solar Flame R5
ATK 412Crit Rate 20.3%
75.26%Cost 4 Crit DMG
Weapon effect
Dealing Basic Attack or Heavy Attack DMG increases ATK by 7.2% and grants 7.2% Heavy Attack DMG Bonus for 7s, stacking up to 4 times. This effect can be triggered 1 time every 1s.
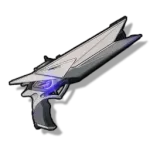
Relativistic Jet R5
ATK 462ATK 18.2%
68.29%Cost 4 Crit Rate
Weapon effect
Casting the Resonance Skill grants 10 Resonance Energy and increases ATK by 20%, lasting for 16s. This effect can be triggered once every 20s.
Solar Flame R1
ATK 412Crit Rate 20.3%
67.68%Cost 4 Crit DMG
Weapon effect
Dealing Basic Attack or Heavy Attack DMG increases ATK by 2.2% and grants 2.2% Heavy Attack DMG Bonus for 7s, stacking up to 4 times. This effect can be triggered 1 time every 1s.
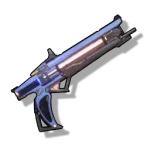
Novaburst R5
ATK 412ATK 30.3%
67.07%Cost 4 Crit Rate
Weapon effect
When the Resonator dashes or dodges, increases ATK by 8%, stacking up to 3 time(s). This effect lasts for 8s.
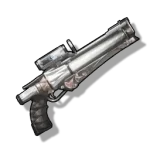
Thunderbolt R5
ATK 387ATK 36.4%
63.12%Cost 4 Crit Rate
Weapon effect
When hitting a target with Basic Attacks or Heavy Attacks, increases Resonance Skill DMG Bonus by 23%, stacking up to 3 time(s). This effect lasts for 10s and can be triggered 1 time(s) every 1s.
Echoes
Main stats
Echoes 1
Flamewing's Shadow


Sonata effect
Flamewing's Shadow · 3 pieces
3 SetDealing Echo Skill DMG increases Heavy Attack Crit. Rate by 20% for 6s. Dealing Heavy Attack DMG increases Echo Skill Crit. Rate by 20% for 6s. While both effects are active, gain 16% Fusion DMG Bonus.
Main Echo
Corrosaurus
Summon a Corrosaurus to attack enemies, dealing 273.60% Fusion DMG. The Resonator with this Echo equipped in the main slot gains 12.00% Fusion DMG Bonus and 20.00% Echo Skill DMG Bonus.
Cost 4Crit DMG / Crit Rate
Cost 3Fusion / ATK
Cost 3Fusion / ATK
Cost 1ATK
Cost 1ATK
Echo stat comparisons


 4 Rate3 Fusion3 Fusion1 ATK1 ATK100%4 Rate3 Fusion3 ATK1 ATK1 ATK98.89%4 Rate3 ATK3 ATK1 ATK1 ATK94.75%4 DMG3 Fusion3 Fusion1 ATK1 ATK94.34%4 DMG3 Fusion3 ATK1 ATK1 ATK93.31%
 4 Rate3 Fusion3 Fusion1 ATK1 ATK92.76%4 Rate3 Fusion3 Fusion1 ATK1 ATK86.54%4 DMG4 Rate1 ATK1 ATK1 ATK73.07%
Teams
Current Team DPS teams
Teams are loaded from the current validated Team DPS projection. Future validated Team DPS updates appear here automatically, replacing the legacy page's stale static team-buff table.
Current teams load only when this section is reached.
Calculations
Damage breakdown
DMG Source Breakdown - No Buffs
100%
Basic Attack0.12%
Heavy Attack36.94%
Echo53.91%
Intro0.96%
Outro8.08%
This breakdown uses Galbrena's solo damage without buffs from other characters. Heavy Attack DMG buffs increase the Heavy Attack portion of her rotation, while Echo Skill DMG buffs increase the Echo portion. Rotation: Intro, Echo, Basic 2, 3, 4, 2, 3, Skill, Forte Skill, Liberation, Basic 2, 3, 4, 5, Hellstride, Basic 3, 4, 5, Outro.
DMG Source Breakdown - Qiuyuan
100%
Basic Attack0.04%
Heavy Attack25.50%
Echo68.43%
Intro0.64%
Outro5.39%
This breakdown uses Galbrena's damage distribution when played with Qiuyuan. Rotation: Intro, Echo, Basic 2, 3, 4, 2, 3, Skill, Forte Skill, Liberation, Basic 2, 3, 4, 5, Hellstride, Basic 3, 4, 5, Outro.
DMG Source Breakdown - Mortefi
100%
Basic Attack0.06%
Heavy Attack39.49%
Echo51.88%
Intro0.91%
Outro7.66%
This breakdown uses Galbrena with Mortefi and the normal rotation, without canceling the hits considered Echo Skill DMG. Rotation: Intro, Echo, Basic 2, 3, 4, 2, 3, Skill, Forte Skill, Liberation, Basic 2, 3, 4, 5, Hellstride, Basic 3, 4, 5, Outro.
Character synergies









Combo damage comparison
Character Combo Damage
Last updated:
Recommended
This comparison shows the damage difference between Galbrena's verified combos. Some routes focus on Heavy Attack damage, some focus on Echo Skill damage, and others balance both.
Recommended combo: 3 Wings - 1 More Basic Attack 3. Even with Mortefi, the best Mortefi route is only 1.6% ahead, so the extra difficulty is not worth it.
| # | Combo | Total damage | Relative damage | Rotation time | Rotation | Video |
|---|---|---|---|---|---|---|
| Qiuyuan - Moonlit CloudsGalbrena uses Lux & Umber R1 with Flamewing's Shadow and Flaming Clawprint. Qiuyuan uses Moonlit Clouds and Emerald Sentence; Shorekeeper uses Rejuvenating Glow and Stellar Symphony. | ||||||
| 1 | 2 Wings - Normal Combo | 1,553,538 | 92.67% | 12.1s | View rotation
| Watch |
| 2 | 3 Wings - 1 More Basic Attack 3 | 1,676,448 | 100.00% | 13.04s | View rotation
| Watch |
| 3 | 4 Wings (Full Heavy Attack DMG) | 1,375,646 | 82.06% | 13.65s | View rotation
| Watch |
| 4 | 3 Kicks (Full Echo Skill DMG) | 1,519,006 | 90.61% | 14.34s | View rotation
| Watch |
| Qiuyuan - Law of Harmony & Sierra GaleGalbrena uses Lux & Umber R1 with Flamewing's Shadow and Flaming Clawprint. Qiuyuan uses Law of Harmony and Sierra Gale with Emerald Sentence; Shorekeeper uses Rejuvenating Glow and Stellar Symphony. | ||||||
| 1 | 2 Wings - Normal Combo | 1,296,242 | 93.37% | 12.1s | View rotation
| Watch |
| 2 | 3 Wings - 1 More Basic Attack 3 | 1,388,317 | 100.00% | 13.04s | View rotation
| Watch |
| 3 | 4 Wings (Full Heavy Attack DMG) | 1,129,516 | 81.36% | 13.65s | View rotation
| Watch |
| 4 | 3 Kicks (Full Echo Skill DMG) | 1,280,500 | 92.23% | 14.34s | View rotation
| Watch |
| Mortefi - Moonlit CloudsGalbrena uses Lux & Umber R1 with Flamewing's Shadow and Flaming Clawprint. Mortefi uses Moonlit Clouds and Static Mist; Shorekeeper uses Rejuvenating Glow and Stellar Symphony. | ||||||
| 1 | 2 Wings - Normal Combo | 1,149,657 | 88.42% | 12.1s | View rotation
| Watch |
| 2 | 3 Wings - 1 More Basic Attack 3 | 1,279,755 | 98.43% | 13.04s | View rotation
| Watch |
| 3 | 4 Wings (Full Heavy Attack DMG) | 1,300,211 | 100.00% | 13.65s | View rotation
| Watch |
| 4 | 3 Kicks (Full Echo Skill DMG) | 991,576 | 76.26% | 14.34s | View rotation
| Watch |
Review
Galbrena review
Review updated:
Galbrena is a 5-Star Fusion Pistols main DPS built around two gauges — Sinflame and Afterflame — and a transformed state called Demon Hypostasis. Her damage deliberately mixes Heavy Attack damage and Echo Skill damage: in the page's tested solo breakdown, Echo Skill hits account for 53.91% of her damage, Heavy Attack hits for 36.94%, and her Outro for 8.08%. In her tested teams she is the carry, dealing roughly 85–90% of the team's damage in her two-support structures.
The live Team DPS section is the authority for Galbrena's current tested compositions, ordering, DPS values, and rotations. It updates from the validated Team DPS projection instead of freezing those values in this review.
Quick Verdict
Build Galbrena if you like her and you can give her the right second slot. She is a main DPS, so personal preference comes first — but her best partners are the ones who amplify Echo Skill damage (Qiuyuan, or Lucilla in Echo Mode), because that is her biggest damage share. She still functions with generic supports, just at a lower level. Her two best tested teams — with Lucilla, or with Qiuyuan — are almost identical in output, with Lucilla the slightly better choice for a reason that has nothing to do with damage — more on this in Team Fit & Account Value.
At S0 her kit is already complete: the full transformation loop, both gauges, and her entire rotation work without sequences. For low spenders, S0 is enough. S2 is the first major stopping point — the page's sequence chart jumps to 148% there. S6 is a whale ceiling, reaching 293% on the same chart.
How Galbrena Works
Galbrena starts every fight in Threshold State. In this state, hitting the enemy with her Basic Attacks, Heavy Attacks, Resonance Skill, and Intro builds Sinflame (up to 100 points). When Sinflame is full, her Resonance Skill turns into Ascent of Malice. Casting it transforms her into Demon Hypostasis: her Sinflame becomes Purging Flame, and all of her attacks are replaced with stronger versions — Seraphic Execution (Basic), Flamewing Verdict (Heavy), Hellsent Barrage (mid-air), Purgatory Scourge (Dodge Counter), and Ravage (Skill) — that consume Purging Flame on hit. When Purging Flame runs out (or after 50 seconds), the state ends and she starts building Sinflame again.
The second gauge, Afterflame, is filled by Echo Skill casts — including her own. While she is in Threshold State, every Echo Skill cast by any Resonator in the team gives her 8 Afterflame (up to 40, and the same named Echo can only trigger it once per cycle). Every character can cast the Echo equipped in their main slot, so Galbrena's own Echo cast counts too — it just has to happen before she transforms, because the gauge stops filling once Ascent of Malice moves her into Demon Hypostasis. Inside Demon Hypostasis, each point of Afterflame increases the damage of her transformed attacks by 1.5%, up to 60%. The math: the full bonus needs five Echo casts before she transforms (5 × 8 = 40 points), and her best team reaches exactly that — Qiuyuan provides four casts (his own Echo plus his three Forte heavies, which his kit counts as performing Echo Skills) and Shorekeeper's Echo is the fifth. If Shorekeeper skips her Echo in a later rotation, Galbrena's own Echo cast — placed before the Forte Skill — takes its place. All Afterflame is removed when the state ends, so it rebuilds every rotation.
Her Resonance Liberation is considered Echo Skill damage and, while she is in Demon Hypostasis, it increases the damage multiplier of her transformed attacks by 85% for 14 seconds — so the rotation always casts it right after transforming.
Three smaller mechanics keep the loop running. Burning Drive: casting her Intro, Hellstride, Seraphic Execution Stage 4, or any of her Skills gives +20% ATK and interruption resistance for 4 seconds, and the rotation refreshes it constantly. Oathbound Hunt (Inherent Skill I): her hits inflict Fated End stacks, up to 4, and each stack amplifies her direct damage by 5% — a free 20% damage amplification that her rotation keeps fully stacked. Sin Feaster (Inherent Skill II): her Stage 4, Stage 5, and Heavy Stage 3 hits refund 10 STA each, which pays for the Heavy chains.
Hellstride deserves its own paragraph because the tested rotation depends on it. Pressing Dodge on the ground during her own skills casts Hellstride: a fixed Fusion hit counted as Basic Attack damage (it is not affected by damage buffs), which can trigger successful Dodges and — the important part — does not reset her attack chain. Its real job in the rotation is not damage; it is canceling the long Stage 5 kick animations while letting the next chain continue from Stage 3.
Her standard tested rotation — the "3 Wings" route, about 13.04 seconds of field time, difficulty 2:
Intro > Basic 2, 3, 4 > Basic 2, 3 > Skill > Forte Skill > Echo > Liberation > Basic 2, 3, 4, 5 (cancel the 5th with Hellstride) > Hellstride > Basic 3, 4, 5 (cancel the 5th with Hellstride) > Hellstride > Basic 3 (cancel with Outro) > Outro
This exact string is the same in every tested team — only her teammates' rotations change — so there is exactly one rotation to learn.
Two tested alternatives are worth knowing:
- "2 Wings" — the easier option, 12.65 seconds, difficulty 1. It simply drops the Hellstride-cancel segment: Intro > Basic 2, 3, 4 > Basic 2, 3 > Skill > Forte Skill > Echo > Liberation > Basic 2, 3, 4, 5 > Basic 3, 4, 5 > Outro. It lands a few percent behind 3 Wings in the tested teams. Start here, then add the cancels once the route is comfortable.
- "4 Wings" — the full Heavy Attack route, 13.65 seconds, difficulty 6. It replaces the kicks with Heavy Cancel + Hellstride loops to maximize Heavy Attack damage. It is only tested with Mortefi, where it ends about 1.6% ahead of 3 Wings — and the tested team note says plainly that the gain does not justify the difficulty. Treat it as a tech route, not a recommendation.
Build Priorities
Galbrena's tested damage profile (solo, from the page's calculations): Echo Skill 53.91%, Heavy Attack 36.94%, Outro 8.08%, with Intro and Basic Attack under 1% each. This profile decides everything about her build and her partners. Echo Skill buffs cover her biggest share — with Qiuyuan in the team, the Echo portion rises to 68.43%. Heavy Attack buffs cover barely a third — with Mortefi, the Heavy portion is 39.49%.
- Sub-stat priority: Crit Rate, Crit DMG, ATK%, Heavy Attack DMG Bonus, Energy Regen.
- Talent priority: Normal Attack Lv. 10, Forte Circuit Lv. 10, Resonance Liberation Lv. 10, Resonance Skill Lv. 6, Intro Skill Lv. 6.
- Build targets: ATK 2,200–2,300 with Fusion/Fusion Cost 3 (2,450–2,600 with ATK/Fusion), Crit Rate 64–67.5%, Crit DMG 285–295%, Energy Regen 125%, Heavy Attack DMG 20–35%.
Her best weapon is Lux & Umber, her signature Pistols, and the page puts Lux & Umber R1 at 100% as the comparison baseline. The passive is made for her: dealing Echo Skill damage grants 24% Heavy Attack Amplification for 6s, dealing Heavy Attack damage grants 24% Echo Skill Amplification for 6s, and while both are active she ignores 8% of the target's DEF. Because every one of her chains alternates Heavy-typed and Echo-typed hits, both halves are always up. She is a main DPS, so the standing recommendation is to get her signature — a carry lives on personal damage, and the gap here is real: Woodland Aria R1 at 81.25% and The Last Dance R1 at 81.14% are the closest alternatives, and both are essentially crit stat sticks for her (she cannot inflict Aero Erosion, and her Resonance Skill damage share is effectively zero, so neither passive works). Static Mist R1 at 77.36% is the standard-banner option and Solar Flame R5 at 75.26% the 4-star one.
Her Echo setup is 3-piece Flamewing's Shadow with 2-piece Flaming Clawprint, and Corrosaurus as the main Echo. The set fits the same way the weapon does: dealing Echo Skill damage gives 20% Heavy Attack Crit Rate for 6s, dealing Heavy Attack damage gives 20% Echo Skill Crit Rate for 6s, and holding both grants 16% Fusion DMG — all permanently active in her mixed chains. Corrosaurus adds 12% Fusion DMG and 20% Echo Skill DMG in the main slot.
For main stats: Crit Rate on Cost 4, Fusion DMG on both Cost 3, ATK on both Cost 1. The page's echo comparison — calculated on Galbrena alone, with no teammate buffs — puts Fusion/Fusion at 100%, Fusion/ATK at 98.89%, and ATK/ATK at 94.75%. Because the calculation is solo, nothing saturates either stat, and the 1.1-point gap between the two Fusion mixes is small enough that sub-stat quality can flip them. ATK/ATK is only worth it when the sub-stats are clearly better.
Team Fit & Account Value
Her two best tested structures — Galbrena with Lucilla and Shorekeeper and Galbrena with Qiuyuan and Shorekeeper — are almost identical in the tested data, so there is no clear number 1 team here. Given the choice, Lucilla is the slightly better option, and the reason is not damage. In Echo Mode, her Outro gives the incoming Resonator 50% Echo Skill DMG Amplification for 14 seconds — exactly the buff Galbrena's biggest damage share wants — while she still deals real personal damage of her own. She runs Moonlit Clouds in this team, tested in two versions: a normal-speed one and a fast one that uses Lucilla's Perfect Focus release trick (see Lucilla's review) — plus about 0.2 seconds for the Heron Echo cast, as the team note flags.
What separates Lucilla from Qiuyuan is one small line in her kit: her Intro, Clip It, inflicts 1 stack of Glacio Chafe — with no mode condition, so it lands even in Echo Mode. Glacio Chafe is a Negative Status, and game modes regularly run buffs keyed to exactly that — for example, "enemies affected by a Negative Status have their attribute resistance reduced by 10%". One Lucilla Intro switches that kind of buff on for the whole fight, for all of Galbrena's damage. Qiuyuan applies no Negative Status at all, so his teams cannot touch those buffs. In a mode without such a buff the two structures are effectively tied; in a mode with one, Lucilla pulls ahead.
Her most-tested partner is Qiuyuan, alongside Shorekeeper. His Outro grants the same 50% Echo Skill DMG Amplification for 14 seconds, and he feeds her Afterflame gauge almost single-handedly — his own Echo plus his three Forte heavies (each counted as performing an Echo Skill) provide four of the five casts she needs. Two set notes from the tested teams matter here: Moonlit Clouds is his best set when he plays only with Galbrena, while Law of Harmony is the pick if you share one Qiuyuan build between Galbrena and Phrolova teams; and his energy is delicate — let his Skill animation play fully, because canceling it leaves 130% Energy Regen short, and a Cost-3 Energy Regen Echo on him desynchronizes Shorekeeper's Liberation and wastes more time than the team cards show.
Comparing the two directly for her amplifier slot: the headline buff is identical, the tested team output is almost the same, and Qiuyuan's structure is the more-tested and slightly simpler one (his teams run at difficulty 1–2, while Lucilla's fast version is difficulty 4). Lucilla's edge is the Negative Status utility described above, which the projection numbers do not capture. Both are real options — the live Team DPS section shows the current tested values for both, along with every composition and rotation named here.
Beyond those two, the tested alternatives all come with caveats the team notes are honest about. Phrolova with Qiuyuan is a tested dual-carry structure where Phrolova gets 7 Aftersound stacks each rotation. Mortefi with Shorekeeper is the budget option — a 4-star most accounts own at S6 — and even there the tested advice is to stay on 3 Wings. The Fusion structures are tested lower: Lupa's Outro Fusion amplification applies, but its Basic Attack amplification is wasted on her (her Basic Attack share is about 0.1%); Brant gives her the 20% Fusion half of his Outro but not the 25% Resonance Skill half, since she has effectively no Resonance Skill damage; Changli with Lupa runs too long, with both sides losing Outro value; and Iuno's 50% Heavy Attack Amplification only covers Galbrena's smaller share — the team note says Augusta benefits from it fully, Galbrena does not. A Mono Fusion team with Lupa and Mornye is also tested.
Her honest limits: Galbrena gives her team nothing back — her Outro is pure damage and she has no team buff at S0 — she wants 13 or more seconds of field time per rotation, and without an Echo Skill amplifier her teams drop a full tier. Opportunity cost also cuts both ways: Lucilla is wanted by Sigrika's and Hiyuki's teams, and Qiuyuan by Phrolova's, so check who else needs them before committing.
Sequence Value
Galbrena is complete at S0 — the transformation loop, both gauges, Hellstride, and her full rotation all function without sequences. The page's sequence damage chart: S0 100% → S1 114% → S2 148% → S3 177% → S4 192% → S5 196% → S6 293%.
- S1 — Heart of Defiance Ever Ablaze (3/5): Each point of Afterflame also grants 2% Crit DMG to her transformed attacks, up to 80% — the same 40-point pool as the base gauge, so the full bonus again needs five Echo casts. Stage 5, Flamewing Verdict Stage 3, and Hellsent Barrage also gain interruption immunity. Comfort plus damage.
- S2 — Hellbound Dive of Fire and Abyss (5/5): The first major stopping point. The text says Burning Drive grants 350% more ATK, and that number needs an honest breakdown so it does not mislead anyone. Burning Drive's +20% is calculated from her base ATK — 462 from Galbrena herself plus 587 from Lux & Umber is 1049, so the buff is worth about +210 ATK. S2's 350% multiplies that bonus, not her base ATK: 210 × 4.5 ≈ +945 ATK, which is why the correct way to say it is "the +20% buff becomes +90% ATK". That is a strong, real upgrade — this is the jump from 114% to 148% on the chart — but it is not 350% of her base ATK, which would be roughly +3,670 ATK.
- S3 — Hunter’s Blood Oath Rekindled (5/5): Resonance Liberation's damage multiplier increases by 130%. A large single-hit upgrade, and it lands inside her biggest buff window.
- S4 — Carry Forth This Fading Spark (3/5): When any Resonator in the team casts an Echo Skill, the whole team gains 20% all-Attribute DMG Bonus for 20 seconds. Her only team buff — good, but a luxury node, not a stopping point.
- S5 — Though Light Fades, Torment Consumes (1/5): +150% multipliers on Encroach, Ascent of Malice, and Ravage. Small in practice — the Forte Skill animation is usually canceled, and these hits are a minor share of her damage. The chart barely moves (192% → 196%).
- S6 — I Remain Who I am, Eternal My Flame (5/5): Her whale ceiling. Demon Hypostasis becomes Eternal Hypostasis: the four transformed attack types gain another 60% damage multiplier, and each point of Afterflame adds 0.875% Fusion DMG Amplification, up to 35%. This is the 293% on the chart.
For most players S0 is the stopping point; S2 is the efficient vertical investment; everything past that is for dedicated Galbrena mains.
Pull Value
Pull Galbrena if:
- You like her and want a Fusion main DPS — for a DPS, enjoying the character comes first.
- You own or plan to pull Qiuyuan or Lucilla — her two best tested amplifiers.
- You want a carry with exactly one rotation to learn — her tested string is identical in every team, with an easier 2 Wings variant while you practice.
- You can get Lux & Umber — she is a main DPS, and the signature gap over the alternatives is real.
- You enjoy technical play: dodge-cancels, animation timing, and gauge management.
Skip or delay Galbrena if:
- You do not enjoy cancel-heavy, gauge-managed rotations.
- Your account has no Echo Skill amplifier and you will not build one — Mortefi works, but the team is a clear step down from her best.
- You already have a built Fusion core (Changli, Brant, Lupa, Encore) and your account needs elemental coverage more than another Fusion carry.
- Pulling her team together would mean taking Lucilla or Qiuyuan away from teams that need them more.
Materials
Exact totals come from the canonical material data.
Character materials




Important skills
Max character and skills
Videos
Related videos
Videos load only when this section is reached.