 HP
16713
HP
16713
Character guide · Spectro Rectifier Support
Shorekeeper
Spectro Rectifier guide - Exact talents, sequences, teams, synergies, materials, and videos.
Shorekeeper is a 5-star Spectro Rectifier support in Wuthering Waves. This guide preserves her verified stats, complete talents and multipliers, sequence notes, live teams, synergies, materials, and videos.
 Element: Spectro
 Weapon: Rectifier
Rarity: 5★
Version: 1.3
Weapon: Rectifier
Rarity: 5★
Version: 1.3

Overview
Base stats
HP
16713
 ATK
288
ATK
288
 DEF
1100
DEF
1100
 Max Energy
100
Max Energy
100
 Crit Rate
5%
Crit Rate
5%
 Crit DMG
150%
Crit DMG
150%
 Healing Bonus
0%
Healing Bonus
0%
 Spectro DMG Bonus
0%
Spectro DMG Bonus
0%
 Tune Break Boost
0
Tune Break Boost
0
 Off-Tune Buildup Rate
100%
Off-Tune Buildup Rate
100%
Talents
Talent descriptions & multipliers
Talent priority
 Normal Attack
Recommended levelLv. 6
Normal Attack
Recommended levelLv. 6
 Resonance Skill
Recommended levelLv. 10
Resonance Skill
Recommended levelLv. 10
 Forte Circuit
Recommended levelLv. 6
Forte Circuit
Recommended levelLv. 6
 Resonance Liberation
Recommended levelLv. 10
Resonance Liberation
Recommended levelLv. 10
 Intro Skill
Recommended levelLv. 6
Intro Skill
Recommended levelLv. 6
Normal Attack
Origin Calculus
Basic Attack
Perform up to 4 consecutive attacks, dealing Spectro DMG. Each hit generates 1 .
Heavy Attack
Hold the Normal Attack Button to enter , which consumes STA continuously. While in this form, Shorekeeper will:
Generate a segment of every second.
Automatically collect nearby plant collectibles.
Using up all STA or actions such as casting Basic Attack will end the and deal Spectro DMG to the target. Each accumulated segment of will convert into a segment of and generate a .
Mid-air Attack
Consume STA to perform a Plunging Attack. Each hit generates 1 . Quickly Press the Normal Attack Button after the Plunging Attack to perform Basic Attack Stage 2.
Dodge Counter
Press the Normal Attack Button after a successful Dodge to attack a target, dealing Spectro DMG.
Multipliers Lv.
Open this panel to load exact values.
Resonance Skill
Chaos Theory
Restore HP for all nearby party members and summon 5 , which automatically track and attack a target, dealing Spectro DMG. Follow up with Basic Attack in time to start the Basic Attack cycle from Stage 2.
Can be performed in mid-air.
Multipliers Lv.
Open this panel to load exact values.
Forte Circuit
Astral Chord
Flare Star Butterfly
Hitting a target with a Normal Attack generates a , which transforms into a after 6s. Flare Star Butterflies automatically track and attack a target, dealing Spectro DMG. If there are already 5 Collapsed Cores, Shorekeeper's next Normal Attack hit will instantly convert a into a .
Illation
When Shorekeeper has 5 segments of , casting Heavy Attack will consume all segments to pull in nearby targets, dealing Spectro DMG. Meanwhile, all generated Collapsed Cores will instantly transform into Flare Star Butterflies.
Transmutation
When Shorekeeper has 5 segments of , casting Mid-air Attack will consume all segments to deal Spectro DMG. Meanwhile, all generated Collapsed Cores will instantly transform into Flare Star Butterflies. Quickly press the Normal Attack Button afterward to perform Basic Attack Stage 2.
Empirical Data
Shorekeeper can hold up to 5 segments of .
Obtain 1 segment of when Basic Attack Stage 1, 2, or 4 hits a target.
Obtain 2 segments of when Basic Attack Stage 3 hits a target.
Obtain 1 segment of when Mid-air Attack hits a target.
Obtain 1 segment of when Dodge Counter hits a target.
Multipliers Lv.
Open this panel to load exact values.
Resonance Liberation
End Loop
Outer Stellarealm
Generate the to restore HP for all party members within its effective range continuously. This effect can be triggered once every 3s.
Inner Stellarealm
When a party member uses Intro Skill within the , it evolves into the . Within the effective range of the , for every 0.2% of Shorekeeper's Energy Regen, all party members gain 0.01% bonus Crit. Rate, up to 12.5%. has all the effects of the .
Supernal Stellarealm
When a party member uses Intro Skill within the , it evolves into the . Within the effective range of the , for every 0.1% of Shorekeeper's Energy Regen, all party members gain a 0.01% increase of Crit. DMG, up to 25%.
has all the effects of the .
When is generated, Shorekeeper's first Intro Skill triggered in its duration will be replaced with Intro Skill . This effect takes place once each time a is generated.
Multipliers Lv.
Open this panel to load exact values.
Intro Skill
Proof of Existence
Enlightenment
Shorekeeper appears to restore HP for all nearby party members and summon 5 , which automatically track and attack a target, dealing Spectro DMG. This is considered Resonance Skill DMG.
Discernment
When a is generated, Shorekeeper's first Intro Skill triggered in its duration will be replaced with Intro Skill . Casting ends the current , restores HP for all nearby party members, and deals Spectro DMG to the targets. This attack is guaranteed to be a Critical Hit dealing Resonance Liberation DMG. The Intro Skill can only be cast one time for each generated.
Multipliers Lv.
Open this panel to load exact values.

Outro Skill
Binary Butterfly
Shorekeeper summons 1 and 1 Dim Star Butterfly to circle the Resonator on the field for up to 30s, granting the following effects:
If the Resonator on the field is hit or launched, tapping the Dodge Button allows the Resonator to immediately recover from the interruption, triggering a successful Dodge. The Resonator launched in the air can land on the ground standing if they are close to the ground. This effect can be triggered up to 5 time(s).
All nearby party members' DMG is Amplified by 15%.

Tune Break
Tune Break: Rectifier
When the target's is full, the Resonators may cast Tune Break on the target.

Inherent Skill I
Life Entwined
When a Resonator other than Shorekeeper takes a fatal blow, they will not be knocked out and will instead be healed for 50% of Shorekeeper's HP while Shorekeeper loses the same amount of HP. Shorekeeper's HP will not go below 1 from this effect. This effect can be triggered once every 10 minutes.

Inherent Skill II
Self Gravitation
When the Resonator on the field is within the effective range of a , Shorekeeper's Energy Regen increases by 10%. If Rover is on the same team, Rover's Energy Regen also increases by 10%.
Sequences
Sequence value

S1
Unspoken Conjecture
★★★★★
The Stellarealms generated by Resonance Liberation gain the following enhancements:
- The effective range of the healing and buffs is extended by 150%
- The duration is extended by 10s.
- Casting Intro Skill no longer ends the existing .
Why it matters
Not Available

S2
Night's Gift and Refusal
★★★★★
The now increases the ATK of all nearby party members by 40%.
Why it matters
Not Available

S3
Infinity Awaits Me
★★★★★
Casting Resonance Liberation grants Shorekeeper 20 Concerto Energy. This effect can be triggered once every 25s.
Why it matters
Not Available

S4
Overflowing Quietude
★★★★★
Gain 70% additional Healing Bonus when casting Resonance Skill .
Why it matters
Not Available

S5
Echoes in Silence
★★★★★
Extend the ranges of the pulling effect of Basic Attack Stage 3 by 50% and by 30%.
Why it matters
Not Available

S6
To the New World
★★★★★
Increase the DMG Multiplier of Intro Skill by 42%. Casting Intro Skill increases Shorekeeper's Crit. DMG by 500%.
Why it matters
Not Available
Teams
Current Team DPS teams
Teams are loaded from the current validated Team DPS projection. The DPS shown is the average across three rotations, and future validated Team DPS updates appear here automatically.
Current teams load only when this section is reached.
Character synergies





















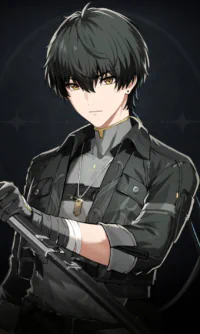
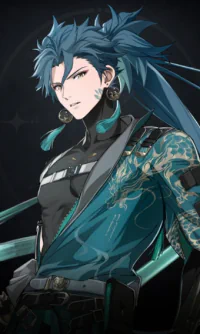

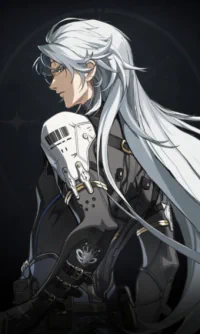
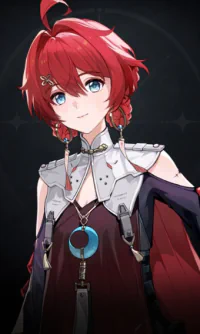


Review
Shorekeeper review
Review updated:
Shorekeeper is a 5-Star Spectro Rectifier support and healer built around the Stellarealm, a zone created by her Resonance Liberation that upgrades through three tiers and gives the whole team Crit Rate and Crit DMG scaled from her Energy Regen. Her personal damage is close to nothing: in the tested Team DPS rotations she contributes roughly 0.5%–1% in the first rotation and 1.4%–3% from the second rotation onward once her enhanced Intro Skill Discernment comes online. Her real output is everything else she provides: up to 12.5% Crit Rate, up to 25% Crit DMG, a party-wide 15% DMG Amplification Outro, team ATK through her set and weapon, continuous healing, one fatal-blow save every 10 minutes, and five interruption recoveries.
What separates her from other supports is what her kit does not ask for. There is no Negative Status requirement, consume-versus-inflict trigger, stat-scaling requirement, or element restriction. Everything she gives applies to any damage dealer standing inside her zone.
The live Team DPS section is the authority for Shorekeeper's current tested compositions, ordering, DPS values, and rotations. It updates from the validated Team DPS projection instead of freezing those values in this review.
Quick Verdict
Pull Shorekeeper if you want one support who fits almost every team you build. Her buffs do not care what element your carry uses, what stat they scale with, or whether they interact with Negative Status. Nothing in her base package can fail to apply, which gives her a place in nearly any structure.
She is not always the highest ceiling. In a team built around a specific mechanic, a specialist who applies the required Negative Status and buffs the carry's scaling stat can contribute more. Shorekeeper is the support who is rarely wrong, not always the support who is best.
Her repeated caveat is simple: the full team rotation must be long enough to cover her Liberation cooldown. If the other two characters finish too quickly, she returns with no Liberation available and the team loses time.
At S0 she is already complete. S1 closes the uptime hole in her base cycle, S2 is the practical investment stopping point with a 40% team ATK buff, and S6 is a whale ceiling for personal damage rather than support value.
Shorekeeper overall rating:
How Shorekeeper Works
The three-tier Stellarealm
Her Resonance Liberation End Loop creates the Outer Stellarealm, which heals every party member inside once every 3 seconds. The first Intro Skill used inside it upgrades the zone to the Inner Stellarealm, granting 0.01% Crit Rate for every 0.2% of Shorekeeper's Energy Regen, up to 12.5%. A second Intro Skill upgrades it to the Supernal Stellarealm, which keeps the lower-tier effects and adds 0.01% Crit DMG for every 0.1% Energy Regen, up to 25%.
The full buff therefore needs two Intro Skills after her Liberation. Shorekeeper casts Liberation and leaves the Outer Stellarealm behind; the next character's Intro upgrades it to Inner, and the following character's Intro upgrades it to Supernal. The carry you want fully buffed should cast the second Intro after her Liberation, not the first. Most tested teams use that order, but verify the live rotation for the team you actually play.
Discernment and the S0 gap
Creating a Supernal Stellarealm replaces Shorekeeper's next Intro Skill with Discernment. It heals the party and deals Spectro damage that is guaranteed to crit and counted as Resonance Liberation damage. It can be used once for each Supernal Stellarealm created.
At S0, Discernment ends the current Stellarealm, removing the zone, healing, and both Crit buffs until she casts Liberation again. That rebuild happens every rotation and is why her Liberation cooldown matters. Discernment is also why her damage share rises from the second rotation onward: the opener normally has no Intro, while later rotations begin with her only meaningful hit.
Energy Regen is the team buff
Every 1% Energy Regen gives the team 0.05% Crit Rate and 0.1% Crit DMG through the upgraded Stellarealm. Both buffs cap at 250% Energy Regen, and every point above that does nothing for them.
Her Inherent Skill Self Gravitation gives Shorekeeper 10% Energy Regen while the active character stands inside a Stellarealm, so the sheet target is 240%. It also gives Rover 10% Energy Regen when Rover is in the team.
- Base: 100%
- Stellar Symphony: 77%
- Two Energy Regen Cost 3 Echoes: 32% each, 64% total
- Result: 241% on the sheet, 251% inside the zone
That caps both team buffs with zero Energy Regen sub-stats and leaves the remaining rolls for HP or Crit DMG.
Binary Butterfly and healing
Her Outro Binary Butterfly summons 1 Flare Star Butterfly and 1 Dim Star Butterfly around the active Resonator for up to 30 seconds. While they are present, all nearby party members' DMG is Amplified by 15%. This is a party-wide, 30-second buff rather than the common one-character Outro rider that ends on a swap.
The butterflies also let the active character recover immediately after being hit or launched by pressing Dodge, and the recovery counts as a successful Dodge. This works up to 5 times.
Her healing scales with HP and comes from four places:
- Resonance Skill, Chaos Theory: heals all nearby party members and summons 5 Dim Star Butterflies.
- Intro Skill, Enlightenment: heals all nearby party members and summons 5 Dim Star Butterflies.
- Outer Stellarealm: heals everyone inside every 3 seconds and remains active through the Inner and Supernal tiers.
- Life Entwined: once every 10 minutes, a fatal blow against another Resonator instead heals them for 50% of Shorekeeper's HP while she loses the same amount; this cannot reduce her below 1 HP.
Tested rotations
First rotation, about 6.06 seconds of field time:
5 Basic Attacks > Heavy > Skill > 3 Basic Attacks > Liberation > 2 Basic Attacks > Heavy > Echo > Outro
The Chaos Theory heal activates the team ATK buffs from Rejuvenating Glow and Stellar Symphony before she leaves, while the inputs after Liberation finish the Concerto needed for her Outro. The 3 Basic Attacks before Liberation assume Stellar Symphony and Concerto gained from a dodge. Without that dodge, use 2 Basic Attacks to fill the Forte and then Heavy instead.
Second rotation onward, about 4.75 seconds of field time:
Enhanced Intro (Discernment) > Basic 1, 2, 3 > Liberation > Basic 4, 5 > Heavy > Skill > Basic 1, 2 (cancel the 2nd with Outro) > Outro
At S0, Liberation immediately rebuilds the Stellarealm that Discernment ends. Casting Skill later refreshes the two 30-second ATK timers shortly before she leaves. This route is about 1.3 seconds faster than the opener. It is the standard string in nearly every tested team; quick-swap openers with partners such as Zhezhi, Sanhua, Carlotta, Yinlin, and Jinhsi are the exceptions.
Where the team loses time
Shorekeeper's Liberation cooldown is her genuine team constraint. The tested data records wasted time on her in roughly one in six entries, including fast Jiyan rotations, Xiangli Yao with a very short Yinlin loop, fast Carlotta and Zhezhi swaps, and Qiuyuan builds running ahead of her cycle.
The fix is not a Shorekeeper build change. Let one teammate remain on the field slightly longer so the full loop matches her cooldown; if the team cannot do that comfortably, a different support may fit better.
Build Priorities
Do not build Shorekeeper like a damage dealer. Her tested contribution is roughly 0.5%–1% in the first rotation and 1.4%–3% later; that is her design, not a flaw.
Sub-stat priority: HP%, flat HP, Crit DMG, Energy Regen, Resonance Liberation DMG, Crit Rate.
HP raises every heal. Crit DMG and Liberation DMG raise Discernment, her only meaningful hit. Crit Rate is last because Discernment is guaranteed to crit and the remaining butterfly damage is tiny. Energy Regen only needs extra rolls when the weapon and main stats do not reach the 250% cap.
Talent priority: Resonance Skill Lv. 10, Resonance Liberation Lv. 10, Normal Attack Lv. 6, Forte Circuit Lv. 6, Intro Skill Lv. 6. Talent levels improve healing and personal damage; they do not change the Energy Regen-scaled Crit buffs or the fixed 15% Outro amplification.
Energy Regen240% sheet / 250%+ in the zone
HPAs high as remaining rolls allow
Crit DMGAfter Energy Regen and HP
Echoes
Use 5-piece Rejuvenating Glow, the set in every tested team. Its 2-piece gives 10% Healing Bonus; after healing allies, its 5-piece gives the whole team 15% ATK for 30 seconds. Her Skill and Intro both trigger it.
The tested teams record the set but not her main Echo, so this review does not name one. The tested opener does include one Echo Skill cast, while the later standard rotation does not.
Use Energy Regen on both Cost 3 slots and HP on both Cost 1 slots. The page has no tested Cost 4 comparison: HP is the safe healing choice, while Crit DMG is the personal Discernment choice. Avoid Crit Rate because Discernment already guarantees a critical hit.
Weapons
Stellar Symphony R1, used in every tested team, provides 77% Energy Regen, restores 8 Concerto Energy when she casts Liberation once every 20 seconds, and gives nearby party members 14% ATK for 30 seconds when her Skill heals. It also raises her HP, but its value is the team ATK and rotation support rather than personal damage.
You can skip it. Variation R1 provides 51.8% Energy Regen, 25.2% less than the signature. Energy Regen sub-stat rolls in the site's Echo data range from 6.8% to 12.4%, so two or three good rolls close the gap and cap the same Crit buffs. Firstlight's Herald carries essentially the same 77% Energy Regen main stat if the account already owns it.
Skipping Stellar Symphony gives up its 14% team ATK and its Liberation-based Concerto support. Pull it for the extra team ATK and smoother field time, not because Shorekeeper needs it to cap her Stellarealm buffs.
Team Fit & Account Value
Her two strongest tested structures both center on Sigrika: one with Lucilla and one with Qiuyuan. They are close enough that execution decides the order: Lucilla's team leads with her fast rotation and falls behind at normal speed. Use the live Team DPS cards for current values.
If both routes are comfortable, Lucilla adds one extra advantage that the projection does not measure: her Intro inflicts 1 stack of Glacio Chafe even in Echo Mode, enabling game-mode buffs that require an enemy to carry a Negative Status. Qiuyuan applies no Negative Status.
The common structure is main DPS + sub-DPS + Shorekeeper, ordered so the main damage dealer takes the second Intro after her Liberation and receives the completed Supernal Stellarealm. Her tested partners span nearly every element and damage style because her base buffs impose no partner condition.
Other supports tested in similar third slots include Suisui, Chisa, Mornye, and Verina. The specialists offer more when their conditions connect: Suisui supports ATK-scaling carries that consume Negative Status, while Chisa applies Havoc Bane, increases Negative Status caps, and provides 18% DEF ignore to eligible teammates. Shorekeeper offers less specificity and far more portability.
- No Negative Status: Shorekeeper cannot supply Glacio Chafe, Spectro Frazzle, Havoc Bane, Fusion Burst, Aero Erosion, or Electro Flare. Carries and game modes that require one need another applier.
- Liberation cooldown: very fast teams can return before End Loop is ready.
- Zone range: the Crit buffs and healing stop if the carry moves outside the Stellarealm. S1 extends the effective range by 150%.
- Echo Skill count: the tested standard route casts an Echo only in the opener. Add it later yourself if a teammate counts team Echo Skill casts.
- Low opportunity cost: she uses little field time, a healer set, and a weapon slot that normally does not compete with a damage dealer.
Use the live Team DPS section for current tested compositions, ordering, DPS, equipment, and rotations. Those results update independently from this review.
Sequence Value
Shorekeeper is complete at S0. Her page has no sequence damage chart, so these stopping points follow the exact effect and the page's star rating rather than invented comparison percentages.
- S1 — Unspoken Conjecture (4/5): extends the Stellarealms' healing and buff range by 150%, extends their duration by 10 seconds, and makes Discernment stop ending the existing Stellarealm. This closes the S0 uptime gap and makes leaving the zone much less likely.
- S2 — Night's Gift and Refusal (5/5): the Outer Stellarealm gives all nearby party members 40% ATK. It is active as soon as Liberation creates the first tier and stacks with the 15% from Rejuvenating Glow and 14% from Stellar Symphony. It does not increase an HP-scaling carry's damage, but the rest of Shorekeeper's kit still works.
- S3 — Infinity Awaits Me (3/5): casting End Loop grants 20 Concerto Energy once every 25 seconds, reducing filler attacks and field time.
- S4 — Overflowing Quietude (1/5): grants 70% additional Healing Bonus when casting Chaos Theory. Her base healing already covers current content.
- S5 — Echoes in Silence (1/5): extends the pull range of Basic Attack Stage 3 by 50% and Illation by 30%. Useful grouping, but no support-value increase.
- S6 — To the New World (5/5): increases Discernment's damage multiplier by 42% and gives Shorekeeper 500% Crit DMG when she casts it. Her base 150% Crit DMG becomes 650%; on a guaranteed critical hit, that changes the crit factor from 2.5 times to 7.5 times, exactly 3 times higher. With the 42% multiplier increase, Discernment lands at roughly 4 times its S0 damage before existing gear Crit DMG is considered. Her tested damage share suggests roughly 5%–10% team contribution rather than a change to her support package.
The practical stopping points are S0 for a complete universal support, S1 for uptime and range, and S2 for the large team ATK buff. S6 is personal-damage luxury.
Pull Value
Pull Shorekeeper if:
- You want one support who fits almost every team with no condition for the carry to satisfy.
- Your damage dealer has no dedicated support for their element, scaling stat, or status yet.
- You want healing, Crit Rate, Crit DMG, damage amplification, and interruption recovery from one slot.
- You want a support complete at S0 who can cap her Energy Regen buffs without her signature weapon.
- You value one short, reusable rotation across many teams.
- Your team rotations are long enough to cover her Liberation cooldown.
Skip or delay Shorekeeper if:
- You already own the specialist support your only carry needs, including their required Negative Status and scaling-stat buffs.
- Your teams finish before her Liberation returns and you do not want to slow another character's loop.
- You need a sub-DPS or second damage dealer more than a healer; below S6 her damage stays intentionally tiny.
- You already clear comfortably and a new main DPS would change your account more than another support.
Materials
Exact totals come from the canonical material data.
Character materials







Important skills




Max character and skills
Videos
Related videos
Videos load only when this section is reached.