 HP
10825
HP
10825
Character guide · Spectro Frazzle DPS and Sub-DPS
Phoebe
Spectro Rectifier guide - Stats, talents, sequences, weapons, Echoes, and live teams.
Phoebe is a 5-star Spectro Rectifier DPS and sub-DPS built around Absolution, Confession, Heavy Attack: Starflash, and Spectro Frazzle. This guide preserves her tested weapon rankings, Eternal Radiance Echo setup, complete talents, sequence value, live teams, damage breakdown, materials, and videos.
 Element: Spectro
 Weapon: Rectifier
Rarity: 5★
Version: 2.1
Weapon: Rectifier
Rarity: 5★
Version: 2.1

Overview
Base stats
HP
10825
 ATK
412
ATK
412
 DEF
1259
DEF
1259
 Max Energy
100
Max Energy
100
 Crit Rate
5%
Crit Rate
5%
 Crit DMG
150%
Crit DMG
150%
 Healing Bonus
0%
Healing Bonus
0%
 Spectro DMG Bonus
0%
Spectro DMG Bonus
0%
 Tune Break Boost
0
Tune Break Boost
0
 Off-Tune Buildup Rate
100%
Off-Tune Buildup Rate
100%
Talents
Talent descriptions & multipliers
Talent priority
 Normal Attack
Recommended levelLv. 6
Normal Attack
Recommended levelLv. 6
 Resonance Skill
Recommended levelLv. 10
Resonance Skill
Recommended levelLv. 10
 Forte Circuit
Recommended levelLv. 10
Forte Circuit
Recommended levelLv. 10
 Resonance Liberation
Recommended levelLv. 10
Resonance Liberation
Recommended levelLv. 10
 Intro Skill
Recommended levelLv. 6
Intro Skill
Recommended levelLv. 6
Normal Attack
O Come Divine Light
Basic Attack
Perform up to 3 consecutive attacks of Holy Light, dealing Spectro DMG.
Heavy Attack
Consume STA to attack the target, dealing Spectro DMG.
Mid-air Attack
Consume STA to ride the staff and dive down from mid-air to attack the target, dealing Spectro DMG.
Mid-air Heavy Attack
Consume STA to ride on the staff for a distance.
Can be re-cast after a Mid-Air Dodge or using Grapple.
Dodge Counter
After a successful Dodge, quickly use Basic Attack to attack the target, dealing Spectro DMG.
When Phoebe is inside the , Dodge Counter becomes : Dodge Counter.
Multipliers Lv.
Open this panel to load exact values.
Resonance Skill
To Where Light Shines
Summon a at the target location, making the target hit stagnate for 2s and dealing Spectro DMG. The stagnation effect can be applied to 12 targets max for each . Using Resonance Skill again shortly after the summoning teleports Phoebe to the ' location, dealing Spectro DMG.
Unable to teleport if Phoebe is too far from the .
Ring of Mirrors
lasts for 30s. When Phoebe summons a new , the existing disappears.
When Phoebe is outside of the , a Basic Attack or Dodge Counter that hits the will refract Holy Light, which deals Spectro DMG to targets inside the and pulls the targets hit to the center of the ring. The DMG dealt is considered Basic Attack DMG. Can be triggered once every 0.5s.
When Phoebe is inside the , Basic Attack becomes Basic Attack , which performs up to 3 consecutive attacks, dealing Spectro DMG, considered Basic Attack DMG.
Multipliers Lv.
Open this panel to load exact values.
Forte Circuit
Radiant Invocation
When Phoebe's is full, consume all to cast one of the following skills:
Hold Basic Attack to cast Heavy Attack Litany, dealing Spectro DMG and applying 1 stack of to the targets hit. Phoebe enters status, which allows her to deal more DMG.
Hold Resonance Skill to cast Resonance Skill Utter , dealing Spectro DMG and applying 1 stack of to the targets hit. Phoebe enters status, which allows her to better exploit .
and cannot coexist. Entering into one will end the other.
When is not exhausted, Phoebe is unable to cast Heavy Attack Litany and Resonance Skill Utter .
When is exhausted, Phoebe will not exit the or status.
Heavy Attack: Starflash
When Phoebe has , casting Basic Attack Stage 3 or Dodge Counter replaces the next Heavy Attack with , which deals Spectro DMG at the cost of 30 .
Enhancement: Reduce the cost of by 15. When the targets hit have , the skill gains 256% DMG Amplification.
Enhancement: Apply 5 stacks of to the targets hit.
Prayer
Phoebe can hold up to 120 .
Phoebe automatically gains 5 every second.
Divine Voice
Phoebe can hold up to 60 .
Casting Heavy Attack Litany or Resonance Skill Utter restores 60 .
Multipliers Lv.
Open this panel to load exact values.
Status multipliers Lv.
Open this panel to load exact values.
Resonance Liberation
Dawn of Enlightenment
Phoebe concentrates the light in her hands into the Mirror of Enlightenment and smashes it, dealing Spectro DMG.
Enhancement: Increase DMG Multiplier by 255%.
Enhancement: Apply 8 stacks of to targets hit.
Multipliers Lv.
Open this panel to load exact values.
Intro Skill
Golden Grace
Knock back nearby targets and deal Spectro DMG.
Multipliers Lv.
Open this panel to load exact values.

Outro Skill
Attentive Heart
Deal Spectro DMG equal to 528.41% of Phoebe's ATK to nearby targets.
Enhancement: Increase DMG Multiplier by 255%.
Enhancement: Grant to the Resonator on the field, reducing the Spectro RES of nearby targets by 10% and granting 100% DMG Amplification. When inflicts DMG, extend 's damage interval by 50%. This effect lasts 30s or until Phoebe switches to status.
Multipliers Lv.
Open this panel to load exact values.

Tune Break
Tune Break: Rectifier
When the target's Off-Tune Level is full, the Resonators may cast Tune Break on the target.

Inherent Skill I
Presence
Mid-air Heavy Attack can be cast 1 more time.

Inherent Skill II
Revelation
When in the status and status, Spectro DMG Bonus is increased by 12%.
Sequences
Sequence value

S1
Warm Light and Bedside Wishes
★★★★★
When in , Resonance Liberation Dawn of Enlightenment now increases DMG Multiplier by 480% instead of 255%.
When in , Resonance Liberation Dawn of Enlightenment increases DMG Multiplier by 90% and applies to the targets with the maximum stack the targets can receive.
Why it matters
Not Available

S2
A Boat Adrift in Tears
★★★★★
When in , DMG dealt by Outro Skills to targets with is Amplified by 120%.
When in , grants 120% more DMG Amplification for .
Why it matters
Not Available

S3
Daisy Wreaths and Dreams
★★★★★
When in , the DMG Multiplier of Heavy Attack Starflash is increased by 91%.
When in , the DMG Multiplier of Heavy Attack Starflash is increased by 249%.
Why it matters
Not Available

S4
Ringing Bells on Wings Aloft
★★★★★
When Basic Attack, Basic Attack , Dodge Counter, or : Dodge Counter hits, the target's Spectro RES is reduced by 10% for 30s.
Why it matters
Not Available

S5
Prayer to the Distant Light
★★★★★
Casting Intro Skill Golden Grace increases Phoebe's Spectro DMG Bonus by 12% for 15s.
Why it matters
Not Available

S6
Whispering Chirps in Silence
★★★★★
Targets entering the are stagnated for an additional 2s. The stagnation effect affects all targets entering the and can be applied to 12 targets max for each . Each target will only be affected by this effect once.
When in or , summoning a with Resonance Skill increases Phoebe's ATK by 10% for 20s, and triggers an extra Heavy Attack Starflash at the ' location. This Heavy Attack Starflash does not consume and is not considered as casting a Heavy Attack.
Why it matters
Not Available
Sequence damage comparison
Build
Build targets
Sub-stat priority
- 1Crit Rate
- 2Crit DMG
- 3ATK%
- 4
 Heavy Attack DMG Bonus
 - 5Energy Regen
Optimal Build Targets - DPS
ATK2050Cost 3 Spectro / SpectroATK2300Cost 3 ATK / SpectroCrit Rate80%Crit DMG290%Energy125%Heavy Attack DMG35%Optimal Build Targets - Sub-DPS
ATK1950Cost 3 Spectro / SpectroATK2200Cost 3 ATK / SpectroCrit Rate75%Crit DMG280%Energy130%Heavy Attack DMG20%Weapon comparison
Relative damage
For each weapon, Cost 4 Crit DMG is selected when the weapon provides Crit Rate, Cost 4 Crit Rate is selected when it provides Crit DMG, and Cost 4 Crit Rate is selected when it provides neither.
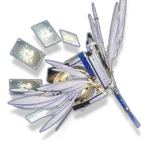
Luminous Hymn R5
ATK 500Crit Rate 36%
114.99%Cost 4 Crit DMG
No Comment
Weapon effect
Increase ATK by 24%. Dealing DMG to targets with Spectro Frazzle grants the wielder 28% Basic Attack DMG Bonus and 28% Heavy Attack DMG Bonus, stacking up to 3 times for 6s. Casting Outro Skill amplifies the Spectro Frazzle DMG on targets around the active Resonator by 60% for 30s. Effects of the same name cannot be stacked.
Luminous Hymn R1
ATK 500Crit Rate 36%
100%Cost 4 Crit DMG
Phoebe's signature weapon gives her the Heavy Attack DMG she needs and amplifies Spectro Frazzle for the team after her Outro. As a sub-DPS in Zani teams, this is a major buff for Zani.
Weapon effect
Increase ATK by 12%. Dealing DMG to targets with Spectro Frazzle grants the wielder 14% Basic Attack DMG Bonus and 14% Heavy Attack DMG Bonus, stacking up to 3 times for 6s. Casting Outro Skill amplifies the Spectro Frazzle DMG on targets around the active Resonator by 30% for 30s. Effects of the same name cannot be stacked.

Stringmaster R1
ATK 500Crit Rate 36%
95.24%Cost 4 Crit DMG
Very strong for main DPS Phoebe. If its uptime covered her full rotation, the result would be 99.5% instead of 95.24%. Its ATK buff does not last strongly enough across the whole rotation, and it provides nothing for Zani when Phoebe is used as a sub-DPS.
Weapon effect
Grant 12% Attribute DMG Bonus. When dealing Resonance Skill DMG, increases ATK by 12%, stacking up to 2 time(s). This effect lasts for 5s. When the equipped Resonator is not on the field, increases their ATK by an additional 12%.
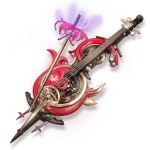
Lethean Elegy R1
ATK 587Crit Rate 24.3%
95.09%Cost 4 Crit DMG
A strong Crit Rate option even with Eternal Radiance's 20% Crit Rate. More Crit Rate improves hit consistency and lets Phoebe stack more Crit DMG through a Cost 4 Crit DMG Echo. Its Skill DMG is not essential, but using the Echo first lets Phoebe partially ignore the target's DEF.
Weapon effect
ATK is increased by 12%. Within 12s after dealing Echo Skill DMG, gain 32% Resonance Skill DMG Bonus and 32% Echo Skill DMG Amplification, and ignore 8% of the target's DEF when dealing damage.

Whispers of Sirens R1
ATK 500Crit DMG 72%
92.87%Cost 4 Crit Rate
Its first passive gives Basic Attack DMG, but Phoebe needs Heavy Attack DMG more. Pair it with a Cost 4 Crit Rate Echo.
Weapon effect
Increases ATK by 12%. Casting Echo Skill within 10s after casting Intro Skill or Basic Attacks grants 1 stack of Gentle Dream. Echoes with the same name can only trigger this effect once, stacking up to 2 times, lasting for 10s. When reaching 2 stacks, casting Echo Skill no longer resets the duration of this effect. This effect activates up to once per 10s. Switching to another Resonator ends this effect early. With 1 stack: Grants 40% Basic Attack DMG Bonus. With 2 stacks: Ignores 12% of the target's Havoc RES.

Rime-Draped Sprouts R1
ATK 500Crit DMG 72%
91.41%Cost 4 Crit Rate
This weapon performs similarly to Whispers of Sirens.
Weapon effect
Increases ATK by 12%. Using Resonance Skill gives the equipped Resonator 12% Basic Attack DMG Bonus for 6s, stacking up to 3 times. When casting Outro Skill with 3 stacks, consume all stacks to give 52% DMG Bonus to the off-field Basic Attacks performed by the equipped Resonator, lasting for 27s.
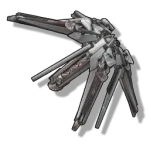
Augment R5
ATK 412Crit Rate 20.2%
86.44%Cost 4 Crit DMG
A usable option that gives a large ATK bonus after Phoebe casts Liberation.
Weapon effect
When Resonance Liberation is released, increases the caster's ATK by 48%, lasting for 15s.

Cosmic Ripples R1
ATK 500ATK 54%
84.30%Cost 4 Crit Rate
It has no Crit Rate or Crit DMG, so use a Cost 4 Crit Rate Echo. The ATK and Basic Attack effects work for Phoebe, but the weapons above are stronger main-DPS choices.
Weapon effect
Increases Energy Regen by 12.8%. When hitting a target with Basic Attacks, increases Basic Attack DMG Bonus by 3.2%, stacking up to 5 time(s). This effect lasts for 8s and can be triggered 1 time(s) every 0.5s.

Ocean's Gift R5
ATK 462ATK 18.2%
82.47%Cost 4 Crit Rate
The free event option. Its Spectro DMG Bonus works against enemies with Spectro Frazzle, but it is weaker overall than the options above.
Weapon effect
Dealing DMG to enemies with Spectro Frazzle increases the wielder's Spectro DMG by 10%, gaining 1 stack per second for 6s, stacking up to 4 times.
Augment R1
ATK 412Crit Rate 20.2%
76.37%Cost 4 Crit DMG
The same option as Augment R5, but with a smaller ATK buff.
Weapon effect
When Resonance Liberation is released, increases the caster's ATK by 15%, lasting for 15s.
Echoes
Main stats
Echoes 1
Eternal Radiance



Sonata effect
Eternal Radiance · 5 pieces
2 SetSpectro DMG +10%.
5 SetInflicting enemies with Spectro Frazzle increases Crit. Rate by 20% for 15s. Attacking enemies with 10 stacks of Spectro Frazzle grants 15% Spectro DMG Bonus for 15s.
Main Echo
Capitaneus
Summon a Capitaneus to jump up and smash enemies, dealing 118.80% Spectro DMG. This attack generates 4 extra Merciless Judgements, each dealing 59.40% Spectro DMG. The Resonator with this Echo equipped in their main slot gains 12.00% Spectro DMG Bonus and 12.00% Heavy Attack DMG Bonus.
Nightmare: Mourning Aix
Summon a Nightmare: Mourning Aix to attack surrounding enemies, dealing 273.60% Spectro DMG. DMG dealt to enemies inflicted by Spectro Frazzle is increased by 100.00%. The Resonator with this Echo equipped in their main slot gains 12.00% Spectro DMG Bonus.
Cost 3Spectro
Cost 4Crit DMG / Crit Rate
Cost 3Spectro
Cost 1ATK
Cost 1ATK
Echo stat comparisons

 4 DMG3 Spectro3 Spectro1 ATK1 ATK100%4 DMG3 Spectro3 ATK1 ATK1 ATK99.37%4 DMG3 ATK3 ATK1 ATK1 ATK95.87%
Teams
Current Team DPS teams
Teams are loaded from the current validated Team DPS projection. The DPS shown is the average across three rotations, and future Team DPS updates appear here automatically.
Current teams load only when this section is reached.
Calculations
Damage breakdown
100%
Basic Attack12.94%
Skill0.62%
Liberation12.29%
Heavy Attack52.62%
Echo3.07%
Intro1.71%
Outro16.17%
Spectro Frazzle0.59%
This breakdown is based on Phoebe's damage distribution when she is played solo without buffs from other characters.
Character synergies




Review
Phoebe review
Review updated:
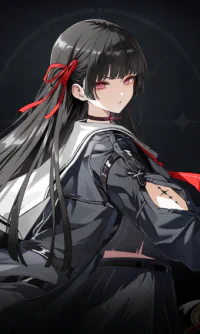
Phoebe is a 5-Star Spectro Rectifier who is really two characters sharing one kit, and you choose which one she is with a single button press each rotation. Her Forte Circuit, Radiant Invocation, spends her full Prayer gauge to enter one of two states that cannot exist at the same time: Absolution, which turns her into a Heavy Attack main DPS, and Confession, which turns her into the heaviest Spectro Frazzle applier in the game and a sub-DPS. The page's solo damage breakdown is for Absolution, and it is blunt about where her damage comes from: Heavy Attack 52.62%, Outro 16.17%, Basic Attack 12.94%, Liberation 12.29%, Echo 3.07%, Intro 1.71%, Skill 0.62%, Spectro Frazzle 0.59%. She is a Heavy Attack carry, not a Basic Attack carry. In her tested sub-DPS teams she personally deals roughly 8.87% to 14.45% of the team's damage, so do not judge Confession Phoebe by her own numbers. Her job there is to feed Zani.
The live Team DPS section is the authority for Phoebe's current tested compositions, ordering, DPS values, and rotations. It updates from the validated Team DPS projection instead of freezing those values in this review.
Quick Verdict
Pull Phoebe if you own Zani, if you plan to pull Zani, or if you simply like her. That is the honest short answer. Zani's kit is written to eat Spectro Frazzle stacks, and Phoebe in Confession produces more of them than anyone, along with a buff that lands directly on Zani's biggest hits. Outside that core her value drops sharply, because every buff she gives is tied to Spectro Frazzle: if nobody in your team cares about Frazzle, she is just a Spectro damage dealer.
There is one fact worth stating once and then moving past: her tested teams currently sit in the lower half of the validated projection. She is not a pull that raises your account's ceiling. She is a pull for Zani owners and for people who want to play her, and inside that lane nothing tested replaces her.
At S0 she is complete. Both states, the full Prayer and Divine Voice loop, the Ring of Mirrors, and her whole rotation work with no sequences at all. For low spenders, S0 is enough. S2 is her first real stopping point, and it is the node that changes what she gives Zani. S6 is the whale ceiling at 228% on the page's sequence chart.
How Phoebe Works
Everything in Phoebe's kit runs on two gauges, and understanding them is most of understanding her.
Prayer is the entry ticket. She holds up to 120 Prayer and gains 5 every second, so a full gauge takes 24 seconds. When Prayer is full she can spend all of it to cast one of her two Forte skills. That means one Forte cast per rotation, with no way to rush it, and it lines up with her tested team rotations, which run roughly 23 to 30 seconds.
The two Forte casts are the fork in the road, and both apply 1 stack of Spectro Frazzle and restore 60 Divine Voice:
- Hold Basic Attack casts Heavy Attack: Absolution Litany and puts her in Absolution. This is the damage state.
- Hold Resonance Skill casts Resonance Skill: Utter Confession and puts her in Confession. This is the Spectro Frazzle state.
The two cannot coexist. Entering one ends the other.
Divine Voice is the ammunition. She holds up to 60, and her signature damage move, Heavy Attack: Starflash, costs 30. Absolution reduces that cost by 15, so a Starflash costs 15 in Absolution and the full 30 in Confession. That is the most important piece of math in her kit:
- In Absolution: 60 ÷ 15 = 4 Starflash casts per rotation.
- In Confession: 60 ÷ 30 = 2 Starflash casts per rotation.
Every tested rotation matches that math exactly, and it explains the whole trade. Absolution buys personal damage with four Starflashes. Confession spends half of them and sells the difference to the team.
Starflash is not a button she can press whenever she likes. It only appears when she has Divine Voice and has just cast Basic Attack Stage 3 or a Dodge Counter, which replaces her next Heavy Attack with Starflash. That is the failure point to watch for: if you press Heavy without landing a Basic 3 or a Dodge Counter first, you get an ordinary Heavy Attack and you have wasted the window. It is also why her rotations look like "Basic 1, 2, 3, Heavy" repeated.
Two more rules govern the states. She cannot cast either Forte skill while she still has Divine Voice, so she has to spend all of it before she can switch states. And once Divine Voice runs out, she does not leave the state, so the Absolution or Confession bonus on her Liberation and Outro still applies after her Starflashes are gone. That is why the rotations end with Liberation and Outro rather than starting with them.
What each state actually changes:
- Heavy Attack: Starflash. In Absolution it costs 15 Divine Voice and gains 256% DMG Amplification if the target already has Spectro Frazzle. In Confession it costs 30 and applies 5 stacks of Spectro Frazzle.
- Resonance Liberation. In Absolution it gains +255% DMG Multiplier. In Confession it applies 8 stacks of Spectro Frazzle.
- Outro Skill. In Absolution it gains +255% DMG Multiplier on top of its 528.41% ATK base. In Confession it grants Silent Prayer.
Notice the condition on the Absolution Starflash: the target must already have Spectro Frazzle for the 256% amplification to fire. Absolution Phoebe applies only 1 stack all rotation, from the Litany itself, so she cannot supply that condition herself. Absolution Phoebe needs a separate Frazzle applier in the team. The page's own calculations say this out loud by assuming the enemy carries 10 Spectro Frazzle stacks. Confession Phoebe is the opposite: she is the applier.
Confession Frazzle math per rotation: 1 stack from Utter Confession, 5 from each of her two Starflashes, and 8 from her Liberation. That is 19 stacks in a single rotation.
Silent Prayer is the Confession Outro effect, and it needs reading slowly because the delivery chain matters. Her Outro grants Silent Prayer to the Resonator on the field, which means the character she swaps into, not the whole team. That character gets 100% Spectro Frazzle DMG Amplification, nearby targets get 10% Spectro RES reduction, and when Spectro Frazzle inflicts damage its damage interval is extended by 50%. Unlike almost every other Outro buff in the game, the kit gives it no "until switched out" clause: it lasts 30 seconds, or until Phoebe enters Absolution. So trace who receives it. In her tested Zani rotations she swaps directly into Zani, which is exactly where you want it.
The Ring of Mirrors is her utility layer and her Basic Attack engine. Her Resonance Skill summons the Ring at the target location, stagnates whatever it hits for 2 seconds (up to 12 targets), and lasts 30 seconds. Pressing the Skill again shortly after teleports her to the Ring. From there:
- Standing outside the Ring: a Basic Attack or Dodge Counter that hits the Ring refracts Holy Light into everything inside it and pulls those targets to the center, once every 0.5 seconds. That damage counts as Basic Attack damage.
- Standing inside the Ring: her Basic Attack becomes Chamuel's Star, a 3-hit string that also counts as Basic Attack damage, and her Dodge Counter becomes Chamuel's Star: Dodge Counter.
In practice the Ring is a grouping tool first and a damage router second, and it is genuinely good at crowd control in a way her damage numbers never show.
Two passives round her out. Revelation (Inherent Skill II) gives her +12% Spectro DMG Bonus while she is in either state, so it is always on during her rotation. Presence (Inherent Skill I) gives her an extra Mid-air Heavy Attack, which is exploration comfort.
Absolution main DPS route, about 13.77 seconds of field time:
Intro > Skill > Hold Basic (Absolution Litany) > Skill > Liberation > Echo > Basic 1, 2, 3 > Heavy Attack: Starflash > Basic 1, 2, 3 > Heavy Attack: Starflash > Basic 1, 2, 3 > Heavy Attack: Starflash > Basic 1, 2, 3 > Heavy Attack: Starflash > Outro
Confession sub-DPS route with Shorekeeper, split into two visits, about 8.24 seconds total. First visit:
Skill > Hold Skill (Utter Confession) > Basic 1, 2, 3 > Heavy Attack: Starflash > Basic 1, 2, 3 > Heavy Attack: Starflash > swap to Shorekeeper
Second visit:
Intro > Liberation > Outro
Confession sub-DPS route without a mid-rotation support, one continuous visit, about 8.24 seconds:
Intro > Skill > Hold Skill (Utter Confession) > Skill > Liberation > Basic 1, 2, 3 > Heavy Attack: Starflash > Basic 1, 2, 3 > Heavy Attack: Starflash > Echo > Outro
Her rotation is not one fixed string across every team, but the shape never changes: summon the Ring, enter a state, then Basic-to-Starflash loops, with Liberation and the Outro closing it out. What varies is whether a support like Shorekeeper takes the middle of the rotation and splits her into two visits, whether she spends a second Skill press to teleport into the Ring, whether she holds her Intro for that second visit, and how many Starflashes the state allows. Learn the loop once and every version follows.
One last thing about her Outro that surprises people: it is a slow, drawn-out attack whose hits keep landing after she has already left the field. In the tested main DPS team, the Outro cast at the end of one rotation is still resolving well into the next one. Cast it and let it finish. Do not expect it to land the moment you press the button.
Build Priorities
- Sub-stat priority: Crit Rate, Crit DMG, ATK%, Heavy Attack DMG Bonus, Energy Regen.
- Build targets, main DPS: ATK 2,050 with a Spectro/Spectro Cost 3 setup (or 2,300 with ATK/Spectro), Crit Rate 80%, Crit DMG 290%, Energy Regen 125%, Heavy Attack DMG 35%.
- Build targets, sub-DPS: ATK 1,950 with Spectro/Spectro (or 2,200 with ATK/Spectro), Crit Rate 75%, Crit DMG 280%, Energy Regen 130%, Heavy Attack DMG 20%.
- Talent priority: Resonance Skill Lv. 10, Forte Circuit Lv. 10, Resonance Liberation Lv. 10, Normal Attack Lv. 6, Intro Skill Lv. 6. Notice that Heavy Attack: Starflash lives inside the Forte Circuit talent, not the Normal Attack talent, so Forte Circuit at 10 is what levels up her single biggest damage source (52.62%). Normal Attack at 6 is correct even though her Basic Attacks are 12.94% of her damage.
Three of those numbers are worth explaining rather than memorising:
- Crit Rate 80% for the main DPS build is not arbitrary. Her Echo set, Eternal Radiance, grants 20% Crit Rate for 15 seconds whenever she inflicts Spectro Frazzle. 80% plus 20% is 100%, so the target exists to hit the cap with the set effect running.
- Energy Regen is higher on the sub-DPS build (130%) than on the main DPS build (125%), which looks backwards until you count field time. As a main DPS she is on field for about 13.77 seconds and lands four Starflashes plus four Basic strings. As a sub-DPS she gets roughly 8 to 9 seconds and half the Starflashes, so she generates less energy and needs more Energy Regen to have her Liberation ready every single rotation. Her Liberation is what applies 8 Spectro Frazzle stacks, so missing it is not an option.
- Heavy Attack DMG drops from 35% to 20% on the sub-DPS build for the same reason the Divine Voice math gave us: Absolution casts four Starflashes, Confession casts two. Half the Heavy Attack casts means Heavy Attack DMG Bonus is worth roughly half as much, so the stat gets pushed down the priority list.
Her best weapon is Luminous Hymn, her signature Rectifier, and the page uses Luminous Hymn R1 as the 100% baseline. Both halves of it are written for her: dealing damage to targets with Spectro Frazzle grants 14% Basic Attack DMG Bonus and 14% Heavy Attack DMG Bonus, stacking 3 times, which feeds her Heavy Attack profile directly; and casting Outro Skill amplifies the Spectro Frazzle DMG on targets around the active Resonator by 30% for 30 seconds, which is a team buff that sits on the enemy rather than on a character, so it covers Zani's entire window no matter who Phoebe swaps into.
The tested alternatives at R1: Stringmaster 95.24%, Lethean Elegy 95.09%, Whispers of Sirens 92.87%, Rime-Draped Sprouts 91.41%, Cosmic Ripples 84.30%, Augment 76.37%. Ocean's Gift is the free event option, and its Spectro DMG Bonus against Frazzled enemies works, but it sits behind everything above it.
She is a main DPS in one of her two roles, so the standing recommendation is her signature. The alternatives are a backup plan, not the goal. The one nuance worth knowing is that Stringmaster is unusually close for an Absolution main DPS Phoebe: the page notes that if its buff uptime covered her full rotation it would reach 99.5% instead of 95.24%, and the shortfall is uptime, not fit. But Stringmaster gives Zani nothing, so the moment you play Phoebe as a Confession sub-DPS, the gap between the two is much larger than the comparison chart suggests. If Stringmaster is already on your account and Phoebe is purely your main DPS, you are fine. If she is going next to Zani, Luminous Hymn is the pick.
Pair each weapon with the right Cost 4: Crit DMG when the weapon gives Crit Rate, Crit Rate when it gives Crit DMG or neither.
Her set is Eternal Radiance, 5 pieces. The 2-piece is 10% Spectro DMG. The 5-piece grants 20% Crit Rate for 15 seconds on inflicting Spectro Frazzle, plus 15% Spectro DMG Bonus for 15 seconds when attacking enemies carrying 10 stacks of Spectro Frazzle. That second condition is another reminder that Absolution Phoebe needs a Frazzle supplier next to her.
For the main Echo, Capitaneus leads: it deals 118.80% Spectro DMG plus four Merciless Judgements at 59.40% each, and in the main slot it grants 12% Spectro DMG Bonus and 12% Heavy Attack DMG Bonus. That Heavy Attack line is exactly why it is first for a character who takes 52.62% of her damage from Heavy Attacks. Nightmare: Mourning Aix is the alternative, with a bigger single hit at 273.60% and 100% increased damage to Frazzle-inflicted enemies, but only 12% Spectro DMG Bonus in the main slot.
Main stats: Cost 4 Crit DMG or Crit Rate, Spectro on both Cost 3, ATK on both Cost 1. The page's comparison puts 1 Cost 4 Crit DMG with 2 Cost 3 Spectro at 100%, the mixed 1 Spectro plus 1 ATK Cost 3 at 99.37%, and 2 Cost 3 ATK at 95.87%. Read those with their context: the page's calculations are run with no team buffs at all, so nothing is saturating her ATK. That is why the mixed setup lands within 0.63% of the winner. Put her in a real team with ATK from Shorekeeper or Chisa and the ATK becomes the plentiful stat while Spectro damage becomes the scarce one, which pushes double Spectro further ahead. With a gap that small in the neutral case, sub-stat quality decides it: take the mixed setup if those pieces are clearly better rolled.
The set changes when the role changes. This is the one build fact the Build section on the page does not show, and it matters. In every tested Zani team, Phoebe wears Moonlit Clouds, not Eternal Radiance. She only wears Eternal Radiance in her own main DPS team.
The reason is the Moonlit Clouds 5-piece: casting an Outro Skill increases the next Resonator's ATK by 22.5% for 15 seconds. Phoebe's Confession rotation ends on her Outro and swaps directly into Zani, who then spends her entire burst on the field. An Outro-rider set like this is only worth wearing next to an on-field carry, and that is exactly the situation. The 2-piece, 10% Energy Regen, also helps her reach the higher 130% sub-DPS energy target. What she gives up is Eternal Radiance's 20% Crit Rate for herself, which is the correct trade for a character who is 8.87% to 14.45% of the team's damage and whose real output is what she hands to somebody else.
Team Fit & Account Value
Her number 1 team is Zani, Phoebe and Shorekeeper. Every other tested composition is an alternative to that one.
Zani's Forte Circuit is the reason. Heliacal Ember reads: when Zani is in the team and a nearby Resonator inflicts Spectro Frazzle on a target, she immediately consumes all of those Spectro Frazzle stacks, triggers their damage, and converts each one into a Heliacal Ember. Every converted stack grants Zani 5 Blaze, and Blaze is what powers her Heavy Slash attacks. Her Outro then removes all Heliacal Ember stacks from the target, with each stack increasing that Outro's damage by 10%. So Phoebe's 19 Frazzle stacks per rotation are not a status effect she is applying to an enemy. They are fuel she is pouring into Zani.
That instant conversion also answers a question the kit raises: why does Phoebe run Confession here instead of her damage state? Because with Zani in the team, Spectro Frazzle never sits on the enemy long enough to be a condition. Absolution's 256% Starflash amplification requires the target to have Spectro Frazzle, and Zani eats it the moment it lands. The same condition sits on Luminous Hymn's stacking Basic and Heavy Attack bonus, which is why the weapon's Outro line is the part that carries in a Zani team. Confession is not a compromise in that team. It is the only correct choice.
The second half of what she gives Zani is Silent Prayer. Zani's Heavy Slashes are counted as both Heavy Attack damage and Spectro Frazzle damage, and her Outro damage is also counted as Spectro Frazzle damage. That means Silent Prayer's 100% Spectro Frazzle DMG Amplification lands on Zani's actual attacks, not just on the status ticks. This is worth being precise about: a buff to Spectro Frazzle damage normally only touches the automatic damage the status itself deals, but Zani's hits are tagged as Frazzle damage, so she collects the whole thing. That is the single cleanest synergy in Phoebe's kit, and it only works because the tested rotation swaps her directly into Zani.
Shorekeeper is the tested support: healing, plus a modest team-wide Crit Rate and Crit DMG contribution through her Stellarealms, and a rotation short enough to sit between Phoebe's two visits.
Chisa is the tested alternative to Shorekeeper, and she brings something specific to a Frazzle team. Her Outro grants Resonant Thread of Closure to all nearby Resonators in the team for 20 seconds, which is a real team-wide buff rather than an Outro rider. While it is active, an attack that hits raises the maximum stacks of Negative Status the target can receive by 3, and inflicting a Negative Status or dealing Negative Status damage grants Thread of Bane. Spectro Frazzle is a Negative Status, so Chisa raises the ceiling Phoebe is filling. There is a build consequence in that team worth knowing: without Shorekeeper's crit contribution, Zani switches to a Cost 4 Crit Rate Echo to reach roughly 95.5% Crit Rate counting Eternal Radiance's 20%. A teammate swap changed a different character's build, which is exactly the kind of detail that only shows up when you compare the teams side by side.
Iuno is tested in the third structure, and this one is a good lesson in reading Outro buffs carefully. Iuno's Outro grants the incoming Resonator 50% Heavy Attack DMG Amplification for 14 seconds, and it ends early if that character swaps out. Phoebe is a Heavy Attack carry, so on paper that looks made for her. In the tested rotation it is not: the order runs Phoebe, then Iuno, then Zani, so Iuno's Outro lands on Zani, whose Heavy Slashes are Heavy Attack damage too. Phoebe's damage share is at its lowest of any tested team here. The same reading applies to Mortefi (38% Heavy Attack DMG Deepen to the next character) and Rebecca (Edgerunner Bonds, 15% all-damage amplification plus up to 35% Heavy Attack DMG Amplification to the incoming Resonator): both are excellent for an Absolution main DPS Phoebe, but only if the rotation actually swaps into her, and both end when she swaps out.
The alternative for her slot. The tested competitor for the Spectro Frazzle role next to Zani is Rover Spectro, who is free and works at S6. The comparison is not close on kit numbers. Rover Spectro applies 2 stacks per Resonating Spin and 6 stacks from the Liberation. Phoebe in Confession applies 19 stacks in a rotation, and adds Silent Prayer and Luminous Hymn's target-side Frazzle amplification on top. What she costs is field time: about 8 to 9 seconds against Rover Spectro's 4.66 seconds, which is time Zani does not get.
The practical reading is straightforward. Rover Spectro makes the Zani team work. Phoebe makes it work properly. If you own Zani and clear your content comfortably with Rover Spectro, Phoebe is an upgrade rather than a requirement. Ciaccona also inflicts 1 Frazzle stack with her Yellow Tonic, but that is incidental to her Aero kit, not a role.
For the live tested compositions, ordering, DPS values, equipment, and rotations behind everything named here, use the live Team DPS section. Those cards update from the validated projection.
Her honest limits, stated plainly:
- Her buffs are Spectro Frazzle specific. Silent Prayer, her Confession Liberation, her Confession Starflash, and her signature weapon's Outro line all speak the same language. A team with no interest in Spectro Frazzle receives almost nothing from her.
- Her two states solve each other's problem, and she can only be in one. Absolution needs a Frazzle supplier; Confession is the best Frazzle supplier in the game. She cannot be both, so a main DPS Phoebe always needs a second Spectro Frazzle source in the team.
- She needs 8 to 9 seconds of field time even in her support role, which is a lot for a character contributing around a tenth of the team's damage. That time is the price Zani pays for the fuel.
- Her tested partner list is narrow. Zani, Shorekeeper, Chisa, Iuno, and Rover Spectro is the whole picture right now.
Opportunity cost is worth a thought too. Shorekeeper and Chisa are wanted by a long list of other teams, so check who else on your account needs them before committing them to a Frazzle core.
Sequence Value
Phoebe is complete at S0. Both states, both gauges, the Ring of Mirrors, and her full rotation work with no sequences. The page's sequence damage chart: S0 100% → S1 107% → S2 127% → S3 167% → S4 186% → S5 194% → S6 228%.
Read that chart with one caveat in mind: it is calculated with Phoebe in Absolution as the main DPS, with 10 Spectro Frazzle stacks assumed on the enemy and no team buffs. It measures her personal damage, so any node whose value goes to Zani is invisible on it.
- S1 — Warm Light and Bedside Wishes (4/5): In Absolution, her Liberation multiplier goes from +255% to +480%. In Confession, the Liberation gains +90% multiplier and applies Spectro Frazzle to the maximum number of stacks the target can receive instead of a fixed 8. That second half is the more interesting one for a Frazzle team, because it scales with anything that raises the stack cap, such as Chisa's Resonant Thread of Closure. The chart only moves 7 points because it cannot see any of that.
- S2 — A Boat Adrift in Tears (5/5): Her first real stopping point, and her most important node. In Absolution, Outro damage to Frazzled targets is amplified by 120%, and her Outro is her second-biggest damage source at 16.17%, which is the whole 107% to 127% jump. In Confession, Silent Prayer grants 120% more Spectro Frazzle DMG Amplification, and it is worth being exact about what that multiplies: Silent Prayer's base is 100% Spectro Frazzle DMG Amplification, so S2 takes it to 220%. That is a huge increase to Zani's tagged Heavy Slash and Outro damage, and the chart does not measure a single point of it. This is why the node is rated 5 stars while showing a smaller chart jump than S3.
- S3 — Daisy Wreaths and Dreams (4/5): The biggest single jump on the chart, 127% to 167%. Heavy Attack: Starflash gains +91% multiplier in Absolution and +249% in Confession. Pure damage, and it lands on the move that is already half her output. If you are building an Absolution main DPS Phoebe, this is the node that pays most.
- S4 — Ringing Bells on Wings Aloft (4/5): Basic Attack, Chamuel's Star, Dodge Counter, and Chamuel's Star: Dodge Counter hits reduce the target's Spectro RES by 10% for 30 seconds. This one sits on the enemy, so the whole Spectro team collects it, and her normal rotation already triggers it without changing anything.
- S5 — Prayer to the Distant Light (3/5): Casting her Intro grants her +12% Spectro DMG Bonus for 15 seconds. Personal only, and the smallest step on the chart at 186% to 194%. Her lowest rated node, correctly.
- S6 — Whispering Chirps in Silence (5/5): Her whale ceiling, 228% on the chart. Two things happen. Targets entering the Ring of Mirrors are stagnated for an extra 2 seconds, up to 12 targets, which is a genuine crowd-control upgrade. And summoning a Ring of Mirrors while she is already in Absolution or Confession grants +10% ATK for 20 seconds and fires an extra Heavy Attack: Starflash at the Ring's location, one that costs no Divine Voice and does not count as casting a Heavy Attack. Read that condition carefully, because it changes how you play the rotation: the tested S0 routes summon the Ring before she casts her Forte skill, so an S6 Phoebe wants a Ring summon placed after she has entered the state in order to collect it. Every qualifying summon is one extra Starflash on top of her four in Absolution or two in Confession.
For most players, S0 is where you stop. S2 is the efficient vertical investment, and it is the one node that changes what she gives her team rather than just what she deals. S3 is next if she is your main DPS. Past that is dedicated-Phoebe territory.
Pull Value
Pull Phoebe if:
- You own Zani, or you plan to pull her. Zani's kit consumes Spectro Frazzle, Phoebe produces more of it than anyone, and Silent Prayer lands directly on Zani's tagged damage.
- You like Phoebe and want a Heavy Attack Spectro carry with a rotation that is structured but easy to read.
- You want a character who can change role on one button press, from main DPS in Absolution to Frazzle battery in Confession, as your account grows around her.
- You can get Luminous Hymn, which is both her best personal weapon and a genuine team buff in Zani teams.
- You enjoy the Ring of Mirrors playstyle: grouping enemies, pulling them into the center, and teleporting through the fight.
Skip or delay Phoebe if:
- You do not own Zani and have no plans to pull her. Outside the Spectro Frazzle core, most of Phoebe's kit is talking to nobody.
- You already clear your content with Rover Spectro next to Zani. He does the job for free, and Phoebe is an upgrade to that team rather than a requirement.
- You want a support who fits into any team. Every buff she has is Spectro Frazzle specific, so she will not do that.
- Your account needs coverage in elements or roles you are missing more than it needs another Spectro damage dealer.
- You are picking between her and a character who would raise your account's ceiling. She is a specialist upgrade to one team rather than a jump in your overall power, and that is a fair reason to wait.
Materials
Exact totals come from the canonical material data.
Character materials





Important skills

Max character and skills
Videos
Related videos
Videos load only when this section is reached.