 HP
10775
HP
10775
Character guide · Havoc Bane Support
Chisa
Havoc Broadblade guide - Best weapons, Echoes, stats, teams, and damage notes.
Chisa is a 5-star Havoc Broadblade support in Wuthering Waves. This guide preserves her talents, sequences, tested weapon ranking, Echo setup, build targets, teams, and damage breakdown.
 Element: Havoc
 Weapon: Broadblade
Rarity: 5★
Version: 2.8
Weapon: Broadblade
Rarity: 5★
Version: 2.8

Overview
Base stats
HP
10775
 ATK
437
ATK
437
 DEF
1137
DEF
1137
 Max Energy
100
Max Energy
100
 Crit Rate
5%
Crit Rate
5%
 Crit DMG
150%
Crit DMG
150%
 Healing Bonus
0%
Healing Bonus
0%
 Havoc DMG Bonus
0%
Havoc DMG Bonus
0%
 Tune Break Boost
0
Tune Break Boost
0
 Off-Tune Buildup Rate
100%
Off-Tune Buildup Rate
100%
Talents
Talent descriptions & multipliers
Talent priority
 Normal Attack
Recommended levelLv. 10
Normal Attack
Recommended levelLv. 10
 Resonance Skill
Recommended levelLv. 6
Resonance Skill
Recommended levelLv. 6
 Forte Circuit
Recommended levelLv. 10
Forte Circuit
Recommended levelLv. 10
 Resonance Liberation
Recommended levelLv. 10
Resonance Liberation
Recommended levelLv. 10
 Intro Skill
Recommended levelLv. 6
Intro Skill
Recommended levelLv. 6
Normal Attack
Reign of Silence
Basic Attack
Perform up to 2 consecutive attacks, dealing Havoc DMG.
Press Normal Attack shortly after casting Basic Attack Stage 2 to cast .
Rending Lunge
Deal Havoc DMG.
Press Normal Attack shortly after casting this skill on the ground to cast .
Use Normal Attack shortly after casting this skill in mid-air to cast .
Death Snip
Open the scissors, dealing Havoc DMG. After a while, the scissors snip, dealing Havoc DMG and restoring HP for all nearby Resonators in the team.
Use Normal Attack during this skill to deal additional Havoc DMG. Use Normal Attack again to immediately snip the target.
The skill DMG is considered Resonance Liberation DMG.
Press Normal Attack shortly after casting to cast .
Thread Withdrawn
Deal Havoc DMG.
Can trigger successful Dodges within a certain time after being cast.
Heavy Attack
Leap into the air and consume STA to attack the target, dealing Havoc DMG.
This skill cannot be cast while in .
Perform the following actions within a certain time after casting this skill to cast :
Press Normal Attack;
Cast and press Normal Attack before landing.
Hold Normal Attack before landing after casting Heavy Attack to cast .
Mid-air Attack
Consume STA to perform Plunging Attack, dealing Havoc DMG.
While not in , press Normal Attack within a certain time after casting Mid-air Attack to cast Basic Attack Stage 2.
Heavy Attack - Severed Facet
Deal Havoc DMG.
Use Normal Attack within a certain time after casting to cast .
If interrupted, can be cast again by holding Normal Attack before landing. This effect can be triggered once only before landing.
Hanging Finality
Consume STA to perform Plunging Attack, dealing Havoc DMG.
Press Normal Attack shortly after casting this skill on the ground to cast .
Dodge Counter
Press Normal Attack right after a successful Dodge to attack the target, dealing Havoc DMG.
Press Normal Attack shortly after casting this skill to cast .
Dodge Counter - Eye of Unraveling: Retraction
Hold Dodge after a successful Dodge on the ground to cast Dodge Counter - to attack and Stagnate the target, dealing Havoc DMG.
While not in , after casting this skill, Press Normal Attack on the ground or use Normal Attack in mid-air to cast . This effect is removed when Chisa enters .
While in , press Normal Attack shortly after casting this skill to cast Stage 3.
Multipliers Lv.
Open this panel to load exact values.
Resonance Skill
Fractured Composition
Eye of Unraveling
Stagnate and deal Havoc DMG.
While not in , after casting this skill, press Normal Attack on the ground or use Normal Attack in mid-air to cast . This effect is removed when Chisa enters .
While in and on the ground, press Normal Attack shortly after casting this skill to cast Stage 2.
Can be cast in mid-air.
Serrated Loop
While on the ground and is full, Resonance Skill is replaced with . Stagnate targets, and deal Havoc DMG and pull in nearby targets.
Casting this skill sends Chisa into and replaces Resonance Skill with .
Press Normal Attack shortly after casting this skill to cast Stage 2.
Hold Resonance Skill while casting this skill to continuously attack and pull in nearby targets. Release the Resonance Skill button in the duration or keep holding it for a certain period of time to cast Stage 1.
Multipliers Lv.
Open this panel to load exact values.
Forte Circuit
Sight of Unraveling - Oblivion
Unseen Snare
Chisa inflicts on the target for 30s in the following 4 ways:
Hitting a target with Resonance Skill.
Hitting a target within a certain period of time after casting .
Hitting a target with Dodge Counter - .
Locking on to a target.
When targets marked by take direct damage from Resonators, Chisa inflicts 1 stack of Havoc Bane on them. This effect can be triggered up to once every 2s.
Thread of Bane
When dealing damage to targets affected by , ignore 18% of their DEF.
Chainsaw Mode
While in , Chisa unlocks , , .
and consume on hit.
Sawring - Blitz
chains up to 3 consecutive attacks, dealing Havoc DMG.
Press Normal Attack to start the combo from Stage 1. Hold Normal Attack to start from Stage 2.
Hold Normal Attack while casting Stage 2 to continuously attack the target. Stage 2 is automatically followed by Stage 3.
While casting Stage 2, release the Normal Attack button or Dodge without directional input to automatically cast Stage 2: , dealing Havoc DMG. Shortly after casting Stage 2: , successful Dodges can be triggered.
Press Normal Attack shortly after casting Stage 2: to cast Stage 3.
While casting Stage 3, hold Normal Attack to continuously attack the target. Stage 3 is automatically followed by .
Release Normal Attack during Stage 3 to automatically cast Stage 3: , dealing Havoc DMG.
DMG is considered Resonance Liberation DMG.
Chainsaw Mode - Dodge Counter
While in , press Normal Attack following a successful Dodge to cast , dealing Havoc DMG.
Press Normal Attack following to cast Stage 3. Hold Normal Attack while casting to sustain the attack. When ends, cast Stage 3 automatically.
Release the Normal Attack button or Dodge without directional input while casting to cast Stage 2: automatically.
deals Resonance Liberation DMG.
Sawring - Eradication
While in , Chisa casts in the following 2 ways:
Press Normal Attack after casting Stage 3: .
Press Normal Attack after consuming all with or .
Attacking targets with deals Havoc DMG and grants Shields to all nearby Resonators in the team for 30s.
The skill DMG is considered Resonance Liberation DMG.
Every 1 point of consumed by and increases the DMG Multiplier of the next . Up to 100 points will be counted toward this effect.
Casting this skill consumes all and ends .
Chainsaw Fever
While in , is replaced with . is at 100% by default.
When Chisa goes on for a period without dealing any damage, will rapidly deplete. Once it reaches 0, Chisa enters the and exits .
While in , Chisa resets when dealing damage or when casting Resonance Liberation Moment of Nihility, Intro Skill Reverberance - Return and Stage 3: .
While in the , will rapidly deplete. Once it reaches 0, Chisa exits the .
When in , Chisa exits the state upon dealing damage, or casting Resonance Liberation Moment of Nihility and Intro Skill Reverberance - Return.
Lifethread - Glide
When Chisa is not in and has more than 10 points of , she can consume 50 points of to cast in the following 5 ways:
Press Dodge in mid-air before landing after casting Heavy Attack.
While in mid-air, press Dodge before landing after casting Resonance Skill or .
Dodge forward shortly after casting .
Press Dodge before landing when launched into mid-air.
Press Dodge before landing after casting .
Casting this skill can pull in nearby enemies marked by .
During the skill, hold Dodge to glide a short distance on the weapon.
Can trigger successful Dodges within a certain time after casting this skill.
Ring of Chainsaw
Chisa can hold up to 100 points of .
Hitting a target with Normal Attack and Resonance Skill grants .
Casting Resonance Liberation Moment of Nihility grants 40 points of .
Casting Intro Skill Reverberance - Return grants 20 points of .
Lifethread - Jetstream
Chisa can hold up to 100 points of .
Chisa continuously obtains over time.
Chisa obtains 100 points of upon defeating a target.
Exiting resets to the max limit.
Chisa cannot obtain passively for a short period of time after casting .
Multipliers Lv.
Open this panel to load exact values.
Resonance Liberation
Moment of Nihility
Deal Havoc DMG and recover HP for all nearby Resonators in the team.
Casting this skill sends Chisa into for 15s.
While not in , press Normal Attack shortly after casting this skill to cast Basic Attack Stage 2.
Can be cast in mid-air close to the ground.
Woven Myriad - Convergence
The DMG Multipliers of , , and are increased by 120%.
The bonus DMG Multiplier for granted by Sawring- Blitz and when is consumed additionally increases by 120%.
Casting ends .
Multipliers Lv.
Open this panel to load exact values.
Intro Skill
Reverberance - Return
Attack the target, dealing Havoc DMG.
While not in , press Normal Attack shortly after casting this skill to cast Basic Attack Stage 2.
While in , use Normal Attack shortly after casting this skill to cast Stage 2.
Multipliers Lv.
Open this panel to load exact values.

Outro Skill
Unraveling - Law Zero
Grant Resonant Thread of Closure to all nearby Resonators in the team for 20s.
While in Resonant Thread of Closure:
When an attack hits, increase the max stacks of Negative Status and Electro Rage the target can receive by 3 for 15s. Unstackable.
Inflicting Negative Status or dealing Negative Status DMG grants for 15s.

Tune Break
Tune Break: Broadblade
When the target's is full, the Resonators may cast Tune Break on the target.

Inherent Skill I
Inescapable Fate
When a Resonator in the team defeats a target marked by , the Cooldown of Chisa's Resonance Skill is reset, triggered up to once every 3s.

Inherent Skill II
All Ends Here
Casting Intro Skill Reverberance - Return or Resonance Liberation Moment of Nihility grants 20% Havoc DMG Bonus and 20% Healing Bonus for 12s.
When Resonators in the team with defeat a target marked by , Chisa gains Sight of Unraveling, lasting 3s.
While in Sight of Unraveling, Chisa inflicts that lasts for 30s on the targets damaged by Resonators in the team with .
Sequences
Sequence value

S1
Wandering Through the Desolate Corridors
★★★★★
Chisa is immune to interruption during , , and
Inflicting grants the following additional effects:
- Chisa's ATK is increased by 30% for 15s.
- Deal fixed 61803 points of Havoc DMG. The target's HP can be reduced to 61.80% at most and each target can take this damage only once. This instance of damage is considered Basic Attack DMG that does not bear any effect from damage bonuses.
Why it matters
This sequence makes Chisa immune to all incoming hits. The , which is the mark she applies to enemies when using her skills or by locking onto a target, will now grant her 30% ATK for 15 seconds. She will deal 61,803 damage when applying this mark once per enemy. This damage is considered Basic Attack DMG and cannot be increased by any kind of buff.

S2
Into the Web of Endless Bonds
★★★★★
Ignore 10% of the target's Havoc RES when dealing damage.
Nearby Resonators in the team with gain 50% All-Attribute DMG Bonus.
Why it matters
She will now ignore 10% of the target’s Havoc Resistance. When she applies the mark and uses her Outro Skill, she will grant the team a 50% Attribute DMG Bonus.

S3
Across the Confusion of the Long Night
★★★★★
The DMG Multipliers of , and are increased by 120%. This effect is mutually stackable with that of .
The bonus DMG Multiplier for granted by Sawring- Blitz and when is consumed is increased by 120%. This effect is mutually stackable with that of .
The Vibration Strength Reduction Rate of , and is increased by 50%.
Why it matters
The DMG multipliers for her Forte state attacks increase by 120%. The final hit she performs at the end of her Forte state also has its DMG multiplier increased by 120%. She will be able to break boss shields faster.

S4
Severing the Endless Cycle of Tragic Fate
★★★★★
The effect of becomes:
When targets marked by take direct damage from Resonators, Chisa inflicts 1 stack of Havoc Bane on them. This effect is triggered up to once every 1s.
Why it matters
Chisa will now inflict 1 stack of Havoc Bane every second instead of every 2 seconds.

S5
Thousands of Lights to Guide the Way Home
★★★★★
Resonance Liberation Moment of Nihility gains 100% DMG Bonus.
costs 50% less .
Why it matters
Her Liberation DMG increases by 100%. She will be able to perform 4 dodges in midair (her second Forte, the one used in the air).

S6
Thus, Hope is Rekindled with the Rising Dawn
★★★★★
When Chisa takes a fatal blow during , , and , she will remain standing with at least 1 HP.
becomes - Finality, which has the following effects:
- - Finality has all the effects of .
- Targets affected by - Finality takes 30% Amplified DMG from Negative Statuses.
- Targets affected by - Finality takes 40% increased DMG from Chisa.
Why it matters
Chisa will not die while performing her Forte attacks. Her damage increases by 40% against enemies marked with , and she will grant 30% more Amplified DMG to the team’s negative stat damage.
Multipliers Lv.
Open this panel to load exact values.
Sequence damage comparison
Build
Build targets
Sub-stat priority
- 1Crit Rate
- 2Crit DMG
- 3ATK%
- 4
 Resonance Liberation DMG Bonus
 - 5Energy Regen
Optimal Build Targets with Signature
ATK2050-2100Cost 3 Havoc / HavocATK2200-2370Cost 3 ATK / HavocCrit Rate80-89%Crit DMG265-275%Energy130%Liberation DMG20-35%Optimal Build Targets with Lustrous Razor
ATK2300-2500Cost 3 Havoc / HavocATK2600-2800Cost 3 ATK / HavocCrit Rate80-89%Crit DMG225-235%Energy130%Liberation DMG20-35%Weapon comparison
Relative damage
All the calculations below are based on using Cost-4 Crit Rate if the weapon provides Crit DMG, Cost-4 Crit DMG if the weapon provides Crit Rate, and Cost-4 Crit Rate if the weapon provides neither.
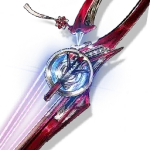
Kumokiri R5
ATK 500Crit Rate 36%
120.40%Cost 4 Crit DMG
Weapon effect
ATK is increased by 24%. When the wielder casts Intro Skill or inflicts Negative Statuses, they gain 16% Resonance Liberation DMG Bonus, stacking up to 3 times for 15s. At max stacks, when Resonators in the team inflict Negative Statuses, they gain 48% All-Attribute DMG Bonus for 15s. Effects of the same name cannot be stacked.
Kumokiri R1
ATK 500Crit Rate 36%
100%Cost 4 Crit DMG
Her weapon will increase the team's damage by 5.7% when comparing Chisa with her signature weapon to Chisa using Lupa's weapon. The team will gain a 7.1% damage increase when comparing Chisa with her signature weapon against the Lustrous Razor weapon.
Weapon effect
ATK is increased by 12%. When the wielder casts Intro Skill or inflicts Negative Statuses, they gain 8% Resonance Liberation DMG Bonus, stacking up to 3 times for 15s. At max stacks, when Resonators in the team inflict Negative Statuses, they gain 24% All-Attribute DMG Bonus for 15s. Effects of the same name cannot be stacked.
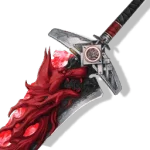
Wildfire Mark R1
ATK 587Crit DMG 48.6%
91.34%Cost 4 Crit Rate
Weapon effect
Increases ATK by 12%. Performing Intro Skill or Resonance Liberation increases Resonance Liberation DMG by 24% for 6s. Dealing Heavy Attack DMG extends this effect by 4s, up to 1 time. Each successful extension gives 24% Fusion DMG Bonus to all Resonators in the team for 30s. Effects of the same name cannot be stacked.

Ages of Harvest R1
ATK 587Crit Rate 24.3%
85.64%Cost 4 Crit DMG
Weapon effect
Grants 12% Attribute DMG Bonus. Casting Intro Skill gives the equipper Ageless Marking, which grants 24% Resonance Skill DMG Bonus for 12s. Casting Resonance Skill gives the equipper Ethereal Endowment, which grants 24% Resonance Skill DMG Bonus for 12s.
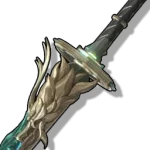
Verdant Summit R1
ATK 587Crit DMG 48.6%
84.68%Cost 4 Crit Rate
Weapon effect
Increases the DMG Bonus of all Resonance Attributes by 12%. Every time Intro Skill or Resonance Liberation is cast, increases Heavy Attack DMG Bonus by 24%, stacking up to 2 time(s). This effect lasts for 14s.
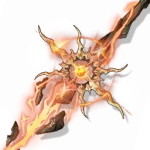
Thunderflare Dominion R1
ATK 675Crit Rate 12.1%
83.33%Cost 4 Crit Rate
Weapon effect
Increases ATK by 12%. Casting Intro Skill or Resonance Skill increases Heavy Attack DMG by 20% for 15s. Obtaining Shield allows Heavy Attack DMG to ignore 7.2% of the target's DEF for 7s, stacking up to 5 times. This effect is triggered once every 0.5s
Thunderflare Dominion R1
ATK 675Crit Rate 12.1%
83.31%Cost 4 Crit DMG
Weapon effect
Increases ATK by 12%. Casting Intro Skill or Resonance Skill increases Heavy Attack DMG by 20% for 15s. Obtaining Shield allows Heavy Attack DMG to ignore 7.2% of the target's DEF for 7s, stacking up to 5 times. This effect is triggered once every 0.5s
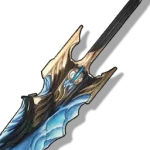
Lustrous Razor R5
ATK 587ATK 36.4%
82.30%Cost 4 Crit Rate
Weapon effect
Increases Energy Regen by 25.6%. When Resonance Skill is released, increases Resonance Liberation DMG by 14%, stacking up to 3 times. This effect lasts for 12s.
Echoes
Main stats
Echoes 1
Echo Mode


Sonata effect
Thread of Severed Fate · 3 pieces
3 SetInflicting Havoc Bane increases the Resonator's ATK by 20% and grants 30% Resonance Liberation DMG Bonus for 5s.
Main Echo
Reminiscence: Threnodian - Leviathan
Summon a Collapsing Horizon, dealing two instances of 131.04% Havoc DMG to the nearby enemies and obtaining the Core of Collapse for 15s. While it lasts, Core of Collapse deals 24.57% Havoc DMG when the active Resonator in the team deals damage. This effect can be triggered once every 0.5s, up to 8. Enemies with Havoc Bane take 100% more DMG from this effect. The Resonator with this Echo equipped in the main slot gains 12% Havoc DMG Bonus and 12% Resonance Liberation DMG Bonus.
Cost 4Crit DMG / Crit Rate
Cost 3Havoc
Cost 3Havoc / ATK
Cost 1ATK
Cost 1ATK
Echo stat comparisons


 4 DMG3 Havoc3 ATK1 ATK1 ATK100%
 4 DMG3 Havoc3 ATK1 ATK1 ATK99.78%4 DMG3 Havoc3 Havoc1 ATK1 ATK99.62%4 DMG3 Havoc3 Havoc1 ATK1 ATK99.01%4 DMG3 ATK3 ATK1 ATK1 ATK98.52%
 4 Rate3 Havoc3 Havoc1 ATK1 ATK84.93%
 4 DMG3 Havoc3 Havoc1 ATK1 ATK84.51%4 DMG3 Havoc3 ATK1 ATK1 ATK84.23%4 Rate3 Havoc3 ATK1 ATK1 ATK83.74%4 Rate4 DMG1 ATK1 ATK1 ATK80.21%
Teams
Current Team DPS teams
Teams are loaded from the current validated Team DPS projection. Future validated Team DPS updates appear here automatically.
Current teams load only when this section is reached.
Calculations
Damage breakdown
100%
Basic Attack3.29%
Skill3.82%
Liberation82.91%
Echo9.98%
This breakdown is based on the damage distribution when she is played solo without any buffs from other characters.
Character synergies









Review
Chisa review
Review updated:
Chisa is a 5-Star Havoc Broadblade sub-DPS with a full support package, built around Havoc Bane, Negative Status teams, and her Chainsaw Mode burst window. She is not a main DPS and should not be judged like one — in the tested Team DPS rotations she accounts for roughly 7–30% of her team's damage depending on the team and build, and the rest of her value is what she hands out: Havoc Bane application, +3 Negative Status stack cap, 18% DEF ignore, healing, shields, and enemy grouping.
The live Team DPS section is the authority for Chisa's current tested compositions, ordering, DPS values, and rotations. It updates from the validated Team DPS projection instead of freezing those values in this review.
Quick Verdict
Pull Chisa if you play, or plan to play, Negative Status teams — that is the only place she works, and inside it she is one of the best third slots in the game. She is the premium sub-DPS partner for Xuanling's number 1 team (Xuanling, Chisa and Suisui), a tested partner for Hiyuki, Aemeath, and Cartethyia, and she keeps working every patch because new Negative Status DPS characters keep releasing.
Do not pull Chisa for non-Negative Status teams. Almost everything she gives requires the enemy to carry a Negative Status or her teammates to inflict one. Outside Negative Status teams she is a weak pick — even free generalist supports do her job better there.
At S0, Chisa is already complete: Havoc Bane engine, +3 stack cap, DEF ignore, healing, shields, and her full Chainsaw Mode rotation. For low spenders, S0 is enough. S2 is the one realistic stopping point if you want to invest in her — it turns her Outro package into a team-wide 50% All-Attribute DMG Bonus. S6 is a whale ceiling at 301% of her S0 personal damage.
How Chisa Works
Chisa plays as a normal on-field sub-DPS with a short, self-contained rotation: she comes in, marks the enemy, applies Havoc Bane, drops her buffs and her burst, and leaves — about 7 to 8.7 seconds of field time in the tested rotations. She is also one of the strongest characters for quick-swap play, because her kit is full of swap windows — points in her animations where you can swap out and let the action finish on its own. Quick swapping is a strength she has, not a requirement she needs. Three mechanics explain her whole kit: Unseen Snare, Ring of Chainsaw, and her Outro.
Unseen Snare is a 30-second mark she puts on enemies (through her Skill, her Serrated Loop, her special Dodge Counter, or simply by locking on). While a target is marked, two things happen:
- Every time any Resonator's direct damage hits the marked target, Chisa applies 1 stack of Havoc Bane (once every 2 seconds). This is her Havoc Bane engine, and it is why she stacks Bane so fast — the whole team's attacks feed it.
- Characters holding Thread of Bane ignore 18% of the marked target's DEF when they damage it. Thread of Bane comes from her Outro (see below) — and it only works for characters who inflict a Negative Status or deal Negative Status damage. A teammate with no Negative Status interaction gets nothing from it.
What the 18% DEF ignore does and does not buff: it buffs the character's own hits — and that includes hits counted as both a normal damage type and Negative Status damage, like Cartethyia's three-sword strike (Basic Attack damage and Negative Status damage at the same time) or Zani's Frazzle-tagged hits (Heavy Attack damage and Spectro Frazzle damage at the same time), because those hits come from the character. It does not increase the Negative Status's own damage — the automatic Glacio Chafe, Spectro Frazzle, or other status ticks — because that damage is dealt by the status itself, not by a character's hit.
Ring of Chainsaw (max 100 points) is her Forte gauge, built through Normal Attacks, her Skill, her Intro (+20), and her Liberation (+40). When it is full, her Skill becomes Serrated Loop: a pulling strike that sends her into Chainsaw Mode, where her Basic Attacks become Sawring - Blitz — a 3-stage chainsaw string whose damage counts as Resonance Liberation damage. The string ends with Sawring - Eradication, a finisher that grows stronger with the gauge spent (up to 100 points counted), shields the whole team for 30 seconds, and ends Chainsaw Mode. Eradication is also one of her swap windows — in the tested rotations she swap-cancels out right after it starts and the hit still resolves, so you do not stand around watching the animation.
One warning about Chainsaw Mode: it runs on Chainsaw Fever, a hidden timer that drains when Chisa is not dealing damage. Stop attacking and she burns out of the mode. The mode is a burst window, not a state to idle in — go in, spend it, and finish the string.
Her Liberation, Moment of Nihility, deals Havoc damage, heals the whole team, grants 40 Ring of Chainsaw, and opens Woven Myriad - Convergence for 15 seconds — during which her Sawring moves gain +120% damage multiplier. Eradication ends the state, so the Liberation is always cast before the chainsaw string, not after.
Her Outro, Unraveling - Law Zero, gives the team Resonant Thread of Closure for 20 seconds, and this is the package teams really play her for:
- When any attack hits, the target's maximum Negative Status and Electro Rage stacks increase by 3 for 15 seconds. Higher caps mean more stack damage for everyone.
- When a Resonator inflicts a Negative Status or deals Negative Status damage, they gain Thread of Bane for 15 seconds — the 18% DEF ignore against marked targets described above.
She also has real sustain for a sub-DPS: Death Snip (her Basic 4) heals the team when the scissors close, her Liberation heals the team, and Eradication shields the team. Her second Inherent Skill adds 20% Havoc DMG Bonus and 20% Healing Bonus for 12 seconds after her Intro or Liberation.
Tested rotations. Her standard loop, about 8.7 seconds:
Intro > Basic 2 > Rending Lunge (Basic 3) > Death Snip (Basic 4) > Echo > Liberation > Spam Basic 1, 2, 3 > Outro
The opener (no Intro available) starts with her Skill instead:
Skill > Rending Lunge (Cancel) > Echo > Liberation > Basic 2 > Rending Lunge (Basic 3) > Death Snip (Basic 4) > Forte Skill > Hold Basic 1, 2, 3 > Outro
There is also a shorter tested variant used in her Rejuvenating Glow healing build teams — about 7 seconds — that moves the Echo cast to the end and skips the Forte Skill entirely:
Intro > Basic 2 > Rending Lunge (Basic 3) > Death Snip (Basic 4) > Liberation > Spam Basic 1, 2, 3 > Echo > Outro
you can also use (they are the same):
Intro > Skill, Basic 2 > Rending Lunge (Basic 3) > Death Snip (Basic 4) (Cancel animation with Liberation) > Liberation > Spam Basic 1, 2, 3 > Echo > Outro
The loop is simple once learned: mark, stack, Liberation, chainsaw string, leave. Outside the opener she rarely touches her base Skill, and her mid-air/Heavy Attack/Jetstream tools are movement tech, not rotation parts.
Build Priorities
Chisa's solo damage profile is dominated by Liberation-classed damage — her Sawring moves, Death Snip, and Eradication all count as Resonance Liberation damage:
- Resonance Liberation: 82.91%
- Echo Skill: 9.98%
- Resonance Skill: 3.82%
- Basic Attack: 3.29%
Build her like a Liberation damage dealer, not like a pure support — her sub-DPS contribution is real.
- Sub-stat priority: Crit Rate, Crit DMG, ATK%, Resonance Liberation DMG Bonus, Energy Regen.
- Talent priority: Normal Attack Lv. 10, Forte Circuit Lv. 10, Resonance Liberation Lv. 10, Resonance Skill Lv. 6, Intro Skill Lv. 6.
Build targets (with signature):
ATKaround 2,050–2,100 with Havoc/Havoc Cost 3 echoes, or 2,200–2,370 with ATK/Havoc
Crit Ratearound 80–89%
Crit DMGaround 265–275%
Energy Regenaround 130%
Her Echo setup is Thread of Severed Fate 3-piece (inflicting Havoc Bane grants 20% ATK and 30% Liberation DMG Bonus) combined with Havoc Eclipse and Midnight Veil — that pairing is the tested 100% — with Lingering Tunes as the near-identical alternative at 99.78%. Main Echo: Reminiscence: Threnodian - Leviathan (12% Havoc DMG, 12% Liberation DMG, and bonus hits that deal double damage to Havoc Bane targets). Main stats: Crit DMG or Crit Rate on Cost 4, Havoc or ATK on Cost 3, ATK on Cost 1 — the tested Cost 3 configs all sit within about 1.5% of each other, so sub-stats decide.
She also has a tested healing build on Rejuvenating Glow: it costs about 15% of her personal damage (84.51% of the damage build) in exchange for real team sustain. It is used in tested Hiyuki and Xuanling teams when the team wants her to cover the healer role too.
Her signature weapon is Kumokiri. At R1 it gives Crit Rate, 12% ATK, up to 24% Resonance Liberation DMG Bonus for herself — and at max stacks, 24% All-Attribute DMG Bonus for the whole team whenever anyone inflicts a Negative Status. The page's note puts that team effect at roughly a 5.7–7.1% team damage increase over her next-best options. The page comparison: Kumokiri R1 100%, Wildfire Mark R1 91.34%, Ages of Harvest R1 85.64%, Verdant Summit R1 84.68%, Thunderflare Dominion R1 83.33%, Lustrous Razor R5 82.30%. She is a sub-DPS, not a main DPS, so her signature is good but skippable — Wildfire Mark covers most of her personal damage. The reason to pull Kumokiri is the team-wide 24% buff, not her own numbers, and in teams where she is the difference-maker (like Cartethyia's, where the comparison point is a free alternative) it is the piece that keeps her clearly ahead.
Team Fit & Account Value
Chisa's condition is simple to state and strict in practice: she needs a Negative Status team. Her Bane engine needs the enemy marked and hit; Thread of Bane needs teammates who inflict Negative Status; her +3 stack cap only matters to Negative Status damage. Inside that world she fits almost everywhere — Xuanling, Hiyuki, Aemeath, and Cartethyia all have tested Chisa teams, and her listed synergies add Suisui, Denia and Lucilla on top.
Use the live Team DPS section for the current tested compositions, ordering, DPS values, equipment, and rotations. Those cards update from the validated Team DPS projection and are the only source for mutable team results on this page.
Her headline spot is Xuanling's number 1 team — Xuanling, Chisa and Suisui. Chisa feeds Xuanling's Feathered Oath and Windbound with fast Havoc Bane application, deals real sub-DPS damage, and because she is Havoc, Xuanling's own Outro buffs her back. A tested variant of this team runs her on the Rejuvenating Glow healing build for more sustain. She is also tested with Hiyuki (Glacio Chafe), Aemeath in both Fusion Burst and Rupture modes, and Cartethyia — worth pausing on, because Cartethyia scales with HP, not ATK: Chisa fits her precisely because Chisa's buffs (stack cap, DEF ignore, Negative Status amp) are not ATK-based, which is exactly where Suisui's ATK package fails. When you read that Suisui does not fit Cartethyia, Chisa is the reason the team still works.
The sub-DPS/support alternatives for her slot are real and worth comparing honestly. Suisui is the closest competitor in Xuanling and Hiyuki teams — Suisui brings bigger ATK-scaled buffs and stronger healing, Chisa brings far more personal damage and the +3 stack cap; the tested answer is that Xuanling's best team plays both. Shorekeeper, Verina, and Aero Rover are the cheaper third-slot alternatives, and in some teams (Spectro Frazzle teams are the clearest example) they contest her hard. Where she genuinely loses: non-Negative Status teams, where most of her kit switches off, and fast multi-wave content where enemies die before her Havoc Bane finishes stacking.
Opportunity cost cuts in her favor: she is one character who serves many Negative Status cores, so pulling her once upgrades several teams at once — but the same fact means she is always busy, and accounts with several Negative Status teams will feel the queue for her.
Sequence Value
Chisa is complete at S0 — her Bane engine, Outro package, and Chainsaw Mode all function without sequences. The page's sequence damage chart (personal damage): S0 100% → S1 134% → S2 170% → S3 209% → S4 209% → S5 221% → S6 301%.
- S1 — Wandering Through the Desolate Corridors (3/5): Comfort plus damage. Interruption immunity during all her Sawring moves, +30% ATK for 15s when she applies Unseen Snare, and a fixed 61,803 Havoc hit once per target on mark application.
- S2 — Into the Web of Endless Bonds (5/5): The stopping point, and it is a team node, not a personal one. She ignores 10% Havoc RES, and teammates holding Thread of Bane gain 50% All-Attribute DMG Bonus. Since her Outro hands Thread of Bane to the whole Negative Status team, this is a team-wide damage spike hiding in a support's sequence list.
- S3 — Across the Confusion of the Long Night (5/5): Personal damage. +120% multiplier on all her Sawring moves, stacking with her Liberation's Convergence state, and faster boss-shield breaking.
- S4 — Severing the Endless Cycle of Tragic Fate (1/5): Unseen Snare applies Havoc Bane every 1 second instead of every 2. The chart shows why it is rated low — zero personal damage gain — but note what it actually does: faster Bane stacking for the whole team, which Bane-hungry carries (Xuanling above all) feel directly. Low priority, not zero value.
- S5 — Thousands of Lights to Guide the Way Home (2/5): Liberation +100% DMG and cheaper air glides. Fine, not a stopping point.
- S6 — Thus, Hope is Rekindled with the Rising Dawn (5/5): Her whale ceiling. She cannot die during her Sawring moves, and Unseen Snare upgrades to Finality: targets take 40% increased damage from Chisa and 30% amplified damage from Negative Statuses. That last line is a team buff again — at S6 she is still half support.
Pull Value
Pull Chisa if:
- You play or plan to pull Negative Status DPS characters — Xuanling, Hiyuki, Aemeath, Cartethyia, or whoever comes next.
- You own Xuanling: she is the premium sub-DPS in his number 1 team, and he buffs her back.
- You want one sub-DPS who upgrades several teams instead of a main DPS who needs a team built around them.
- You want sustain without giving up a slot — she heals and shields while dealing real damage.
- You play Cartethyia: Chisa fits her where ATK-based supports cannot.
Skip or delay Chisa if:
- Your teams are not Negative Status teams — she does almost nothing there, and this is the single biggest reason to pass.
- You already have Suisui covering your Xuanling/Hiyuki cores and your Astrite is short — Chisa is the stronger third slot, but the free alternatives (Shorekeeper, Verina, Aero Rover) do clear.
- You mainly fight fast multi-wave content, where her Bane engine ramps too slowly to matter.
- You want a main DPS. She is not one, and no sequence makes her one.
Materials
Exact totals come from the canonical material data.
Character materials





Important skills




Max character and skills
Videos
Related videos
Videos load only when this section is reached.