 HP
10063
HP
10063
Character guide · Glacio Sword Basic Attack Sub-DPS
Sanhua
Glacio Sword Sub-DPS guide - Exact talents, sequence damage, build, weapons, Echoes, teams, and damage notes.
Sanhua is a 4-star Glacio Sword Basic Attack Sub-DPS in Wuthering Waves. This guide preserves her verified stats, complete talents and multipliers, sequence comparison, build targets, ten weapons, Moonlit Clouds Echo setup, live teams, synergies, damage breakdown, materials, and related videos.
 Element: Glacio
 Weapon: Sword
Rarity: 4★
Version: 1.0
Weapon: Sword
Rarity: 4★
Version: 1.0

Overview
Base stats
HP
10063
 ATK
275
ATK
275
 DEF
941
DEF
941
 Max Energy
100
Max Energy
100
 Crit Rate
5%
Crit Rate
5%
 Crit DMG
150%
Crit DMG
150%
 Healing Bonus
0%
Healing Bonus
0%
 Glacio DMG Bonus
0%
Glacio DMG Bonus
0%
 Tune Break Boost
0
Tune Break Boost
0
 Off-Tune Buildup Rate
100%
Off-Tune Buildup Rate
100%
Talents
Talent descriptions & multipliers
Talent priority
 Normal Attack
Recommended levelLv. 6
Normal Attack
Recommended levelLv. 6
 Resonance Skill
Recommended levelLv. 10
Resonance Skill
Recommended levelLv. 10
 Forte Circuit
Recommended levelLv. 10
Forte Circuit
Recommended levelLv. 10
 Resonance Liberation
Recommended levelLv. 10
Resonance Liberation
Recommended levelLv. 10
 Intro Skill
Recommended levelLv. 6
Intro Skill
Recommended levelLv. 6
Normal Attack
Frigid Light
Basic Attack
Sanhua performs up to 5 consecutive attacks, dealing .
Heavy Attack
Sanhua consumes Stamina to launch attacks, dealing .
Mid-air Attack
Sanhua consumes Stamina to perform a Mid-Air , dealing .
Dodge Counter
Use after a successful Dodge to attack the target, dealing .
Multipliers Lv.
Open this panel to load exact values.
Resonance Skill
Eternal Frost
Sanhua sends an air blade to create 1 "" cross the ground, dealing .
Multipliers Lv.
Open this panel to load exact values.
Forte Circuit
Clarity of Mind
Heavy Attack: Detonate
When holding , your cursor can move. If is released when cursor falls in the "" area, Sanhua will cast a to attack the target, dealing , considered as damage.
Ice Burst
Sanhua’s detonates all "Ice Thorns", "Ice Prisms" and "Glaciers" within her attack range, dealing . DMG done by is considered as damage.
Frostbite Area
The "" area expands with every 1 stack of "". "" stacks up to 2 times.
Sanhua obtains 1 stack of "" upon performing V.
Sanhua obtains 1 stack of "" upon casting Intro Skill .
Sanhua obtains 1 stack of "" upon casting .
Sanhua obtains 2 stack(s) of "" upon casting .
Upon casting , all "" is removed.
Multipliers Lv.
Open this panel to load exact values.
Resonance Liberation
Glacial Gaze
Sanhua deals and creates 1 "".
Multipliers Lv.
Open this panel to load exact values.
Intro Skill
Freezing Thorns
Sanhua swings her blade downward and creates 1 "", dealing .
Multipliers Lv.
Open this panel to load exact values.

Outro Skill
Silversnow
The next character (or other characters on a nearby team that activates an Outro Skill) gains 38% for 14s, or until the character is switched off field.

Tune Break
Tune Break: Sword
When the target's is full, the Resonators may cast on the target.

Inherent Skill I
Condensation
Damage dealt by Sanhua's increased by 20% for 8s after casting her Intro Skill.

Inherent Skill II
Avalanche
Damage dealt by Sanhua's Forte Circuit is increased by 20% for 8s after casting V.
Sequences
Sequence value

S1
Solitude's Embrace
★★★★★
V increases Sanhua's Crit. Rate by 15% for 10s.
Why it matters
Not Available

S2
Snowy Clarity
★★★★★
STA cost is reduced by 10. When Sanhua casts , her resistance to interruption is enhanced for 10s.
Why it matters
Not Available

S3
Anomalous Vision
★★★★★
Sanhua's damage dealt is increased by 35% against targets with HP below 70%.
Why it matters
Not Available

S4
Blade Mastery
★★★★★
restores 10 Resonance Energy.
DMG of the next within 5s is increased by 120%.
Why it matters
Not Available

S5
Unraveling Fate
★★★★★
Crit. DMG of Forte Circuit is increased by 100%. Ice Creations (, , and ) will explode even if they are not detonated.
Why it matters
Not Available

S6
Daybreak Radiance
★★★★★
After an or a is detonated, all team members' ATK is increased by 10% for 20s, stacking up to 2 times.
Why it matters
Not Available
Sequence damage comparison
Build
Build targets
Sub-stat priority
- 1Crit Rate
- 2Crit DMG
- 3ATK%
- 4
 Resonance Skill DMG Bonus
 - 5
 Resonance Liberation DMG Bonus
 - 6Energy Regen
Build targets
ATK1,996HP14,622DEF941Crit Rate69.8%Crit DMG275.0%Energy Regen125%Resonance Skill DMG Bonus43.0%Resonance Liberation DMG Bonus43.0%Weapon comparison
Relative damage
Performance statistics are based on perfect Cost 4 Echo main stats. If the weapon provides Crit Rate, performance is calculated with Cost 4 Crit DMG. If the weapon provides Crit DMG, performance is calculated with Cost 4 Crit Rate. If the weapon provides neither, Cost 4 Crit Rate is used by default.
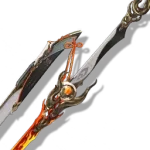
Blazing Brilliance R1
ATK 587Crit DMG 48.6%
105.87%Cost 4 Crit Rate
Sanhua deals Basic Attack DMG, Skill DMG, Liberation DMG, and Heavy Attack DMG. As of now, the best weapon for her full damage rotation is this one, since it provides Skill DMG, which contributes about 29% of her personal damage, along with high ATK and Crit DMG. In the future, if a weapon is released that provides equal or higher ATK, similar or better Crit DMG, and Liberation DMG, then it would be another strong option for her. Weapons that provide Basic Attack DMG or Heavy Attack DMG are not reliable, as they do not contribute as much to her rotation compared to Skill and Liberation DMG.
Weapon effect
ATK increased by 12%. The equipper gains 1 stack of Searing Feather upon dealing damage (once every 0.5s), and 5 stacks upon casting Resonance Skill. Each stack grants 4% Resonance Skill DMG Bonus, up to 14 stacks. All stacks expire 12s after reaching max stacks.

Emerald of Genesis R5
ATK 587Crit Rate 24.3%
102.53%Cost 4 Crit DMG
This is the top weapon for Sanhua. If you have it (which you should), just use it and forget about any other weapon. The Crit Rate it provides, along with the high ATK from its base stats and passive, are more than enough for her, and she will perform very well with it. Do not forget the Energy Regen this weapon also provides.
Weapon effect
Increases Energy Regen by 25.6%. When Resonance Skill is released, increases ATK by 12%, stacking up to 2 times for 10s.
Emerald of Genesis R1
ATK 587Crit Rate 24.3%
100%Cost 4 Crit DMG
This is the top weapon for Sanhua. If you have it (which you should), just use it and forget about any other weapon. The Crit Rate it provides, along with the high ATK from its base stats and passive, are more than enough for her, and she will perform very well with it. Do not forget the Energy Regen this weapon also provides.
Weapon effect
Increases Energy Regen by 12.8%. When Resonance Skill is released, increases ATK by 6%, stacking up to 2 times for 10s.
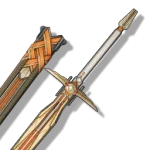
Feather Edge R5
ATK 412Crit Rate 20.3%
89.83%Cost 4 Crit DMG
It is a good weapon to use on Sanhua, but the Crit Rate is low. The 89.83% value mentioned for this weapon is based on using Cost 4 Crit DMG, which lowers the rate even further. Even if we switch the Cost 4 to Crit Rate, the percentage remains the same because Sanhua does not gain any Crit Rate or Crit DMG from her talent tree. Remember, if your Echoes have low Crit Rate, you should use the Cost 4 as Crit Rate, because otherwise you will not benefit from the Crit DMG you have if the hits do not crit.
Weapon effect
Casting Resonance Liberation increases ATK by 23% and grants 34.5% Resonance Liberation DMG Bonus for 15s.
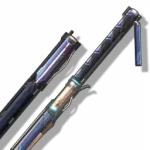
Commando of Conviction R5
ATK 412ATK% 30.3%
85.99%Cost 4 Crit Rate
It is a good weapon to use at the start of the game, but once you obtain the Emerald of Genesis, equip it on Sanhua and never switch.
Weapon effect
When Intro Skill is released, increases ATK by 30% for 15s.
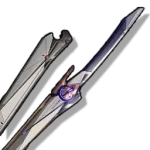
Endless Collapse R5
ATK 462ATK% 18.2%
85.45%Cost 4 Crit Rate
It is a good weapon to use at the start of the game, but once you obtain the Emerald of Genesis, equip it on Sanhua and never switch.
Weapon effect
Casting the Resonance Skill grants 10 Resonance Energy and increases ATK by 20% for 16s. This effect can be triggered once every 20s.
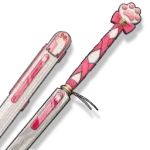
Somnoire Anchor R5
ATK 462ATK% 18.2%
83.91%Cost 4 Crit Rate
It is a good weapon to use, but the issue is that you cannot activate its passive Crit Rate buff unless you stay on the field longer than usual, which is not a good choice when using Sanhua as a Sub-DPS. The percentage mentioned above is without this Crit Rate buff. If you already have the weapon, you can still use it.
Weapon effect
Gain 1 stack of Hiss when dealing damage (1/s). Each stack increases ATK by 4% for 3s, up to 10 stacks; switching off clears stacks. At 10 stacks, gain +12% Crit Rate.
Feather Edge R1
ATK 412Crit Rate 20.3%
82.15%Cost 4 Crit DMG
It is a good weapon to use on Sanhua, but the Crit Rate is low. The 82.15% value mentioned for this weapon is based on using Cost 4 Crit DMG, which lowers the rate even further. Even if we switch the Cost 4 to Crit Rate, the percentage remains the same because Sanhua does not gain any Crit Rate or Crit DMG from her talent tree. Remember, if your Echoes have low Crit Rate, you should use the Cost 4 as Crit Rate, because otherwise you will not benefit from the Crit DMG you have if the hits do not crit.
Weapon effect
Casting Resonance Liberation increases ATK by 7.2% and grants 10.8% Resonance Liberation DMG Bonus for 15s.
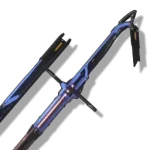
Lunar Cutter R5
ATK 412ATK% 30.3%
81.49%Cost 4 Crit Rate
This is the last option you should use on Sanhua. If you have no other weapon, then use it.
Weapon effect
Upon entering the field, gain 6 stacks of Oath. Each stack increases ATK by 4%, up to 6 stacks. Triggers once every 12s. Oath decreases by 1 stack every 2s. Defeating an enemy grants an additional 6 stacks.
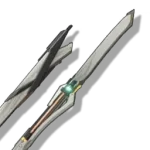
Overture R5
ATK 337Energy Regen 51.8%
62.50%Cost 4 Crit Rate
This weapon is the worst option in terms of damage output for Sanhua. However, if you are just starting the game and want faster rotations, especially if you do not have Sanhua at Sequence 5, then this weapon can be the number one choice. It provides Concerto Energy whenever you use her Skill, which is a huge boost to rotation speed. Sanhua at Sequence 5 is where she truly becomes fast in her rotations.
Weapon effect
When Resonance Skill is released, restores Concerto Energy by 16. This effect can be triggered 1 time every 20s.
Echoes
Main stats
Echoes 1
Moonlit Clouds Set

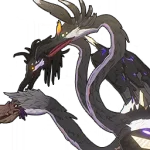
Sonata effect
Moonlit Clouds · 5 pieces
2 SetEnergy Regen +10%.
5 SetUpon using Outro Skill, ATK of the next Resonator increases by 22.5% for 15s.
Main Echo
Impermanence Heron
Transform into Impermanence Heron to fly up and smack down, dealing 310.56% Havoc DMG. Long press to stay as Impermanence Heron and continuously spit flames, each attack dealing 55.73% Havoc DMG. Once the initial attack lands on any enemy, the current character regains 10 Resonance Energy. If the current character uses their Outro Skill within the next 15s, the next character’s damage dealt will be boosted by 12% for 15s.
Cost 4Crit DMG / Crit Rate
Cost 3Glacio / ATK
Cost 3Glacio / ATK
Cost 1ATK
Cost 1ATK
Echo stat comparisons

 4 DMG3 Glacio3 Glacio1 ATK1 ATK100%4 DMG3 Glacio3 ATK1 ATK1 ATK97.05%4 DMG3 ATK3 ATK1 ATK1 ATK90.62%4 DMG4 DMG1 ATK1 ATK1 ATK86.58%
Teams
Current Team DPS teams
Teams are loaded from the current validated Team DPS projection. The DPS shown is the average across three rotations, and future validated Team DPS updates appear here automatically.
Current teams load only when this section is reached.
Calculations
Damage breakdown
100%
Basic Attack12.24%
Skill29.30%
Liberation29.95%
Heavy Attack18.03%
Echo6.21%
Intro4.26%
This breakdown is based on Sanhua's damage distribution when she is played solo without buffs from other characters.
Character synergies









Review
Sanhua review
Review updated:
Sanhua is a 4-Star Glacio Sword sub-DPS from Version 1.0, which makes her effectively free: every account collects her from the standard pool over time, and her sequences arrive by playing rather than by spending. Her own kit runs on Clarity stacks, the Frostbite area, and a Heavy Attack Detonate that sets off every Ice Creation she has planted (Ice Thorn, Ice Prism, Glacier) as Ice Burst damage. Her real job in a team, though, is her Outro Skill Silversnow: the next character on the field gains 38% Basic Attack DMG Deepen for 14s. In the site's tested teams she contributes roughly 13% of the team's damage on her standard route, so judge her by what she hands the carry, not by her own numbers.
The live Team DPS section is the authority for Sanhua's current tested compositions, ordering, DPS values, and rotations. It updates from the validated Team DPS projection instead of freezing those values in this review.
Quick Verdict
Sanhua is a 4-star, so there is no pull decision here, only an investment one, and the answer is narrower than her reputation suggests. Build her if you play a Basic Attack carry who stands on the field, and ideally one who scales with ATK. For that one job she is genuinely excellent: 38% Basic Attack DMG Deepen is the largest single Basic Attack multiplier among her tested competition, and she delivers it in under six seconds of field time at zero pull cost.
What she cannot do is lift a team upward. Her buff covers one damage type, on one character, for 14 seconds, and it ends the moment that character swaps out. Her tested teams sit at the bottom of the validated projection because the carries she serves are older ones. Her rotation is complete at S0, but S5 is the node that makes her feel finished, and for a standard-pool 4-star that is a matter of time rather than money.
Sanhua overall rating:
How Sanhua Works
Sanhua plants Ice Creations, then blows all of them up with one Heavy Attack.
The three Ice Creations. Her Intro Skill Freezing Thorns creates 1 Ice Thorn. Her Resonance Skill Eternal Frost creates 1 Ice Prism. Her Resonance Liberation Glacial Gaze creates 1 Glacier. These are the three things her payoff hit detonates, and their timers decide her whole rotation: the Ice Thorn lasts 8 seconds, but the Ice Prism and the Glacier last only 5 seconds each. That is why her tested rotation casts Skill, then Liberation, then the Heavy back to back with nothing in between. Hesitate there and the Prism or the Glacier expires before it can ever be detonated.
Clarity and the Frostbite area. To cast the Heavy Attack Detonate you hold Basic Attack. A cursor starts moving, and you release when it falls inside the Frostbite area. That area is narrow by default and it widens with every stack of Clarity, up to 2 stacks. Sanhua gains 1 Clarity from Basic Attack V, 1 from her Intro Skill, 1 from her Resonance Skill, and 2 from her Resonance Liberation. Clarity stacks last 5 seconds, and casting the Detonate removes all of them. In practice, play the rotation in order and you arrive at the Heavy with 2 Clarity and the widest possible release window. If you release outside the Frostbite area there is no Detonate at all, nothing is set off, and the back half of her damage is gone.
Ice Burst is Resonance Skill damage. When the Detonate lands it explodes every Ice Creation in range: Glacier Burst 139.17%, Ice Prism Burst 79.53%, Ice Thorn Burst 59.65%. All of that is counted as Resonance Skill damage, not Heavy Attack damage. This is the single most important thing to understand about building her. The Detonate hit itself is Heavy Attack damage, but the explosions it causes are Skill damage, which is why Resonance Skill DMG Bonus sits above Basic Attack or Heavy Attack bonuses on her build.
Two Inherent Skills, two 8-second windows. Condensation increases her Resonance Skill damage by 20% for 8s after her Intro Skill, and because Ice Burst counts as Resonance Skill damage, that 20% covers the explosions as well. Avalanche increases Ice Burst damage by a further 20% for 8s after Basic Attack V. Both windows are 8 seconds, both need to still be running when the Detonate lands, and together they are the real reason her rotation is a fixed, tight sequence instead of a loose one.
Tested rotations
Standard route, about 5.5 seconds of Sanhua field time:
Intro > Basic 3, 4, 5 > Skill > Liberation > Heavy > Echo > Outro
That string is identical in her Cartethyia team and in her standard Camellya team, so there is exactly one rotation to learn.
Swap route, about 3.8 seconds of Sanhua field time, split across two visits:
Skill > Liberation > Heavy Forte > swap out ... later ... Intro > Basic 3, 4, 5 > Echo > Outro
This is the tested fast version of her Camellya team. She enters early without her Intro, sets up and detonates while the support's rotation is still running, swaps straight back out, and returns later for her Basic string and her Outro. The point of the route is not her damage: it overlaps her setup with someone else's field time and shortens the team's total rotation. Her own damage share falls to roughly 7% to 10.5% from about 13%, and the route is rated much harder to execute in the tested data.
It is also not the default for two mechanical reasons. On the first visit she has no Ice Thorn yet because her Intro has not happened, so that Heavy sets off two Ice Bursts instead of three. And she never casts a second Heavy, so the Ice Thorn she plants on her second visit is only cashed in through S5, which makes Ice Creations explode on their own. Below S5 that Thorn is simply wasted.
Silversnow and the handoff
Her Outro is the product. Silversnow reads: "The next character (or other characters on a nearby team that activates an Outro Skill) gains 38% Basic Attack DMG Deepen for 14s, or until the character is switched off field." Three clauses matter. It reaches the incoming character, one character, not the team. It covers Basic Attack damage only. And it ends at 14 seconds or the moment that character leaves the field, whichever comes first.
Two more buffs ride the same Outro. The Moonlit Clouds 5-piece gives the incoming character 22.5% ATK for 15s, and Impermanence Heron adds 12% damage for 15s if the Outro follows the Echo within 15 seconds. All three land on the same character in the same instant, and all three die when that character swaps out.
The 14 seconds is tighter than it sounds. In the tested Cartethyia team, Cartethyia's field stay is 13.99 seconds against a 14-second buff, so there is no slack whatsoever. In the tested Camellya teams, Camellya's field stay is 16.96 seconds, which is longer than the buff, so the last stretch of her rotation runs without the Deepen. Neither is a reason to avoid the pairing, but both are reasons to cast the Outro cleanly and get the carry on the field immediately.
Build Priorities
Her tested damage profile, played solo without team buffs: Resonance Liberation 29.95%, Resonance Skill 29.30%, Heavy Attack 18.03%, Basic Attack 12.24%, Echo 6.21%, Intro 4.26%. A little over half of that Skill share is Eternal Frost itself; the rest is the three Ice Bursts. That is how a character who casts one Skill per rotation ends up with a Skill line that large.
Sub-stat priority: Crit Rate, Crit DMG, ATK%, Resonance Skill DMG Bonus, Resonance Liberation DMG Bonus, Energy Regen.
ATK1,996
Crit Rate69.8%
Crit DMG275.0%
Energy Regen125%
Resonance Skill DMG Bonus43.0%
Resonance Liberation DMG Bonus43.0%
Why 125% Energy Regen, and why it is nearly free. Her Liberation costs 100 Resonance Energy and her Max Energy is exactly 100, so she needs a full bar every single rotation. The tested loadout gets her most of the way there on its own: Emerald of Genesis at R1 gives 12.8% Energy Regen and the Moonlit Clouds 2-piece gives another 10%, which puts her at 122.8% before a single Energy Regen sub-stat. One roll finishes the target. It is worth hitting because skipping the Liberation costs her the Glacier, the largest of the three Ice Bursts, 2 Clarity, 20 Concerto Energy, and at S6 one of her two team ATK stacks.
Talent priority: Resonance Skill, Forte Circuit, and Resonance Liberation to Lv. 10; Normal Attack and Intro Skill to Lv. 6.
Echoes
Her set is 5-piece Moonlit Clouds with Impermanence Heron as the main Echo. The set is the entire point of her build: the 2-piece supplies the Energy Regen above, and the 5-piece hands the incoming character 22.5% ATK on her Outro, stacked on top of her kit's Deepen.
Main stats are Crit DMG or Crit Rate on Cost 4, Glacio or ATK on both Cost 3 slots, and ATK on both Cost 1 slots. The page's comparison settles the Cost 3 question: 2 Glacio Cost 3 at 100%, one Glacio swapped for ATK at 97.05%, both slots on ATK at 90.62%, and the two-Cost-4 setup at 86.58%. Take the two Glacio Cost 3.
For the Cost 4, note that Sanhua gains no Crit Rate and no Crit DMG from her talent tree. Every point of crit she has comes from her weapon, her echoes, and at S1 her sequence. With Emerald of Genesis, which supplies 24.3% Crit Rate, take Crit DMG on the Cost 4. If your Echo sub-stats are crit-poor, flip to Crit Rate instead because Crit DMG on hits that do not crit does nothing.
Weapons
Her strongest tested option is Blazing Brilliance at 105.87%, ahead of Emerald of Genesis R1 at 100%, and the reason is her damage profile: it stacks Resonance Skill DMG Bonus, which is her largest line, on top of high ATK and Crit DMG. But Blazing Brilliance is Brant's signature, and the gap is about 5.9% of Sanhua's personal damage on a character who contributes roughly an eighth of her team's output, which works out to well under 1% of team DPS. She is a support, not a carry, so Emerald of Genesis is the recommendation: it covers her Crit Rate, its ATK stacks trigger on the Skill she casts every rotation, and its Energy Regen is most of her 125% target on its own. Do not move a signature off a damage dealer for this slot.
Behind those two sit the 4-star swords, and the page's comparison puts them in a clear order: Feather Edge, Commando of Conviction, Endless Collapse, Somnoire Anchor, and Lunar Cutter, all landing in the low-to-mid 80s. These are early-account weapons; move her onto Emerald of Genesis as soon as you have one. Feather Edge gives Crit Rate, but not enough of it, and Somnoire Anchor's Crit Rate passive needs her to stay on the field longer than a sub-DPS should, so its listed value does not include that buff.
Overture is the one deliberate exception. It is the weakest sword on the list for damage, but it restores 16 Concerto Energy when she casts her Skill, and that noticeably speeds up her rotation. If you are early in the game and do not have S5 yet, it is a reasonable choice for exactly that reason.
Team Fit & Account Value
Sanhua asks one question of a partner: does this character deal Basic Attack damage while standing on the field? Everything else about her fit follows from the answer.
She has two tested cores and they land close enough together that there is no single number 1 team. Which one you play is decided by which carry you own, not by Sanhua.
- Camellya is where the whole package lands. Camellya scales with ATK and 80% of her damage is Basic Attack damage, so every piece of Sanhua's Outro connects at once: the 38% Basic Attack DMG Deepen, the Moonlit Clouds 22.5% ATK, and Heron's 12%. At S6 her 20% team ATK lands too. Shorekeeper fills the third slot in both tested versions, and the difference between them is the swap route described above.
- Cartethyia gets half the package. More than half of Cartethyia's damage is Basic Attack damage, and several of her other moves are explicitly counted as Basic Attack DMG on top of that, so the 38% Deepen covers a wide slice of her kit. But Cartethyia scales entirely on HP: her build target is 48,000 to 50,000 HP and her signature weapon's main stat is HP. Sanhua's Moonlit Clouds ATK buff and her S6 team ATK buff do almost nothing for her. Rover Aero fills the third slot here. This is Cartethyia's budget team, not her strongest structure.
- Roccia is the direct comparison for the Camellya slot, and it is genuinely close. Roccia's Outro gives the incoming character 20% Havoc DMG Amplification and 25% Basic Attack DMG Amplification. Sanhua's single Basic Attack figure is the larger one; Roccia's package is broader, and she deals more personal damage across a longer field stay. In the tested data Roccia's Midnight Veil build edges Sanhua's best route by a hair, and Sanhua's best route edges Roccia's Moonlit Clouds support build. A free 4-star holding that line against a limited 5-star is the strongest single fact on Sanhua's record.
Use the live Team DPS section for the current tested compositions, ordering, DPS values, equipment, and rotations. Those cards update from the validated Team DPS projection and are the only source for mutable team results on this page.
Her honest limits. Her Outro covers one damage type, on one character, for 14 seconds, and it dies the instant that character swaps out. The newer supports in the same role hand out All DMG Amplification instead, some of it granted to the whole team and lasting twice as long, which covers a carry's Skill, Liberation, and Echo damage as well as their Basic Attacks. She brings no healing, no shield, no grouping, and no Negative Status, so she cannot switch on the game-mode buffs that reward applying one. Her buff shape suits modern Basic Attack carries on paper, Luuk Herssen's damage is 92.73% Basic Attack, but the slot beside those carries goes to characters who buff and deal real damage at the same time. Her tested teams sit at the bottom of the validated projection, and that is a statement about the structures she appears in rather than about how well she does her job inside them.
Sequence Value
Sanhua's rotation is complete at S0. Clarity, the Frostbite area, the Detonate, the three Ice Bursts, and her Outro all work with no sequences at all. What sequences buy her is damage and speed, and because she comes from the standard pool they arrive by playing.
The page's sequence damage chart: S0 100% → S1 112% → S2 112% → S3 132% → S4 142% → S5 148% → S6 148%. The page also notes S6 reads 160% if you stay on Sanhua instead of swapping out because that node's buff belongs to the team rather than to her.
- S1 — Solitude's Embrace (5/5): Basic Attack V gives her 15% Crit Rate for 10s. She gains no crit whatsoever from her talent tree, so this is the most valuable node she has, and Basic Attack V is already sitting in her rotation.
- S2 — Snowy Clarity (2/5): 10 less Stamina on the Detonate, plus interruption resistance for 10s after her Skill. The chart does not move at all, 112% to 112%. Comfort only.
- S3 — Anomalous Vision (5/5): 35% more damage against targets below 70% HP. Conditional on paper, close to permanent in a real fight once the opening is over. The chart's 132% assumes the enemy is under that threshold.
- S4 — Blade Mastery (3/5): Her Liberation restores 10 Resonance Energy, and the next Heavy Attack Detonate within 5s deals 120% more damage. That applies to the Detonate hit itself, which is Heavy Attack damage, not the three Ice Bursts it sets off, which are Resonance Skill damage. The chart sets the expectation: 132% to 142% is a real gain, but it is a fraction of what 120% more damage sounds like on its own.
- S5 — Unraveling Fate (5/5): Ice Burst gains 100% Crit DMG, and Ice Thorn, Ice Prism, and Glacier explode on their own even if they are never detonated. That frees her from having to land the Frostbite release every time, and it is what makes the short swap route work at all. The site's own weapon note puts it plainly: S5 is where her rotations become fast.
- S6 — Daybreak Radiance (5/5): Every Ice Prism or Glacier detonation gives all team members 10% ATK for 20s, stacking twice, so 20% team ATK. Her personal chart does not move because the buff is not hers alone. It is worth a great deal next to Camellya and very little next to Cartethyia for the scaling reason in Team Fit. All three of her tested teams run her at S6.
Realistic stopping points: S1 is a real upgrade the moment it arrives, S3 is the next meaningful one, S5 changes how she plays, and S6 is her ceiling as a support. For a standard-pool 4-star, all of that is reachable by playing rather than by spending.
Pull Value
Since Sanhua is a 4-star, there is no pull decision here, only an investment one.
Build Sanhua if:
- You play Camellya. This is the pairing her whole package was designed for, and it is where she holds her slot against a limited 5-star.
- You are running the budget Cartethyia team and do not have her premium partners. The Deepen half of Sanhua's package still covers a wide slice of Cartethyia's damage.
- You want a buffer who costs almost no field time: under six seconds on her standard route and under four on the swap route.
- Your account is new or thin on supports and you need a real Basic Attack buff without spending anything. She is free, and the sequences that matter come from playing.
Leave Sanhua unleveled if:
- None of your carries deal Basic Attack damage on the field. Her entire kit buff would sit unused, and a general Amplification support serves you better.
- Your Basic Attack carry scales on HP or DEF and you were counting on the ATK half of her package. With Cartethyia, only the Deepen connects.
- Your endgame teams are already settled around newer supports for the same carries. Sanhua does not displace them; she understudies them.
- You dislike timing-window inputs. Her whole payoff runs through one held Basic Attack released inside the Frostbite area, and missing that release costs the back half of her damage.
Materials
Exact totals come from the canonical material data.
Character materials





Important skills


Max character and skills
Videos
Related videos
Videos load only when this section is reached.