 HP
11600
HP
11600
Character guide · Havoc Rectifier Sub-DPS
Cantarella
Havoc Rectifier guide - Best weapons, Echoes, stats, teams, and damage notes.
Cantarella is a 5-star Havoc Rectifier sub-DPS built around Basic Attack DMG, coordinated Dreamweaver attacks, healing, and a Havoc and Skill Amplification Outro. This guide preserves her weapons, Midnight Veil Echo setup, stats, complete talents, sequence value, live teams, damage breakdown, materials, and videos.
 Element: Havoc
 Weapon: Rectifier
Rarity: 5★
Version: 2.2
Weapon: Rectifier
Rarity: 5★
Version: 2.2

Overview
Base stats
HP
11600
 ATK
400
ATK
400
 DEF
1100
DEF
1100
 Max Energy
100
Max Energy
100
 Crit Rate
5%
Crit Rate
5%
 Crit DMG
150%
Crit DMG
150%
 Healing Bonus
0%
Healing Bonus
0%
 Havoc DMG Bonus
0%
Havoc DMG Bonus
0%
 Tune Break Boost
0
Tune Break Boost
0
 Off-Tune Buildup Rate
100%
Off-Tune Buildup Rate
100%
Talents
Talent descriptions & multipliers
Talent priority
 Normal Attack
Recommended levelLv. 6
Normal Attack
Recommended levelLv. 6
 Resonance Skill
Recommended levelLv. 10
Resonance Skill
Recommended levelLv. 10
 Forte Circuit
Recommended levelLv. 10
Forte Circuit
Recommended levelLv. 10
 Resonance Liberation
Recommended levelLv. 10
Resonance Liberation
Recommended levelLv. 10
 Intro Skill
Recommended levelLv. 6
Intro Skill
Recommended levelLv. 6
Normal Attack
Illusion Collapse
Basic Attack
Perform up to 3 consecutive attacks, dealing Havoc DMG.
Heavy Attack
Consume STA to attack the target, dealing Havoc DMG.
Heavy Attack - Delusive Dive
When Cantarella has , Heavy Attack becomes Delusive Dive, dealing Havoc DMG to the target, and then Cantarella enters . While in , casting Delusive Dive does not activate again. Can be cast in water.
Mid-air Attack
Consume STA to perform Plunging Attack, dealing Havoc DMG.
Dodge Counter
Press Normal Attack right after a successful Dodge to attack the target, dealing Havoc DMG.
Multipliers Lv.
Open this panel to load exact values.
Resonance Skill
Dance with Shadows
Graceful Step
Attack the target, dealing Havoc DMG.
Flickering Reverie
When in , Resonance Skill becomes Flickering Reverie, which is considered an Echo Skill when being cast. Attack the target, dealing Havoc DMG, and send them into .
Can be cast in mid-air.
Hazy Dream
Reduce the target's movement speed for 6.5s. When the target takes damage, Jolt is triggered once, removing to deal Havoc DMG, considered Basic Attack DMG. Attacks by other Resonators in the team will not Jolt a target influenced by and will remove the .
Coordinated Attacks and damage from Utilities will not Jolt a target.
Multipliers Lv.
Open this panel to load exact values.
Forte Circuit
Between Illusion and Reality
Mirage
Basic Attack becomes Basic Attack . Perform up to 3 consecutive attacks, dealing Havoc DMG. Can be cast in mid-air. When cast mid-air, Basic Attack consumes STA, and the combo does not reset when Cantarella is airborne.
Hitting the target with Basic Attack consumes 1 point of to obtain 1 point of and heal all nearby Resonators in the team.
The third stage of Basic Attack triggers 3 Coordinated Attacks, dealing Havoc DMG.
Mid-air Attack becomes Abysmal Vortex. Press Jump to perform a Plunging Attack at the cost of STA, dealing Havoc DMG.
Dodge Counter becomes Dodge Counter Shadowy Sweep. Attack the target, dealing Havoc DMG. Press Normal Attack right after casting the skill to cast Basic Attack Stage 2.
When Mid-air Attack Abysmal Vortex or Dodge Counter Shadowy Sweep hits a target, consume 1 point of to obtain 1 point of and heal all nearby Resonators in the team.
lasts for 8s.
ends when is depleted.
Forte Circuit - Perception Drain
If Cantarella has 3 points of when in , Resonance Skill becomes .
Consume all to attack the target, dealing Havoc DMG, considered Basic Attack DMG. Send the target into and heal all Resonators in the team.
Casting this skill is also considered as casting Echo Skill.
Can be cast in mid-air.
Abyssal Rebirth
After casting Intro Skill, Cantarella enters , which lasts for 25s and can be activated once every 25s. In the duration, for up to 6 times, when Resonators in the team cast Echo Skill, Cantarella recovers 6 points of Concerto Energy. Echoes with the same name can only trigger this effect once.
When in water, Cantarella's swimming speed increases and STA cost decreases.
Trance
Cantarella can hold up to 5 points of .
Casting Intro Skill recovers 1 point of .
Hitting a target with Basic Attack Stage 3 recovers 1 point of .
Casting Resonance Skill Graceful Step recovers 1 point of .
Casting Resonance Liberation Flowing Suffocation recovers 3 point of .
When in the water, recover 1 point of every 5s.
Shiver
Cantarella can hold up to 3 points of .
Hitting the target with Basic Attack recovers 1 point of .
When Mid-air Attack Abysmal Vortex or Dodge Counter Shadowy Sweep hits a target, restore 1 point of .
Multipliers Lv.
Open this panel to load exact values.
Resonance Liberation
Beneath the Sea
Flowing Suffocation
Attack the target, dealing Havoc DMG (considered Basic Attack DMG). Grant to all Resonators in the team. Casting this skill is also considered as casting Echo Skill.
Can be cast in mid-air close to the ground.
Diffusion
When the Resonator on the field deals damage to a target, summon to perform Coordinated Attack, dealing Havoc DMG (considered as Basic Attack DMG).
Within 3s after the Resonator deals damage, summon 1 Dreamweaver per second. This effect can be triggered once per second. Damage dealt by cannot trigger this effect.
Up to 1 Dreamweaver can be summoned each second, max 21 in total.
This effect lasts for 30s or until reaching the maximum number of .
Multipliers Lv.
Open this panel to load exact values.
Intro Skill
Cruise
Ripple
Attack the target, dealing Havoc DMG.
Press Normal Attack shortly after casting this skill to start the Basic Attack combo from Basic Attack Stage 3.
Tidal Surge
When in , Intro Skill becomes Tidal Surge, which triggers 3 coordinated attacks on hit, dealing Havoc DMG. Casting Tidal Surge resets the combo of Basic Attack .
Multipliers Lv.
Open this panel to load exact values.

Outro Skill
Gentle Tentacles
Amplify the incoming Resonator's Havoc DMG by 20% and Resonance Skill DMG by 25% for 14s. Switching Resonators ends this effect.

Tune Break
Tune Break: Rectifier
When the target's Off-Tune Level is full, the Resonators may cast Tune Break on the target.

Inherent Skill I
"Cure"
Increase Healing Bonus by 20%.

Inherent Skill II
"Poison"
Casting Echo Skill gives 6% Havoc DMG Bonus for 10s, stacking up to 2 times.
Sequences
Sequence value

S1
Embrace the Endless Waves
★★★★★
Casting Resonance Skill recovers 1 point of . The DMG Multiplier of Resonance Skill Graceful Step, Resonance Skill Flickering Reverie, and Forte Circuit is increased by 50%. Immune to interruptions while casting .
Why it matters
Not Available

S2
Surrender to the Illusive Reverie
★★★★★
Resonance Liberation Flowing Suffocation now sends the target into . The DMG Multiplier of Jolt triggered by Cantarella is increased by 245%.
Why it matters
Not Available

S3
Gaze into the Abyss
★★★★★
The DMG Multiplier of Resonance Liberation Flowing Suffocation is increased by 370%. After casting Resonance Liberation Flowing Suffocation, enter into . If already in , casting Resonance Liberation Flowing Suffocation does not activate the state again.
Why it matters
Not Available

S4
Behold Your Own Soul
★★★★★
When in , Healing Bonus is increased by 25%.
Why it matters
Not Available

S5
Rest in Your Reflection
★★★★★
The maximum number of Cantarella can summon through Resonance Liberation is increased by 5.
Why it matters
Not Available

S6
Fall, Fall... and Fall Deeper into the Dream
★★★★★
Increase the DMG Multiplier of Basic Attack by 80%. Casting Resonance Liberation Flowing Suffocation makes Cantarella's DMG ignore 30% of the target's DEF for 10s.
For the first 1.2s of , when the target takes an instance of DMG that does not inflict , Jolt will not be triggered on the target.
Why it matters
Not Available
Sequence damage comparison
Build
Build targets
Sub-stat priority
- 1Crit Rate
- 2Crit DMG
- 3ATK%
- 4
 Basic Attack DMG Bonus
 - 5Energy Regen
Build targets
ATK2200Crit Rate75%Crit DMG300%Energy130%Basic Attack DMG43%Weapon comparison
Relative damage
Performance statistics use optimal Cost 4 main stats. If the weapon provides Crit Rate, Cost 4 Crit DMG is used. If it provides Crit DMG, Cost 4 Crit Rate is used. If it provides neither, Cost 4 Crit Rate is used by default.

Whispers of Sirens R5
ATK 500Crit DMG 72%
124.71%Cost 4 Crit Rate
No comment.
Weapon effect
Increases ATK by 24%. Casting Echo Skill within 10s after casting Intro Skill or Basic Attacks grants 1 stack of Gentle Dream. Echoes with the same name can only trigger this effect once, stacking up to 2 times, lasting for 10s. When reaching 2 stacks, casting Echo Skill no longer resets the duration of this effect. This effect activates up to once per 10s. Switching to another Resonator ends this effect early. With 1 stack: Grants 80% Basic Attack DMG Bonus. With 2 stacks: Ignores 24% of the target's Havoc RES.
Whispers of Sirens R1
ATK 500Crit DMG 72%
100%Cost 4 Crit Rate
No comment.
Weapon effect
Increases ATK by 12%. Casting Echo Skill within 10s after casting Intro Skill or Basic Attacks grants 1 stack of Gentle Dream. Echoes with the same name can only trigger this effect once, stacking up to 2 times, lasting for 10s. When reaching 2 stacks, casting Echo Skill no longer resets the duration of this effect. This effect activates up to once per 10s. Switching to another Resonator ends this effect early. With 1 stack: Grants 40% Basic Attack DMG Bonus. With 2 stacks: Ignores 12% of the target's Havoc RES.
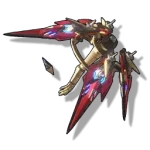
Stringmaster R1
ATK 500Crit Rate 36%
94.57%Cost 4 Crit DMG
No comment.
Weapon effect
Grant 12% Attribute DMG Bonus. When dealing Resonance Skill DMG, increases ATK by 12%, stacking up to 2 time(s). This effect lasts for 5s. When the equipped Resonator is not on the field, increases their ATK by an additional 12%.

Rime-Draped Sprouts R1
ATK 500Crit DMG 72%
84.63%Cost 4 Crit Rate
No comment.
Weapon effect
Increases ATK by 12%. Using Resonance Skill gives the equipped Resonator 12% Basic Attack DMG Bonus for 6s, stacking up to 3 times. When casting Outro Skill with 3 stacks, consume all stacks to give 52% DMG Bonus to the off-field Basic Attacks performed by the equipped Resonator, lasting for 27s.

Lethean Elegy R1
ATK 587Crit Rate 24.3%
83.35%Cost 4 Crit Rate
No comment.
Weapon effect
ATK is increased by 12%. Within 12s after dealing Echo Skill DMG, gain 32% Resonance Skill DMG Bonus and 32% Echo Skill DMG Amplification, and ignore 8% of the target's DEF when dealing damage.
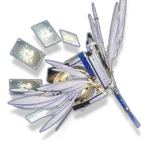
Luminous Hymn R1
ATK 500Crit Rate 36%
78.95%Cost 4 Crit DMG
No comment.
Weapon effect
Increase ATK by 12%. Dealing DMG to targets with Spectro Frazzle grants the wielder 14% Basic Attack DMG Bonus and 14% Heavy Attack DMG Bonus, stacking up to 3 times for 6s. Casting Outro Skill amplifies the Spectro Frazzle DMG on targets around the active Resonator by 30% for 30s. Effects of the same name cannot be stacked.
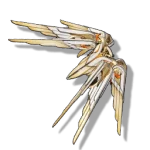
Radiant Dawn R5
ATK 412Crit DMG 40.5%
75.92%Cost 4 Crit Rate
No comment.
Weapon effect
Casting Resonance Skill increases ATK by 28.8% and grants 28.8% Basic Attack DMG Bonus for 10s.

Cosmic Ripples R1
ATK 500ATK 54%
75.06%Cost 4 Crit Rate
No comment.
Weapon effect
Increases Energy Regen by 12.8%. When hitting a target with Basic Attacks, increases Basic Attack DMG Bonus by 3.2%, stacking up to 5 time(s). This effect lasts for 8s and can be triggered 1 time(s) every 0.5s.
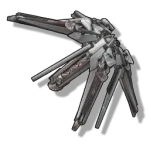
Augment R5
ATK 412Crit Rate 20.2%
73.32%Cost 4 Crit DMG
No comment.
Weapon effect
When Resonance Liberation is released, increases the caster's ATK by 48%, lasting for 15s.
Fusion Accretion R5
ATK 462ATK 18.2%
64.86%Cost 4 Crit Rate
No comment.
Weapon effect
Casting the Resonance Skill grants 10 Resonance Energy and increases ATK by 20%, lasting for 16s. This effect can be triggered once every 20s.
Echoes
Main stats
Echoes 1
Midnight Veil


Sonata effect
Midnight Veil · 5 pieces
2 SetHavoc DMG +10%.
5 SetWhen Outro Skill is triggered, deal additional 480% Havoc DMG to surrounding enemies, considered Outro Skill DMG, and grant the incoming Resonator 15% Havoc DMG Bonus for 15s.
Main Echo
Lorelei
Transform into Lorelei and attack surrounding enemies, dealing 405% Havoc DMG. The Resonator with this Echo equipped in their main slot gains 12.00% Havoc DMG Bonus and 12.00% Basic Attack DMG Bonus.
Cost 4Crit Rate / Crit DMG
Cost 3Havoc / ATK
Cost 3Havoc / ATK
Cost 1ATK
Cost 1ATK
Echo stat comparisons

 4 Rate3 Havoc3 Havoc1 ATK1 ATK100%4 Rate3 Havoc3 ATK1 ATK1 ATK99.24%4 Rate3 ATK3 ATK1 ATK1 ATK95.58%
 4 Rate3 Havoc3 Havoc1 ATK1 ATK88.12%4 Rate3 Havoc3 ATK1 ATK1 ATK86.83%
 4 Rate3 Havoc3 Havoc1 ATK1 ATK80.35%4 Rate3 Havoc3 ATK1 ATK1 ATK78.72%
Teams
Current Team DPS teams
Teams are loaded from the current validated Team DPS projection. The DPS shown is the average across three rotations, and future Team DPS updates appear here automatically.
Current teams load only when this section is reached.
Calculations
Damage breakdown
100%
Basic Attack87.52%
Skill6.50%
Heavy Attack2.01%
Echo0.77%
Intro3.20%
This breakdown is based on Cantarella's damage distribution when she is played solo without buffs from other characters. The Sonata Set used is Empyrean Anthem. Using Midnight Veil changes the result because its Outro Skill DMG can reach up to 8% of her total damage.
Character synergies






Review
Cantarella review
Review updated:
Cantarella is a 5-Star Havoc Rectifier sub-DPS built around Mirage, the Trance and Shiver gauges, Perception Drain, and coordinated Dreamweaver attacks — with team healing and a Havoc and Resonance Skill Amplification Outro on top. Her real output is Basic Attack-typed Havoc damage: in the page's tested breakdown, 87.52% of her personal damage is Basic Attack DMG, most of it from Phantom Sting, Perception Drain, Jolt, and Dreamweavers rather than from her normal attack string. She is a sub-DPS, not a carry — in the tested Team DPS rotations she accounts for roughly 23–33% of her team's damage in the first rotation, settling to about 17–25% by the third — so judge her by what the package gives the team, not by her personal numbers alone.
The live Team DPS section is the authority for Cantarella's current tested compositions, ordering, DPS values, and rotations. It updates from the validated Team DPS projection instead of freezing those values in this review.
Quick Verdict
Pull Cantarella if you own Phrolova or plan to pull her. Cantarella is Phrolova's best teammate, and Phrolova's number 1 team — Phrolova with Qiuyuan and Cantarella — runs through her: Phrolova's off-field damage scales with how many Echo Skills her team casts, and Cantarella casts four per rotation, more than any other tested option for her slot. Outside Phrolova's teams, the honest answer is that no tested team without Phrolova exists in the current projection, and her Outro is only ever half-used by other carries — more on this in Team Fit & Account Value.
At S0, Cantarella is already complete: the full Mirage loop, the Dreamweavers, the healing, and the Outro all work without sequences. She is also one of the easiest sub-DPS characters on the site to pilot — the exact same tested rotation string appears in all three of her tested teams, at difficulty 0. For vertical investment, S3 is the first real stopping point (the page's sequence chart jumps to 175% there), and S6 is a whale ceiling at 226%. S1 and S2 are modest, and S4 and S5 add almost nothing.
How Cantarella Works
Cantarella plays one short, structured on-field window — about 8 seconds — then Outros. Two gauges drive the window: Trance (max 5 points) and Shiver (max 3 points).
Building Trance. She gains Trance from four sources: casting her Intro Skill (+1), hitting with Basic Attack Stage 3 (+1), casting Resonance Skill Graceful Step (+1), and casting Resonance Liberation Flowing Suffocation (+3). With any Trance held, her Heavy Attack becomes Delusive Dive, which deals Havoc DMG and puts her into Mirage.
Mirage and Shiver. Mirage lasts 8 seconds and ends early when Trance runs out. Inside Mirage, her Basic Attacks become Phantom Sting: every Phantom Sting hit consumes 1 Trance, grants 1 Shiver, and heals all nearby Resonators in the team, and the third stage fires 3 coordinated attacks. Her mid-air and dodge-counter hits convert Trance into Shiver the same way. So the flow is: Trance is the fuel, Phantom Sting burns the fuel into Shiver, and Shiver arms the finisher.
The finisher — Perception Drain. At 3 Shiver inside Mirage, her Resonance Skill becomes Perception Drain: it consumes all Shiver for a heavy hit that is considered Basic Attack DMG, heals the whole team, sends the target into Hazy Dream, and — a small clause with big consequences — casting it is considered as casting an Echo Skill. Before 3 Shiver, the Mirage-version Skill is Flickering Reverie, which also sends the target into Hazy Dream and is also considered an Echo Skill cast.
Hazy Dream and Jolt. Hazy Dream slows the target for 6.5 seconds. When the target then takes damage from Cantarella, Jolt triggers once: Hazy Dream is removed and converted into a hit of Havoc DMG that is considered Basic Attack DMG. The conditions matter here, because they can fail. Jolt is Cantarella's own proc — attacks by other Resonators cannot trigger it, and a teammate's hit removes Hazy Dream without the Jolt payoff, so if she applies Hazy Dream and swaps out before landing her next hit, the Jolt is simply lost. Coordinated attacks and Utilities never trigger Jolt either. The one designed exception lives in Phrolova's kit: Hecate's attacks do not remove Hazy Dream, which is part of why the pairing works. In practice, the tested rotation always Jolts Hazy Dream with her own next hit while she is still on the field, so nothing is lost.
Liberation and the Dreamweavers. Flowing Suffocation is a hit considered Basic Attack DMG, is considered as casting an Echo Skill, refunds 3 Trance, and grants Diffusion to all Resonators in the team: when the Resonator on the field deals damage, a Dreamweaver is summoned for a coordinated attack (considered Basic Attack DMG), at most 1 per second, up to 21 Dreamweavers or 30 seconds. Diffusion keeps firing after Cantarella swaps out, so it is her off-field damage contribution while her carry takes the field. Her maximum Resonance Energy is only 100, so this Liberation is cheap and goes off every rotation.
Why her Concerto charges so fast — Abyssal Rebirth. After casting her Intro, Cantarella enters Abyssal Rebirth for 25 seconds: up to 6 times, whenever a Resonator in the team casts an Echo Skill, she recovers 6 Concerto Energy (Echoes with the same name trigger this only once). Now count her own Echo Skill casts in one rotation: the Liberation is one, Flickering Reverie is one, Perception Drain is one, and her actual main-slot Echo is a fourth — before her teammates cast anything at all, most of Abyssal Rebirth's triggers are already covered. That is how she fills a full Outro off an 8-second field window, and it is the same four casts that make her Phrolova's best teammate (see Team Fit & Account Value). Her Inherent Skills round the kit out: "Cure" gives 20% Healing Bonus, and "Poison" gives 6% Havoc DMG Bonus per Echo Skill cast for 10 seconds, stacking twice — her considered-casts stack it during her window.
Standard tested rotation, about 7.98 seconds of Cantarella field time — identical in every tested team:
Intro > Basic 3 > Skill > Liberation > Heavy (Delusive Dive) > Skill (Flickering Reverie) > Basic 1, 2, 3 (Phantom Sting) > Skill (Perception Drain) > Basic 4, 5 > Echo > Outro
Build Priorities
Cantarella's tested damage profile is overwhelmingly Basic Attack-typed:
- Basic Attack: 87.52%
- Resonance Skill: 6.50%
- Intro Skill: 3.20%
- Heavy Attack: 2.01%
- Echo Skill: 0.77%
Two consequences. First, Basic Attack DMG Bonus is a real sub-stat for her, not filler. Second, Skill and Echo Skill buffs barely move her own damage — keep that in mind when reading what teammates' buffs do for her in Team Fit & Account Value.
Talent priority: Resonance Skill, Forte Circuit, and Resonance Liberation to Lv. 10; Normal Attack and Intro Skill to Lv. 6. This looks wrong at first — most of her damage is "Basic Attack DMG", so why is the Normal Attack talent left at 6? Because damage type and damage source are different things: Phantom Sting and Perception Drain are considered Basic Attack DMG, but their multipliers live in the Forte Circuit talent, Flickering Reverie's lives in the Skill talent, and the Dreamweavers' live in the Liberation talent. The Normal Attack talent only covers her out-of-Mirage hits, which are a small slice of the rotation.
Sub-stat priority: Crit Rate, Crit DMG, ATK%, Basic Attack DMG Bonus, then Energy Regen.
Build targets: ATK around 2200, Crit Rate around 75%, Crit DMG around 300%, Energy Regen around 130%, Basic Attack DMG Bonus around 43%. The 130% Energy Regen target exists to guarantee the Liberation every rotation — at only 100 energy it is cheap, but missing it breaks the whole loop, because the Liberation carries Diffusion, 3 Trance, and an Echo Skill cast at once.
Her Echo set is Midnight Veil with Lorelei as the main Echo: Crit Rate on Cost 4 (her signature already brings Crit DMG), Havoc DMG on both Cost 3 slots, and ATK on both Cost 1 slots. The page's comparison puts Midnight Veil at 100%, Empyrean Anthem at 88.12%, and Moonlit Clouds at 80.35%. The gap is real and structural: Midnight Veil's 5-piece fires a 480% Havoc hit (considered Outro Skill DMG) every time she Outros — and she Outros every rotation — then grants the incoming Resonator 15% Havoc DMG Bonus for 15 seconds, which lands on the Havoc carry she Outros into. The page's calculation notes put that Outro hit alone at up to roughly 8% of her total damage, and the buff half is pure team value. For the Cost 3 slots, the comparison is closer than the set gap: Havoc/Havoc at 100%, Havoc/ATK at 99.24%, and ATK/ATK at 95.58% — sub-stat quality can honestly decide between the first two.
Her best weapon is Whispers of Sirens, her signature Rectifier, at 100% on the page's comparison. The passive builds Gentle Dream stacks when she casts Echo Skills within 10 seconds of her Intro or Basic Attacks — and since three of her kit actions count as Echo Skill casts, she stacks it inside her normal window without doing anything special: at 1 stack it grants 40% Basic Attack DMG Bonus, and at 2 stacks she ignores 12% of the target's Havoc RES. Both effects sit exactly on her 87.52% Basic Attack profile. That said, she is a sub-DPS, and the page's numbers say the signature can be skipped: Stringmaster R1 performs at 94.57%. If you already own Stringmaster, use it and spend the pulls elsewhere. If you do not, treat Whispers of Sirens as a worthwhile-but-optional upgrade for an account committed to the Phrolova core — not a requirement. Further down, Rime-Draped Sprouts R1 sits at 84.63% and Lethean Elegy R1 at 83.35%; below those, the page lists the 4-star budget tier — Radiant Dawn at 75.92% and Augment at 73.32% (both counted at R5, the normal assumption for 4-stars) — with the standard-banner Cosmic Ripples R1 at 75.06% between them.
Team Fit & Account Value
Cantarella's number 1 team is Phrolova with Qiuyuan and Cantarella, and the reason is arithmetic. Phrolova's Maestro state allows 10 off-field Enhanced Hecate attacks per rotation, each one triggered by an Echo Skill cast from a Resonator in the team — and this team reaches exactly 10: 2 from Phrolova's own Outro, 4 from Qiuyuan (his Echo plus his three Forte heavies, each counted as an Echo Skill cast), and 4 from Cantarella (her Liberation, Flickering Reverie, Perception Drain, and her own Echo). No other tested structure fills the bar, and without Echo-cast teammates a real chunk of Phrolova's damage simply never happens. Cantarella's Outro also lands on Phrolova in this team — the Outros circulate Phrolova into Qiuyuan into Cantarella into Phrolova — and its 20% Havoc and 25% Resonance Skill Amplification covers Phrolova's on-field setup window, Scarlet Coda included. Two honest footnotes, both from the tested data: the buff ends when Phrolova swaps out, so it never covers Hecate's off-field hits (those are Echo Skill-typed anyway, and are carried by Qiuyuan's team-wide Law of Harmony set instead), and Qiuyuan's own Outro lands on Cantarella — whose Echo-typed damage is 0.77% of her profile — so his 50% Echo Skill Amplification is mostly wasted on her. What she gets from him is the persistent team buffs, not the Outro.
The tested alternatives both keep the same Cantarella core. Phrolova with Cantarella and Roccia is the mono-Havoc version: Roccia's Outro (20% Havoc and 25% Basic Attack DMG Amplification) lands on Cantarella, and since Cantarella's own damage is Basic Attack-typed, that one fits her perfectly — the team reaches 8 Enhanced Hecate hits per rotation. Phrolova with Cantarella and Shorekeeper is the sustain-heavy version. Both sit below the number 1 team; use the live Team DPS section for the current tested compositions, ordering, DPS values, equipment, and rotations. The one tested structure that replaces her slot entirely is the Galbrena and Phrolova with Qiuyuan dual-carry team — it works, but it drops Phrolova to 7 Enhanced Hecate hits and asks a second premium carry to do a sub-DPS's job, and it sits below her number 1 team as well.
Her healing deserves a straight statement: Phantom Sting hits and Perception Drain heal the team on every rotation, backed by her "Cure" Inherent, so she provides real sustain from the sub-DPS slot. It is best read as flexibility for the third slot — the tested teams have filled it with Qiuyuan, Roccia, and Shorekeeper — not as a reason to skip a dedicated sustain where one is needed.
Her honest limits: her Outro's ideal recipient is a Havoc, Resonance Skill-typed carry, and Phrolova is that carry. Every other name on her synergy list uses only half of it — Camellya, Rover Havoc, and Danjin take the 20% Havoc Amplification but waste the Skill half (Camellya's damage is Basic Attack-typed), while Carlotta and Jinhsi take the 25% Skill Amplification and waste the Havoc half — and none of those routes has a tested team in the current projection, so treat them as theory, not tested data. Her personal damage share is real but modest, and her Jolt is hers alone: Hazy Dream applied at the very end of her window and left for a teammate to touch is a Jolt lost. Opportunity cost also cuts one more way — the Phrolova core wants Qiuyuan too, and he is wanted by other teams.
Sequence Value
Cantarella is complete at S0. The full Mirage and Shiver loop, Perception Drain, Diffusion's Dreamweavers, the Abyssal Rebirth Concerto engine, the healing, and the Outro all function without sequences. The page's sequence damage chart: S0 100% → S1 122% → S2 136% → S3 175% → S4 175% → S5 178% → S6 226%, calculated on her personal damage with her signature and no team buffs.
- S1 — Embrace the Endless Waves (3/5): Casting any Resonance Skill recovers 1 Trance — in the base kit only Graceful Step does that, so this extends the refund to Flickering Reverie and Perception Drain, letting Mirage stretch into more Phantom Sting hits. The multipliers of Graceful Step, Flickering Reverie, and Perception Drain rise by 50%, and Perception Drain becomes immune to interruption. A mix of comfort and damage; this is the chart's 122%.
- S2 — Surrender to the Illusive Reverie (3/5): Flowing Suffocation now sends the target into Hazy Dream, and the DMG Multiplier of Jolt rises by 245%. Jolt is considered Basic Attack DMG and fires multiple times per rotation off a large multiplier base, so this is the 136% step — a clean damage node, nothing structural.
- S3 — Gaze into the Abyss (4/5): The first real stopping point. Flowing Suffocation's multiplier rises by 370%, and casting it now enters Mirage directly — no Delusive Dive needed (if she is already in Mirage, the Liberation does not restart it). A big personal spike, and the chart's jump to 175%.
- S4 — Behold Your Own Soul (1/5): While in Mirage, Healing Bonus increases by 25%. A healing node on a sub-DPS whose healing is already a bonus — the chart does not move at all (175%).
- S5 — Rest in Your Reflection (1/5): The Dreamweaver cap rises by 5, from 21 to 26. The chart barely notices (178%) — the 1-per-second summon rate and the 30-second window matter more than the ceiling.
- S6 — Fall, Fall... and Fall Deeper into the Dream (4/5): The whale ceiling. Phantom Sting's multiplier rises by 80%, casting Flowing Suffocation makes her damage ignore 30% of the target's DEF for 10 seconds, and Hazy Dream gains a 1.2-second opening window during which damage that does not inflict Hazy Dream cannot trigger Jolt — so stray hits can no longer spend the Jolt early. This is the chart's 226%.
The realistic stopping points: S0 for almost everyone, S3 if you are vertically investing in the Phrolova core, S6 for whales. S4 and S5 are skip nodes in every sense.
Pull Value
Pull Cantarella if:
- You own or plan to pull Phrolova — Cantarella is her best teammate, her number 1 team needs Cantarella's four Echo Skill casts to reach all ten Enhanced Hecate attacks, and no tested alternative fills the slot the same way.
- You want a sub-DPS who also heals, freeing up how you fill the third slot.
- You value comfort: one short rotation, identical in every tested team, at difficulty 0 — there is exactly one thing to learn.
- You like her — she is complete at S0, and her signature is optional when Stringmaster performs at 94.57% of it.
Skip or delay Cantarella if:
- You do not own and do not want Phrolova — her Outro is only ever half-used by other carries, and no tested team without Phrolova exists in the current projection.
- You need a main damage dealer — she is a sub-DPS, and only about a fifth to a third of her team's damage is hers.
- Completing the core would mean pulling Qiuyuan as well — if your pulls are better spent finishing a different team first, finish that team first.
Materials
Exact totals come from the canonical material data.
Character materials







Important skills




Max character and skills
Videos
Related videos
Videos load only when this section is reached.