 HP
15375
HP
15375
Character guide · Fusion Broadblade Support
Mornye
Fusion Broadblade guide - Best weapons, Echoes, stats, teams, and sequence notes.
Mornye is a 5-star Fusion Broadblade support in Wuthering Waves. This guide preserves her verified weapons, single Echo setup, stats, talents, sequence value, teams, synergies, materials, and videos.
 Element: Fusion
 Weapon: Broadblade
Rarity: 5★
Version: 3.0
Weapon: Broadblade
Rarity: 5★
Version: 3.0

Overview
Base stats
HP
15375
 ATK
288
ATK
288
 DEF
1357
DEF
1357
 Max Energy
100
Max Energy
100
 Crit Rate
5%
Crit Rate
5%
 Crit DMG
150%
Crit DMG
150%
 Healing Bonus
0%
Healing Bonus
0%
 Fusion DMG Bonus
0%
Fusion DMG Bonus
0%
 Tune Break Boost
10
Tune Break Boost
10
 Off-Tune Buildup Rate
100%
Off-Tune Buildup Rate
100%
Talents
Talent descriptions & multipliers
Talent priority
 Normal Attack
Recommended levelLv. 6
Normal Attack
Recommended levelLv. 6
 Resonance Skill
Recommended levelLv. 6
Resonance Skill
Recommended levelLv. 6
 Forte Circuit
Recommended levelLv. 10
Forte Circuit
Recommended levelLv. 10
 Resonance Liberation
Recommended levelLv. 10
Resonance Liberation
Recommended levelLv. 10
 Intro Skill
Recommended levelLv. 6
Intro Skill
Recommended levelLv. 6
Normal Attack
Ground State Calibration
Basic Attack
Perform up to 4 consecutive attacks, dealing Fusion DMG.
Heavy Attack
Consume STA to attack the target, dealing Fusion DMG.
Basic Attack - Wide Field Observation Mode
While in , Basic Attack is replaced with Basic Attack - .
Perform up to 3 consecutive attacks, dealing Fusion DMG.
Mid-air Attack
Consume STA to perform Mid-air Plunging Attack, dealing Fusion DMG.
Press Normal Attack within a certain time afterward to cast Basic Attack Stage 3.
Dodge Counter
Press Normal Attack right after a successful Dodge to attack the target, dealing Fusion DMG.
Press Normal Attack shortly after performing this attack to perform Basic Attack Stage 2.
Dodge Counter - Wide Field Observation Mode
While in , Dodge Counter is replaced with Dodge Counter - .
Press Normal Attack right after a successful Dodge to counterattack and deal Fusion DMG.
Within a certain time afterward, press Normal Attack to cast Basic Attack - Stage 3.
Multipliers Lv.
Open this panel to load exact values.
Resonance Skill
Resolution
Expectation Error
Heal all nearby Resonators in the team and enter the Parry state, during which DMG taken is reduced by 100% for a time. Switching to another Resonator ends this state immediately.
If attacked while in the Parry state, exit the state and cast Resonance Skill - .
If not attacked while in the Parry state, press Normal Attack to exit the state and cast Basic Attack Stage 2.
Optimal Solution
Stagnate nearby targets and deal Fusion DMG, reducing the cooldown of Resonance Skill - by 2s.
Switching to another Resonator ends the Stagnation effect early.
Distributed Array
While in , Resonance Skill is replaced with Resonance Skill - .
Heal all nearby Resonators in the team and summon Hover Cannons to strike the target, dealing Fusion DMG.
Multipliers Lv.
Open this panel to load exact values.
Forte Circuit
Mass-Energy Equivalence
Baseline Mode
While in her default Baseline Mode, Mornye gains .
Heavy Attack - Geopotential Shift
When reaches 100 points, Heavy Attack is replaced with Heavy Attack - Geopotential Shift.
Cast Heavy Attack - Geopotential Shift to deal Fusion DMG, considered Heavy Attack DMG. Afterward, Mornye jumps into mid-air, consumes all and enters .
Wide Field Observation Mode
lasts for 30s.
- Upon entering , Mornye generates a .
- While in , Mornye gains .
- If is below 100 when holding Normal Attack, perform Basic Attack - Stage 1 to 3 in sequence. If reaches 100 during this time, cast Heavy Attack - Inversion instead.
- While moving, Mornye continuously consumes STA. STA cannot be recovered while in .
- When Dodging with directional input, Mornye starts to fly at speed, which lasts for up to 10s or until STA is depleted or until the ends.
- When Mornye is hit or launched into mid-air, press Dodge to immediately recover from the attack, which is considered a successful Dodge. This effect can be triggered up to 3 times, which resets when ends.
- Press Jump and Mornye will slowly descend. Before she lands, Basic Attack - , Resonance Skill - , and Heavy Attack - Inversion are unavailable. If Jump is pressed when Mornye runs out of STA, she will exit the . She will leave the also when she Dodges, Jumps, or performs Mid-air Attacks.
Additionally, performing environmental interactions, using Utilities, or switching to another Resonator ends . The state also ends when Mornye is no longer airborne.
Syntony Field
- lasts for 25s.
- When the is generated, deal Fusion DMG, considered Resonance Liberation DMG.
- Continuously restores HP for nearby active Resonators in the team within the , triggered once every 3s.
- Increases the Off-Tune Buildup Rate of all nearby Resonators in the team within the by 50%.
- Enhances the resistance to interruption of nearby active Resonators in the team within the .
Heavy Attack - Inversion
- When reaches 100 points, Heavy Attack is replaced with Heavy Attack - Inversion.
- Consume all to cast Heavy Attack - Inversion, dealing Fusion DMG, considered Heavy Attack DMG.
- Heavy Attack - Inversion inflicts upon the target on hit for 30s.
Observation Marker
When a Resonator in the team deals Tune Break DMG to a target inflicted with , Mornye inflicts an on the target for 8s.
Interfered Marker
Targets affected by or take increased DMG from all nearby Resonators in the team. For every 1% of Mornye's Energy Regen exceeding 100%, their DMG is increased by 0.25%, up to 40%.
Visual Field
When a Resonator in the team defeats a target inflicted with or , Mornye gains for 3s. While in this state, Mornye inflicts on the target hit whenever any Resonator in the team deals damage.
Tune Rupture Response - Particle Jet
Mornye deals one instance of Fusion DMG to targets in the state within range, considered Tune Rupture DMG.
Rest Mass Energy
Mornye can hold up to 100 points of .
While in Baseline Mode, she gains when performing Basic Attack, Heavy Attack, Dodge Counter, or when Resonance Skill - hits a target.
Relative Momentum
Mornye can hold up to 100 points of .
While in , she gains when Basic Attack - , Dodge Counter - or Resonance Skill - hits the target.
Mornye cannot gain during Heavy Attack - Inversion.
Multipliers Lv.
Open this panel to load exact values.
Resonance Liberation
Critical Protocol
Attack the targets within the effective range, dealing Fusion DMG.
For every 1% of Mornye's Energy Regen exceeding 100%, this skill gains an additional 0.5% Crit. Rate (up to 80%) and 1% Crit. DMG (up to 160%).
When casting this skill, if a is present, remove it and generate a .
Can be performed in mid-air.
High Syntony Field
- lasts for 25s.
- Increases the DEF of all nearby Resonators in the team within the by 20%.
- Inherits the 's boost to resistance to interruption and Off-Tune Buildup Rate.
- Inherits the 's healing effect and increases the Healing Multiplier by 40%.
Multipliers Lv.
Open this panel to load exact values.
Intro Skill
Convergence
Attack the target to deal Fusion DMG, then jump into mid-air, clearing all and entering .
Multipliers Lv.
Open this panel to load exact values.

Outro Skill
Recursion
Resonators in the team gain 25% All DMG Amplification for 30s.

Tune Break
Decoupling
Mornye can respond to and .
- Responding to : When any Resonator in the team deals Tune Break DMG and inflicts , Mornye casts . Each target can be damaged by this skill up to once every 8s.
- Responding to : Each stack of on the target increases Mornye's total DMG against them. Each point of Mornye's increases the total DMG by 0.12%. While Mornye is in the team, the max stack limit of on a target is increased by 1.
Mornye can perform Tune Break against the targets with full .

Inherent Skill I
Blueprint
Mornye's Energy Regen is increased by 10%.
Casting Intro Skill - Convergence restores 20 points of Concerto Energy, triggered once every 20s.
Casting Basic Attack - Stage 3 restores 20 points of Concerto Energy, triggered once every 20s.

Inherent Skill II
Boundedness
Casting Resonance Skill - or Resonance Skill - grants to all Resonators in the team:
- lasts for 60s and can be gained once every 5 min.
- When the active Resonator takes DMG greater than 30% of their Max HP, they instead take DMG equal to 30% of their Max HP. This effect can trigger up to 3 times. is removed after triggering it 3 times.
- When the active Resonator takes a fatal blow, they are not downed by this instance of damage. This effect can trigger up to 1 time. is removed after triggering it 1 time.
- When is removed, the active Resonator restores HP equal to 150% of Mornye's DEF.
Sequences
Sequence value

S1
The Silent Observer
★★★★★
Basic Attack – becomes immune to interruption.
The duration of is extended by 150%. now grants DMG increase even when the target is not affected by or . When Mornye applies on a target, she also inflicts .
Why it matters
Sequence 1: When you are in the Observation state with the large field active, your Basic Attack hits will be immune to enemy interruption.
The that grants a buff when Tube Rupture (Interfered) or Tune Strain (Interfered) is applied used to last 8 seconds; it now lasts 20 seconds.
Previously, the would only grant the buff if Tune Rupture (Interfered) or Tune Strain (Interfered) was active. Now, it grants the buff even without Tune Rupture (Interfered) or Tune Strain (Interfered) being active.
Before, the required applying Tune Rupture (Interfered) or Tune Strain (Interfered) to the (which comes from Mornye). Now, that is no longer necessary—the buff will activate as soon as Mornye inflicts the , because it will automatically convert into the that grants the buff.

S2
Morning Star of Entropy
★★★★★
All nearby Resonators in the team gain Crit. DMG increase against targets with : Every 1% of Mornye's Energy Regen over 100% grants 0.2% Crit. DMG increase, up to 32%.
and further increase the Off-Tune Buildup Rate of all nearby Resonators in the team by 20%.
Why it matters
Sequence 2: This sequence provides the team with 32% Crit DMG if Mornye’s Energy Regen is at 260%. This will be applied to targets that have the on them.
The rate of filling the Off-Tube Buildup (the Tune Break bar) will be 20% faster.

S3
Blueprint of Recursion
★★★★★
Casting Resonance Skill - additionally restores 25 points of Concerto Energy and 100 , triggered once every 25s.
Why it matters
Sequence 3: The skill you use in the Forte state (Observation state) will now grant 25 additional Concerto, enabling faster rotations.

S4
Latent Variables of the Cosmos
★★★★★
The healing of is increased by 30%.
Why it matters
Sequence 4: Increases the healing received from the field Mornye places by 30%.

S5
Time Dilation Effect
★★★★★
The DMG Multiplier of Resonance Liberation - Critical Protocol is increased by 40%.
The DMG Multiplier of is increased by 160%.
Why it matters
Sequence 5: The Liberation DMG multiplier will increase by 40%, and the DMG multiplier of the Tune Rupture response (the Tune Rupture damage she deals while in the Rupture state) will increase by 160%.

S6
To the Far Shores of the Stars
★★★★★
Resonance Liberation - Critical Protocol deals 400% more DMG. If Mornye has not engaged in combat for over 4s, she restores Resonance Energy equal to 10% of her Max Resonance Energy every 0.2s.
Why it matters
Sequence 6: The damage dealt by her Liberation will increase by 400%. If Mornye is not the active character, she will regenerate 10% Energy every 0.2 seconds, effectively giving unlimited Energy. However, this does not mean you can ignore maintaining 260% Energy Regen to activate her buffs.
Sequence damage comparison
Build
Build targets
Sub-stat priority
- 1Energy Regen
- 2Crit DMG
- 3DEF%
- 4
 Liberation DMG Bonus
Build targets
ATK1051DEF2700Crit Rate20%Crit DMG250.0%Energy260.0%Weapon comparison
Relative damage
The comparison accounts for both Mornye's personal damage and the buff she gives the team.

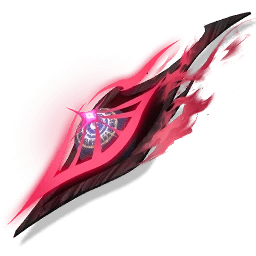
Starfield Calibrator R1
ATK 413Energy Regen 77%
100%Cost 4 Healing Bonus
Weapon effect
Increases DEF by 16%. Casting Resonance Liberation restores 8 points of Concerto Energy. This effect can be triggered once every 20s. When the wielder heals Resonators, increases Crit. DMG of all nearby Resonators in the team by 20% for 4s. Effects of the same name cannot be stacked.
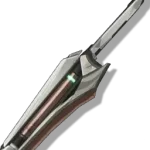
Discord R5
ATK 337Energy Regen 51.8%
84%Cost 4 Healing Bonus
Weapon effect
When Resonance Skill is released, restores Concerto Energy by 16. This effect can be triggered 1 time every 20s.
Echoes
Main stats
Echoes 1
Support Mode


Sonata effect
Halo of Starry Radiance · 5 pieces
2 SetHealing Bonus +10%.
5 SetWhen healing a Resonator in the team, every 1% of Off-Tune Buildup Rate grants a 0.2% ATK increase to all Resonators in the team for 4s, up to 25%. Effects of the same name cannot be stacked.
Main Echo
Reactor Husk
Transform into a Reactor Husk, jumping into the air and unleashing a heavy slash that deals 351.00% Fusion DMG to enemies. The Resonator with this Echo equipped in their main slot gain 10.00% Energy Regen.
Cost 4Healing Bonus / Crit DMG
Cost 3Energy Regen
Cost 3Energy Regen
Cost 1DEF
Cost 1DEF
Echo stat comparisons

 4 Heal3 ER3 ER1 DEF1 DEF100%
 4 Heal3 ER3 ER1 DEF1 DEF84.04%
Teams
Current Team DPS teams
Teams are loaded from the current validated Team DPS projection. Future validated Team DPS updates appear here automatically.
Current teams load only when this section is reached.
Character synergies










Review
Mornye review
Review updated:
Mornye is a 5-Star Fusion Broadblade support and healer built around the Tune Break system. Her kit runs on three things: the Syntony Field she drops for the team, the Observation Marker she stamps on the enemy, and the Interfered Marker that marker turns into, which is where her big team damage buff comes from. Her personal damage is not the point. Across all of her tested Team DPS rotations she accounts for roughly 1.5% to 6.8% of her team's damage, averaging around 3.5%.
What she actually produces is a stack of team-wide effects: up to 40% DMG increase against a marked target, a 25% All DMG Amplification Outro that reaches every Resonator in the team for 30s, up to 25% team ATK from her Echo set and 20% team Crit DMG from her weapon (both delivered by her healing, not by a skill), +50% Off-Tune Buildup Rate so the team reaches Tune Break faster, DEF-scaling healing, interruption resistance, and a damage cap with a death save attached to it.
The live Team DPS section is the authority for Mornye's current tested compositions, ordering, DPS values, and rotations. It updates from the validated Team DPS projection instead of freezing those values in this review.
Quick Verdict
Pull Mornye if your account plays, or plans to play, the Tune Rupture or Tune Strain side of the Tune Break system. That is not a preference, it is a written condition in her kit: her headline buff only pays out on a target affected by Tune Rupture - Interfered or Tune Strain - Interfered, and only four characters on the roster can start that chain (Lynae in either mode, Aemeath in Rupture mode, Luuk Herssen, and Denia in Tune Strain mode). If none of them are in the team, that buff is off at S0.
The rest of her package does not care about any of that. The Outro, the set ATK, the weapon Crit DMG, the healing, the interruption resistance, and the faster Off-Tune bar work in every team, which is exactly why she shows up as the third slot in so many tested compositions that have nothing to do with Tune Rupture. She is a specialist with a generic floor, and the floor is high enough to be useful.
At S0 she is complete in the right team: every state, both fields, the full marker chain, and her whole healing and survivability package are in the base kit. S0 is also the one place where the team you build can switch her main buff off. S1 is her first and most valuable stopping point, because it deletes every condition on the Interfered Marker at once. S2 is the next one. S3, S4, and S5 are comfort and personal damage on a character whose damage is a few percent of the team, and S6 is a whale ceiling.
How Mornye Works
First, the system she plugs into. Enemies have an Off-Tune Level bar. Some characters apply Tune Rupture - Shifting or Tune Strain - Shifting to the target. When the Off-Tune Level is full, a Resonator casts Tune Break on it, and that is what converts the Shifting status into Tune Rupture - Interfered or Tune Strain - Interfered. Characters whose kits "respond" to those Interfered states then get extra hits or extra damage. Mornye responds to both, and more importantly she taxes the whole system for the team's benefit.
Her two modes. She starts in Baseline Mode, where performing a Basic Attack, a Heavy Attack, or a Dodge Counter builds Rest Mass Energy up to 100 points, and her Resonance Skill adds to it as well, though the Skill only counts when Optimal Solution actually hits a target. At 100, her Heavy Attack becomes Heavy Attack - Geopotential Shift: it hits, spends the whole gauge, and throws her into the air in Wide Field Observation Mode, her Forte state, for 30s. Her Intro Skill, Convergence, does the same thing instantly, which is the single most important fact about her rotation timing: whenever she enters through her Intro she skips the entire Baseline Mode build-up.
The Syntony Field. Entering Wide Field Observation Mode generates the Syntony Field for 25s. Inside it, the team gets a damage tick counted as Resonance Liberation damage, healing every 3s, +50% Off-Tune Buildup Rate, and stronger resistance to interruption. This one field is doing more work than it looks like: the Off-Tune boost is what speeds the team's Tune Break cycle, and the 3s healing tick is the trigger that keeps her weapon and Echo set buffs alive (see Build Priorities).
The marker chain. While in Wide Field Observation Mode, her attacks build a second gauge, Relative Momentum, up to 100 points. This gauge is stricter than the first one: her Wide Field Basic Attacks, her Wide Field Dodge Counter, and her Skill only fill it when they hit the target, so a whiffed chain costs her the marker at the end of it. Her Skill there becomes Distributed Array, which heals the team and summons Hover Cannons, and it feeds the gauge too. At 100 Relative Momentum her Heavy Attack becomes Heavy Attack - Inversion, and when that hit lands it inflicts Observation Marker on the target for 30s. From there:
- A Resonator in the team deals Tune Break DMG to the marked target. Mornye converts the Observation Marker into an Interfered Marker for 8s.
- The Interfered Marker increases the damage every nearby Resonator deals to that target, but only while the target is affected by Tune Rupture - Interfered or Tune Strain - Interfered.
- The size of the increase is 0.25% for every 1% of Mornye's Energy Regen above 100%, capped at 40%.
That is three separate conditions at S0, and each one can fail. Her Heavy Attack - Inversion has to hit, or there is no marker at all. Somebody has to land Tune Break damage on that exact target, or the marker never converts. And the team has to contain a character who applies Rupture or Strain Shifting in the first place, or the converted marker sits there without paying out. The site's own tested team note for the Aemeath Fusion Burst team says it plainly: with no Rupture Shifting on the enemy, Rupture Interfered never happens, so the 40% never activates and she loses her Tune Rupture response damage on top of it.
Visual Field covers the add-clear case. When any Resonator in the team defeats a target carrying an Observation Marker or Interfered Marker, Mornye gains Visual Field for 3s, and during those 3s she re-applies Observation Marker to whatever the team damages. In a wave of enemies the marker walks itself down the pack.
Her Liberation upgrades the field. Critical Protocol deals damage and, if a Syntony Field is out, removes it and generates the High Syntony Field for 25s instead. The High version keeps the interruption resistance and the Off-Tune boost, heals with a +40% Healing Multiplier, and adds 20% DEF to the whole team.
Her Tune Break response, Decoupling. When a Resonator in the team deals Tune Break damage and inflicts Tune Rupture - Interfered, she automatically casts Particle Jet, one instance of Fusion damage per target, once every 8s. Against Tune Strain - Interfered each stack raises her own damage by 0.12% per point of her Tune Break Boost, and simply having her in the team raises the target's Tune Strain - Interfered stack cap by 1.
Her survivability package, Proof of Boundedness (Inherent Skill II), is easy to miss because it hides behind a plain Skill cast. Casting either version of her Resonance Skill gives it to all Resonators in the team for 60s, once every 5 minutes. While it is up, any hit that would deal more than 30% of the active character's Max HP is reduced to exactly 30% (three times), one fatal blow does not down them (once), and when the effect is removed that character heals for 150% of Mornye's DEF. It is a fight-opening safety net rather than a permanent one, so cast the Skill before the dangerous part of the fight, not after.
Her tested rotations. She has exactly two, and the difference between them is the mode entry described above. First rotation, about 7.92 seconds of field time:
Basic 1, 2, 3 > Heavy Attack > Basic 1, 2, 3 (cancel the animation with Liberation) > Skill (cancel the animation with Heavy) > Heavy Attack > Echo > Outro
Second rotation onward, about 5.86 seconds:
Intro > Basic 1, 2, 3 (cancel the animation with Liberation) > Skill (cancel the animation with Heavy) > Heavy Attack > Echo > Outro
Read them side by side and the two extra seconds explain themselves. She opens the fight, so she has no Intro to use, and has to build Rest Mass Energy with Basic 1, 2, 3 and then spend it with the first Heavy Attack just to reach Wide Field Observation Mode. From the second rotation on, the Intro does that for free. Everything after the entry is the same: three Wide Field Basic Attacks to build Relative Momentum, the Liberation cancel that swaps the Syntony Field for the High Syntony Field, the Skill for the heal, the second Heavy Attack for Heavy Attack - Inversion and the Observation Marker, then Echo and Outro.
This exact string is the same in all of her tested teams. Twenty-two teams, one rotation to learn, no team-specific variant. For a character with two modes and two gauges, that is a real selling point.
The flip side is that her opening is the whole payload. The Syntony Field, the marker, the Outro, and both healing sources all sit behind that first entry, so time lost in her first rotation is time the rest of the team spends without her buffs. The tested team notes are explicit that her top team is sensitive to exactly this. Practise the opening until it is automatic.
Energy Regen is her real stat, and 260% is not an arbitrary target. Every scaling effect in her kit reads "for every 1% of Mornye's Energy Regen exceeding 100%", and they all cap 160 points later:
- Interfered Marker: 0.25% per 1%, capped at 40%. 40 ÷ 0.25 = 160, so 260% Energy Regen.
- Critical Protocol Crit Rate: 0.5% per 1%, capped at 80%. Same 160 points.
- Critical Protocol Crit DMG: 1% per 1%, capped at 160%. Same 160 points.
- With S2, team Crit DMG: 0.2% per 1%, capped at 32%. Same 160 points again.
So 260% Energy Regen caps three effects at S0 and four at S2, and every point past 260% adds nothing to any of them. That is why the build target stops exactly there instead of asking for more.
The same math explains the surprisingly low 20% Crit Rate build target. Critical Protocol gives itself +80% Crit Rate at 260% Energy Regen, so 20% on the sheet plus 80% from the skill is 100% Crit Rate on the only hit of hers that matters. Building more Crit Rate would be spending sub-stats on a guaranteed crit.
Build Priorities
Do not build or judge Mornye like a damage dealer. Her tested share sits between 1.5% and 6.8% of team damage depending on the team. Her buffs, her healing, and her Off-Tune speed are the product.
- Sub-stat priority: Energy Regen, Crit DMG, DEF%, Liberation DMG Bonus. Energy Regen is first until you reach 260% and then it is finished. Crit DMG is second because her Liberation is already a guaranteed crit, so Crit DMG is the only multiplier left on it. DEF% is third because DEF is her healing stat, not a damage stat.
- Talent priority: Forte Circuit Lv. 10, Resonance Liberation Lv. 10, Normal Attack Lv. 6, Resonance Skill Lv. 6, Intro Skill Lv. 6. Her fields, her markers, and her Liberation live in the first two.
- Build targets: ATK 1,051, DEF 2,700, Crit Rate 20%, Crit DMG 250%, Energy Regen 260%. The ATK target looks strange until you add it up: 288 base plus 413 from her signature weapon plus the flat ATK riding on the Cost 4 and two Cost 3 echoes is 1051. In other words, she is not built with a single point of ATK%. DEF is the stat she actually invests in, because everything she heals with scales from it: the Syntony Field tick, both Skill heals, and the 150% DEF heal when Proof of Boundedness expires.
Her Echo set is Halo of Starry Radiance (5 pieces), with Reactor Husk as the main Echo. The 2-piece gives 10% Healing Bonus. The 5-piece is the interesting half: when she heals a Resonator, every 1% of Off-Tune Buildup Rate grants 0.2% ATK to all Resonators in the team for 4s, up to 25%. The cap needs 125% Off-Tune Buildup Rate, and her own Syntony Field pushes her from the base 100% to 150%, so she caps her own set without any help. The 4-second window is short, but the field heals every 3s, so the field keeps refreshing the buff for its whole 25-second duration. Reactor Husk is there for the 10% Energy Regen it gives in the main slot.
Main stats: Cost 4 Healing Bonus or Crit DMG, Energy Regen on both Cost 3 slots, DEF on both Cost 1 slots. The tested build uses Healing Bonus on Cost 4, and that is the safe default: her healing is the trigger for two team buffs and her damage is a rounding error either way. Crit DMG on Cost 4 is a fair swap if you want her personal numbers to look better, and it costs the team nothing measurable.
Both Cost 3 slots are Energy Regen for a specific reason. Add it up: 100% base + 77% from Starfield Calibrator + 64% from two Cost 3 Energy Regen echoes + 10% from Reactor Husk + 10% from her Inherent Skill I = 261%. She clears the 260% cap with zero Energy Regen sub-stats, which frees every roll for Crit DMG and DEF%. That is the whole reason the recommended build looks the way it does.
Weapons. Her signature is Starfield Calibrator, and the page's comparison, which counts both her personal damage and the buff she gives the team, puts Starfield Calibrator R1 at 100% and Discord R5 at 84%. The gap is bigger than it looks for a support, because the weapon is doing two jobs: the 77% Energy Regen main stat is a quarter of her path to the 260% cap, and the passive gives all nearby Resonators 20% Crit DMG for 4s whenever she heals, riding the same healing trigger her Echo set uses. It also gives her 16% DEF, which feeds her healing.
She is a support, so the signature is not mandatory, and Discord is a genuine budget option. Just know what you are paying. Discord's 51.8% Energy Regen leaves her about 25 points short of 260%, so plan two to three Energy Regen sub-stat rolls to get back to the cap, and accept that the team loses the 20% Crit DMG entirely. The dedicated weapon study for her top team shows the cost is not confined to her: with Discord R1 in her slot instead of her signature, her teammates' damage drops too, and the team total lands at 95.36%. Advice at R1 either way, refinements are whale territory.
Team Fit & Account Value
Her number 1 team is Aemeath (Rupture), Lynae and Mornye. It is the composition that satisfies every condition in her kit at the same time: Aemeath in Rupture mode and Lynae both apply Tune Rupture - Shifting, the team casts Tune Break inside the rotation, and Mornye's marker chain runs from end to end. Every other composition below is an alternative rather than an equal.
The condition a partner has to meet is specific. Mornye's Interfered Marker names Tune Rupture - Interfered and Tune Strain - Interfered, and nothing else. On the current roster, the characters who can start that chain are:
- Lynae, who can switch between Rupture and Strain modes, applies Shifting through Photochromic Flux, and hands the team 40 Tune Break Boost for 30s on top of it. She is Mornye's most frequent tested partner by a wide margin.
- Aemeath, but only in Resonance Mode - Tune Rupture. In Fusion Burst mode she applies Fusion Burst instead, and Mornye's buff has nothing to convert.
- Luuk Herssen, whose whole kit is Tune Strain - Shifting application.
- Denia, but only in Resonance Mode - Tune Strain, for the same reason as Aemeath.
Note the pattern: two of the four have a mode switch, and picking the wrong mode turns Mornye's main buff off just as thoroughly as leaving those characters out of the team. Read the mode, not just the name.
Denia is the clearest example of Mornye changing a teammate's build. Denia's Inherent Skill II converts Off-Tune Buildup Rate into Tune Break Boost: every 10% above 100% gives a Resonator 8 Tune Break Boost, up to 40. Mornye's Syntony Field supplies exactly +50%, which is 5 brackets, which is the full 40, so Mornye alone maxes that conversion for the whole team. Follow it one step further and it explains the tested equipment: Luuk Herssen's Inherent Skill II amplifies his damage by 5% per 10 points of Tune Break Boost up to 30% at 60 points, and his base 10 plus Denia's flat 10 plus Mornye's 40 lands on exactly 60. That is why Denia's set choice changes when Mornye joins: the Luuk Herssen and Denia team is tested with Denia on Moonlit Clouds and on Reel of Spliced Memories, and the Moonlit Clouds version comes out ahead, because Reel's 20 Tune Break Boost is already covered and the set slot can do something else. Without Mornye, Reel is the more valuable of the two. Check the live Team DPS cards for the current versions of both.
Her honest limits are easy to state. Ten of her twenty-two tested teams do not contain a Rupture or Strain applier at all. Fusion Burst Aemeath teams, mono-Fusion teams with Lupa, the Glacio teams around Hiyuki and Lucilla, the Xuanling and Chisa team, and the Hack-based teams with Lucy and Rebecca all use a different branch of the system or none of it. Rebecca and Lucy are worth calling out specifically because they look like they should qualify: they inflict Hack - Shifting and respond to Hack - Interfered, which is a third branch that Mornye's Interfered Marker does not name. In every one of those teams she is a general support: the Outro, the set ATK, the weapon Crit DMG, the healing, the interruption resistance, and the faster Off-Tune bar, without the 40%.
That is a fair role and it is why she appears so widely, but it is not her ceiling. In the Glacio teams in particular she is the general option rather than the specialist, because those teams are built on Glacio Chafe application and consumption, and she touches neither.
Opportunity cost is real but small. She wants her own Echo set and, ideally, her own weapon, and she takes close to eight seconds of the opening rotation. She does not compete for the sets or weapons that carries want, and her S0 build is cheap to assemble.
One nice structural detail: her Outro is written as "Resonators in the team gain 25% All DMG Amplification for 30s", not as a buff for the incoming Resonator. Most Outro amplifications in the game belong to exactly one character and die the moment that character swaps out. Hers does not. It covers the whole team for the full 30 seconds, which means off-field damage dealers keep it and swap order does not have to be engineered around it.
Sequence Value
Mornye is complete at S0 in a team that meets her conditions. Every state, both fields, the full marker chain, the Tune Break responses, and her entire healing and survivability package are in the base kit.
Read her sequence damage chart with one thing in mind: it measures her personal damage only, and it excludes her Tune Rupture damage. S0 100% → S1 100% → S2 103% → S3 103% → S4 103% → S5 138% → S6 491%. A chart like that would suggest S1 does nothing at all, and the opposite is true. S1 is her best node by a distance, and it shows as 100% precisely because everything it fixes belongs to the team, not to her.
- S1 — The Silent Observer (5/5): The node that removes her conditions. Three changes, all to the same chain. The Interfered Marker's duration is extended by 150%, from 8s to 20s. It grants its damage increase even when the target is not affected by Tune Rupture - Interfered or Tune Strain - Interfered. And applying an Observation Marker now inflicts the Interfered Marker at the same time, so no Tune Break is needed to convert it. Put together, her 40% team buff stops caring which characters are in the team and stops caring about the Tune Break window, and its uptime goes from a short pulse to effectively permanent. Her Wide Field Observation Mode Basic Attacks also become immune to interruption. If you are pulling sequences on this character, this is the one.
- S2 — Morning Star of Entropy (5/5): A second team-wide buff. All nearby Resonators gain Crit DMG against targets carrying the Interfered Marker, 0.2% per 1% of Mornye's Energy Regen above 100%, up to 32%, which her 260% target already maxes. Her fields also add another 20% Off-Tune Buildup Rate, which speeds the Tune Break cycle further. Note that the extra 20% does not add anything to Denia's Tune Break Boost conversion, since the Syntony Field alone already caps it. The 3% on the chart is just her own share of the Crit DMG.
- S3 — Blueprint of Recursion (3/5): Rotation speed. Distributed Array additionally restores 25 Concerto Energy and 100 Relative Momentum, once every 25s. The 100 Relative Momentum is the interesting half, since it hands her Heavy Attack - Inversion without building for it. Comfort, not power.
- S4 — Latent Variables of the Cosmos (3/5): Healing luxury. High Syntony Field healing increased by 30%. Her healing is already sufficient.
- S5 — Time Dilation Effect (3/5): Her first real damage node. Critical Protocol's multiplier increased by 40% and Particle Jet's by 160%, which is the chart's jump from 103% to 138%. The Particle Jet half does not appear on the chart at all, because Tune Rupture damage is excluded from that calculation, so in a Rupture team S5 is worth slightly more than the chart shows. It is still personal damage on a character contributing a few percent of the team.
- S6 — To the Far Shores of the Stars (4/5): The whale ceiling. Critical Protocol deals 400% more damage, and after 4 seconds out of combat she restores 10% of her max Resonance Energy every 0.2s, which in practice means her Liberation is always ready while she sits off-field. Do the sanity check on the chart before getting excited by the number: 138% to 491% is about 3.5 times her S5 damage, not 5 times, because the multiplier applies to her Liberation rather than to everything she does. And the energy half does not replace the 260% Energy Regen target, since Energy Regen is what scales her buffs, not just what fuels her bar.
Realistic stopping points: S1, then stop. S2 if you want the second team buff and the faster Off-Tune bar. Everything from S3 up is comfort and personal damage.
Pull Value
Pull Mornye if:
- You own or plan to pull Lynae, Aemeath, Luuk Herssen, or Denia, and want the character who converts their Tune Rupture or Tune Strain setup into a team-wide damage buff.
- You want one slot that covers team damage buffs, team ATK, team Crit DMG, healing, interruption resistance, and a death save.
- You want a support who is complete at S0 and builds cheaply, with a 4-star weapon that works.
- You like a support with one rotation to learn that never changes between teams.
- You want a support whose Outro buff covers the whole team for 30 seconds instead of one character until they swap.
Skip or delay Mornye if:
- Your account has no character who applies Tune Rupture - Shifting or Tune Strain - Shifting, and you are not planning to pull one. At S0 her biggest buff cannot activate, and what remains is a good general support rather than a great one.
- Your Tune Break characters are Lucy or Rebecca. They use the Hack branch, which her Interfered Marker does not name.
- Your teams are Glacio Chafe or Fusion Burst cores. She functions there, but she is not the specialist those teams are built for.
- You dislike opening rotations where a mistimed first entry costs the whole team its buffs for the rest of the cycle.
- You need a main DPS more than a fourth support. Her value is entirely in what she gives other characters.
Materials
Exact totals come from the canonical material data.
Character materials





Important skills


Max character and skills
Videos
Related videos
Videos load only when this section is reached.